Friday, January 31, 2020
Small Adventure 69
Japan has a reputation for being a polite country, and for the people themselves to be considerate of each other's feelings. But, there's also this under-current feeling of self-righteousness and arrogance, at least with what I have seen in smaller countryside cities. This becomes most apparent when four or five people are walking down the sidewalk, 4-5 abreast, blocking the way for everyone approaching, or trying to get around them from behind. Housewives and school girls are the worst, followed by salarymen and college-aged boys. The image is of "we were here first, everyone else has to take account of our presence and not get in our way, or go out of the way to avoid us."
Individuals, on the other hand, have it a little harder in trying to ignore their impact on those around them. In general, this is done by staring at the ground a few inches in front of their feet, keeping their heads down, and bulling forward. In the last couple of years, a new excuse to be a jerk has emerged - smartphones. If you have a smartphone, just hold it low, right in front of your chest, bend your head forward, and weave erratically left and right along the sidewalk as you go, deliberately cutting off anyone approaching you. Everyone else has to get out of your way, and no one dares complain out of fear of actually making eye contact with the braindead, and that whatever you have is contagious.
Thursday, January 30, 2020

Wednesday, January 29, 2020
Small Adventure 68
The other night, I was coming home from work, and I had to stop at the light and wait for it to turn green. There were a few other people there before me including a middle-aged woman wearing a somber-looking kimono, and 1-inch heel sandals. The light turned red for the cross traffic, then the right turn only arrow lit up. The rest of us waited for our light to turn green, but the woman immediately started crossing the street. The kimono hem was wrapped tightly around her ankles, so she could only take small steps. But, she was taking those steps fast. About halfway across she tripped and fell. The people nearest me all gasped with "ah", as if they were gut-punched, and they waited for her to get up to see if she was ok. I expect that they were thinking that she was drunk. But they also were probably aware of just how expensive the kimono was.
The woman stood up, and without pausing continued across the street. The light turned green for the rest of us and I crossed after her. At the opposite corner, she turned to cross the next street of the intersection and went through that before the light turned green, too. On the other side, she stopped at the entrance of a supermarket, and only then did she check whether she'd torn the kimono when she landed on her knees. Everyone else kept on walking in their own directions, and no one stopped to ask if she were all right. But, they were probably thinking, "just another inebriated older person. How sad that society causes these kinds of things to happen."
Tuesday, January 28, 2020

Monday, January 27, 2020
Doraemon Pop-Up Store

Doraemon's Doko-demo (Anywhere) Door only opens out into the kitchen, for snacks.
Sunday, January 26, 2020
Kagoshima Bank Worker

For months now, work has been going on across from Yamakataya on the new Kagin (Kagoshima Ginko = Kagoshima Bank) main offices building.

Where one of the workers keeps losing his contact lenses.
Saturday, January 25, 2020
Power Puff Pushing Hair Care

Everyone is a sell-out in Japan.
"Protects the hair in front. Protects the hair in the back."
Friday, January 24, 2020
Gyows

New gyoza restaurant in Tenmonkan.

That serves flying fish fillets.


Da dum, da-dum, da-dum...

Happy cowface company.
Thursday, January 23, 2020
Dragon Quest Monsters: Joker 3 notes #10
Postscript:
Whenever I put a game away, I soon find myself asking "What if I tried this? Or, is there a way to get that to work?" And I end up pulling the game back out and experimenting again. That's what happened with DQM:J3. Initially, my question was whether there was a way to boost Tension at the beginning of a battle more reliably. Normally, all of your monsters start the battle at 0 Tension. There are some abilities that allow for rarely bumping tension up, but they work maybe only once per 20-30 battles. With the Anesu Battle Arena event (battle master 4), I needed it to happen every round. I did have Tension Vampire for everyone in my party, which sucks 25 units from the enemy on a successful combat attack, and puts it on the attacker, but that kept missing against the cyborgs Anesu used. Tension can go negative, which makes the subsequent attacks or magic weaker. The increments are -100, -50, -25, -5, 0, 5, 25, 50, 100. Making my monsters stronger for one attack by boosting their tension while simultaneously weakening the enemy's first attack by stealing from their tension bar could be the difference between winning and losing a tough battle.
In rooting around in my monsters' abilities (for the ones I had in inventory), I noticed the skill "ouen" - "cheerleader." This skill occasionally bumps up the Tension bar one increment for the entire party. I also found something that is all in kanji that I called "rampage." This causes the monster to injure itself (maybe by 10%) at the beginning of the round, as long as its HP stays above 50% of its max value, in order to bump the Tension bar one increment. If I put cheerleader on everyone, and the one rampage ability I'd found was on my strongest monster, they'd naturally be at 5% at the beginning of the round for one attack (my main monster was equipped with AI2 (for two actions per round)), and the chances of at least one monster cheerleading in the same round would be maybe 10%. If I got lucky, I could get two monsters cheerleading together, to get the Tension bar for everyone at 25%, and 50% for the main monster. If that happened, the main one at least would be hitting for 999 HP on each attack. And, because I had x5 attacks on everyone, that would be 999 five times from my rampager in one round, best case. Since Anesu had 4 cyborgs in his party, with HP around 4000 each, AND I had super-fast start on everyone, I would the first one to attack in the first round of the battle, and - again, best case - I might be able to take out one of his monsters per round before one of them paralyzed one of my monsters some how.
So, I do this thing. I have 4 monsters, each with super fast start (from the motorcycle monster I got from one of the Master Roads), and each with cheerleader (from the BigHat monsters in the chapter 1 field). I have rampage from the Alchemist (which I got through random breeding) on my main guy. Two of the monsters have AllRecovery, a skill that includes Healing Rain (restores 300-700 HP to everyone in the party, depending on the Mnd stat of the caster), and everyone has AtkUp-SP (boosts Atk by about 200 points), and AtkUp-3 (boosts Atk by about another 100 points). The ones that don't have the healing skill have some other offensive skill that also boosts Atk another 50+ points. Finally, I have two accessories that boost Atk another 100+, which I put on my main fighters, and another that boosts Mnd 100 points, for one of the healers.
Then, I go into the battle arena and challenge Anesu. The first couple rounds go really slowly, so I activate Auto battle mode. This causes the screen to go black for a few seconds. Suddenly, the message "You won the battle" pops up on the screen. Cool. Anesu gives me something as a reward, but I couldn't find it when I went through my inventory. I think it was just 4 slices of top quality monster meat used for scouting monsters. Since I already had 50 of those, the prize wasn't that great. Additionally, I got 3 bronze, 2 silver, and 1 gold stars for use as Code Words for the Disk System.
I haven't mentioned this before, but the Battle Event rounds can only be fought once every 24 hours, with the next opportunity becoming available at midnight (based on the clock in the 3DS). Naturally, I could change the 3DS's clock and have the battles as often as I like, but I was using this timer as an excuse to stop playing the game for a while. The next night, I pull the game out, and select the 5th battle round. This turns out to be against Aroma-2, who has a 1-slot robot monster named Sancho, and a 3-slot behemoth robot called Giant Nocho-ra. They are heavily reliant on status attacks that result in some form of paralysis. While my party does deal some damage to them right away, I still ended up getting wiped out in a few rounds.
Pondering my next move, I do a little more exploration, specifically on the Dimension Eyes. There's one eye that usually shows up near the enemy hideout in the chapter one field, and another near the monolith point in the chapter three field. I use Ruler to teleport between the two points, and if the eyes are there, I go in them. Usually, they just have low-level monsters or some minor items (stuff for making the weaker accessories). Sometimes, they have Scout Masters that want to do battle, and more rarely, really high-level boss monsters. One of the scout masters has a party of three flying dragons - red, yellow and green. I'd managed to scout the yellow and green ones from him, but the red one was proving harder to get. By sheer accident, I'd also been messing with creating disks for the disk system and gotten one that had the black flying dragon as a reward. Thinking there might be something useful in having a full 4-dragon rainbow party, I focused on hitting the dimension eyes to see if I could ultimately scout the red dragon. After 2-3 hours of play, I succeeded. Along the way, I found a black chest along the left side of the chapter 1 hideout that contained the final rare item Queeny wanted for the last of her Accessory quests. I give this to her, and she gives me some other rare items. The accessories I can make with them turn out to be boring, though.
I then switch to the disk system, slowly working myself up from level 1. This takes a couple hours, and is really frustrating. Around level 29, the flying monsters hanging around the check points in the relay race challenge stop running away and start attacking you on sight. This trashes my ranking at the finish of the quest, giving me a C-rank, and a 1% chance of winning the award. It also means that the disk system only levels up the disk at the end by 1 level. Finally, I get to about level 70, and get lucky a few times, with the checkpoints in places where there are no monsters. I get S-rank now, and a 25% chance of success. I eventually do get the black flying dragon, but it's a 3-slot monster. I breed it down to 1-slot, put it in the party with the other three (red, yellow and green), and run them all up to exp. level 100 and rank SS-100. I put them in a couple test battles, and they're actually pretty weak.
However, in with all this, I notice that one of the monsters has something called Tsuneni Maho Counter. Going through my inventory, I find another with Tsuneni Ata Counter. These are "always on" mirrors that have a better than 50% of reflecting magic and physical attacks back at the enemy. I also ended up getting a rare monster from the dimension eye that is 3-slot and pretty strong (stronger than my other monsters individually). I take this new monster, level it up, put the two counter abilities on it, add cheerleader and super fast start, and equip it with skills to boost its attack and mind stats. I pair this with my strongest 1-slot healer, and return to the arena to challenge Aroma-2 again. Again, I get in some decent shots in the first round, but I still get paralyzed, and the counter mirrors don't always work. I get whittled down and killed. Sigh.
I put the game away and get ready to type up this postscript. Since I don't know what the reward was that I got from Anesu, I decided to check out the Japanese walkthrough site I've been using. As I'm scrolling through the page on the event battles, I realize that I'm looking at a "preparation guide" for making the monsters for beating Anesu. Going through it more closely, it occurs to me that I already have a lot of the skills and abilities I need to make this work. The biggest issue is in finding a 4-slot monster. The site shows a super-rare cyborg, which I might be able to get from the disk system, if I tried long enough.
Instead, I start wondering what the odds are in being able to breed something with what I already have in inventory. I did get a few rare monsters from the dimension eye, and I don't know what combinations they'd form. I go to Ace at the breeding console in the Center building in the chapter 2 field, and slowly walk through every single one of the 100+ monsters in my inventory, and try to pair them up with every other single one. I find three offspring that I've never gotten before, and I take notes on them. Two are 3-slotters, and one is a 1-slotter. I save my game, then try breeding for the first new monster. When I have it, I try a test breeding with everything remaining in inventory. That gives me nothing new. I reset the game and try again with the second monster. Then I reset again and try with the third one. Amazingly, the second new monster could be bred with another rare monster I'd found to create the only 4-slotter I've every gotten in the game.
The walkthrough suggests taking a slime and breeding it with some 4-slotter to get a slime with a chou-giga (super large) body. On this, add the magic and attack mirror counters, All Guard+, rampage, AI2, Tamekite Body (from the clockwork bird in the chapter 2 field) and Magic Usage 1/2. For skills, add Nijikujaku (for one of the boosts it gives, obtained from the monster of the same name), MndUp-3, Tension Vampire Guard SP, Defense Guard SP, Priest (obtained by buying two lower level priest skills from the skill book shop, and breeding them on two different monsters), and DefUp-SP. I do this, which requires multiple breedings of my slime, and the other monsters that have the other abilities I need. Along the way, I accidentally create stronger skill books that include Giga Power SP, and MndUp-SP. I leave them on SuperSlime, as I call him.
The one thing that really bothers me during all this is that I don't know what to do about the main offensive skill. The walkthrough uses a specific skillbook that can only be found on the 4-slot cyborg used for the basis of the customized slime. I don't have that book, and I don't know what to use in its place. The screen caps of the battle against Aroma-2 show the slime hitting for 4,000+ HP in one attack, and I'm stuck with the 999 cap. Just as a placeholder, I keep Giga Power SP on my slime (it consists of various magic attacks that may or may not do anything against robot metal bodies). Additionally, every time I try putting Magic Usage 1/2 on the slime, it disappears from the abilities list. I try breeding one of the monsters that already has it with one of the Color Fondues, and again, it disappears from the list of available skills.
Giving up, I level up my 4-slot Super Slime in the Golden Slime disk field, and I suddenly discover that I'm getting way more experience from the gold slime than I should be. At one point, I even maxed the exp. received from one encounter at 99,999,999 (I didn't unlock any special achievements with that, though). With SuperSlime as ready as I could get it, I teleported to the battle arena. I save my game, with the expectation that I'd have to shut it off before I died, and then start rummaging through my item inventory for spell books I'd collected from the various special monsters I'd bred, and defeated in the dimension eyes. I start the battle against Aroma-2, and SuperSlime starts taking damage in spite of the counter mirrors. But, he's not getting paralyzed. That, and with the slime body, and the really high defense boosts, the amount of damage received is only about 125 points per attack, and SS has 2,200 HP max. In the next couple of rounds, the mirrors start kicking in, and SS shows that not only does he have the ability to heal himself (from the Priest skills), he also has automatic MP recovery. Suddenly, he throws out one of the Giga Power SP attacks for 5,000 points against the 1-slot enemy (Sancho has 4,000 HP, and the other monster has 8,000), killing it. This is the one that had been doing the healing, and most of the status attacks. Now, things are turning more in my favor, and after 5 rounds, I've won.
Aroma-2 acts surprised at losing, gives me Sancho (the 1-slot monster), and 3 bronze, 2 silver, and 1 gold stars for the disk system. She then invites me back to fight another event battle (you start over with round one again, but the monsters are a little tougher now) the following day. There's nothing else special that happens, so now, yeah, I'm over this. I'm deeply tempted to mail the game to a friend to hold on to for me so I can't try digging it out and wasting more time on it again. I still keep hoping that there's one more monolith for unlocking Scout Class SS, and to try pulling the Anesu clone from the cloning tanks, or to maybe take a space capsule out to space somewhere. These really seem to be unresolved loose ends. But, I'm betting that there's nothing more to do here now. Stick a fork in it, it's done.
Last comments:
I tried playing the Slime Challenge game again, and there doesn't seem to be any kind of logic behind the race stats your monsters are assigned, or any way to make the race monsters faster through stat boosts or winning at the stage races.
Also, when buying items in the shops, or assigning skill points to skills on the monsters, I'd always used the cross controller up and down buttons. These change the increment/decrement counts one unit at a time, and take forever when buying 800 low-level healing potions. By accident, I discovered that the cross controller left and right buttons change the numbers in increments of 10. That's a huge time-saver.
Wednesday, January 22, 2020
Sticky

The city keeps scraping them off, people keep putting them back on.

Venn diagrams of all happy people.
Tuesday, January 21, 2020

Monday, January 20, 2020
Hioki Stamp Rally Poster

Several cities in the area hold periodic stamp rallies, where you visit various historic or cultural locations and collect rubber stamp images in a stamp book. When you have the ones you want, you mail them in to enter a drawing of some kind. Hioki City is halfway between Kagoshima and Ijuin, which is significant when you do the 12 mile Myouenji temple walk in October. There's a strong Samurai history in the region, and Hioki likes to promote that. The rally is to visit 6 of the major shrines in the area, but the prize is only a chance to win 2,500 yen ($22.50 USD). I just scanned the poster for the blog here because of the manga artwork.
Sunday, January 19, 2020
Dragon Quest Monsters: Joker 3 notes #9
Skills:
Ok, last thing. The skill system.
Obtaining skills and assigning points:
At the beginning of the game, you just get the skills your monsters come equipped with. The monsters you scout in chapter one should all be at level 1, and therefore won't have any skill points assigned to the skills they have. As they level up, they'll receive between 4 and 8 points every other level (there may be a couple dry spells where they don't get points for 3 or 4 levels). When any of the primary party monsters get skill points, the assignment screen will open up. Select the monster you want to assign points for, the skill to apply the points to, and then press the cross controller Up button to assign the number of points to each skill you want. Press B when you're done, and continue with any other monsters you care about. For your secondary party, go into the main menu, select the sideways Trident, select the monster, and assign points as described above.
Breeding skills:
Offspring inherit the skills of both parents. If any of the skills have points, half of the points will remain on that skill for the offspring to use. If both parents have the same skill filled with points, the offspring's skill will be filled as well. That is, say both parents have AtkUp-1 at 50 points. The offspring will get AtkUp-1 at 50 points, too. At the same time, if both parents have the same lower-level skill, such as AtkUp-1, the offspring will receive the next higher version of that skill (i.e. - AtkUp-2), even if there are no points assigned to the parents' skills. Obtaining certain skills requires one parent to have one skill and the other to have a related but different skill. That is, if one parent has AtkUp-3 and the other has Master Fencer, the offspring will receive those two skills plus AtkUp-SP.
Now, 1-slot monsters can only equip 3 skills. If both parents have completely different sets of skills, and some of those skills combine to trigger the creation of all new skills, then the offspring could have up to 8 potential skills that you have to pick from. I think the rule is, if a skill you don't pick has half the maximum number of points assigned to it, the book for that skill will go into your inventory after the offspring monster is generated. So, if you want to keep a really good skill, but just not on this specific monster you're currently breeding, be sure to max the points assigned to it before you breed the parents together.
Buying skills:
After you restore power to Central, the Skill Scrolls Shop will open up (next to the Inn shop). The shop will initially carry some low-level scrolls for a few hundred gold each. Don't bother buying any of them unless you really want them on your monsters. Later, as you go through the game and explore the fields, you may find some scrolls in chests or stealth boxes. Bring these back to the Skills Shop, and the Nocho-ra there will take them from you and use them to create all new, higher-powered scrolls that you can buy (up to 20,000 gold each). Whatever you buy will go into inventory.
Assigning skills from inventory:
To see what skills you have, open the main menu, select Items (the sack), and scroll down about halfway through the list. If you select a scroll, a menu will open showing the monsters in both parties, and indicate whether anyone has this skill assigned already. Select the desired monster. If they have an open slot available, the skill will be assigned immediately, otherwise you'll be told you have to pick a skill to discard. Do so, and the skill gets assigned and the game returns to the Inventory list. Keep in mind that doing it this way will throw away the discarded skill and any points previously assigned to it. It may be preferable to breed that monster with something you don't want to keep, and just leave one skill slot empty, then assign the skill from inventory. Although the new offspring monster will now be at level 1, it can quickly be brought back up to max stats with one or two runs through the Metal Area, or a few minutes in the Golden Area (just use a Ko Genkidama on the party, find a x2 or x4 exp. faerie, then scout the Golden Area for a 300,000 exp Gold Slime to jump to level 60 or 80 in one battle).
Skill Basics:
Lower-level skills can take up to 50 points total. As you assign the points, you unlock higher and higher abilities, stat improvements, attacks and magic. This part is pretty intuitive. The better skills can be 75, 100, 150, 200 or 250 points total. To get enough points to max out all of the skills your monster has may require that you breed it a few times and raise it to exp. level 100 each time.
Skills can be task-specific (only boost Atk, or only boost HP), mixed for a "job" (the healer gets to recover HP on an individual or the party, remove ailments, and add certain kinds of buffs), or mixed for an element (a "water" skill can include water-based healing, MP and Mnd boosts, a water-based attack spell, and guards against water attacks). While you can not alter the things a specific skill provides, you can match skills on an individual monster so that it has MndUp-3, Water Guard and Water Magic (for example).
One of the things I hate about attack-based skills is that there are a couple that have a physical attack that damages the attacker for the same amount of damage the target receives. It is difficult when assigning skills to monsters to determine which ones these are. This is important for automatic battles where you can't force the monster to use other attacks, or you lack sufficient healing from the other monsters, because effectively your monster is helping the enemy to kill itself. This two-edged attack doesn't seem to be present in magic attack skills. With magic, you do have to be a little careful of monsters with "reflect" or "mirror" skill abilities, but those aren't common. What I do like is having monsters with the innate "Counter" or "Miracle Body" abilities (assigned if the monster is Rank SS+100), where they counter after receiving physical or magical damage (this is not a skill-based thing, though).
I really haven't been able to figure out what a lot of the skills are or do. The explanations given when I press the Y key of a given skill line item are incomplete, and I don't want to take the time to individually test every single one and take extensive notes. I like "All Recovery", which includes a "Healing Rain" magic to heal the entire party, and "resurrect" to try to restore a downed party member. One of the Warrior skills includes occasional percentage pluses for scouting monsters. And AtkUp-SP adds close to 300 points to Atk. As for everything else, who knows.
That's all I want to write about for DQM:J3 right now.
Saturday, January 18, 2020
No Cat

The Bar Has No Name seems to only be open at night. At least, that's the only time when I see the sign out on the sidewalk. The lighting's not great to capture the artwork, but I like the cat in the hat.
Friday, January 17, 2020
Dragon Quest Monsters: Joker 3 notes #8
The Fondue Brothers:
While you're exploring the fields, you may encounter a green stealth chest in a hidden room, a hard-to-get-to cavern, or an underwater air pocket. In the chest is one of 5 Color Fondues, of one of 5 different colors. The Fondue will thank you for rescuing it, and then blink out. If you go to Woodpark, the hut in the Chapter One field, you'll see the ones you've rescued. If you get all five, they will thank you, then split up to different parts of the building. They will give you hints about using the Color Palette for customizing the colors of the monsters you make, then ask for a bunch of rare Red, Green, Blue, etc. jewels. These jewels are hard to get, and can be used to make accessories. So far, I've donated jewels to them several times and got nothing back. The only upside to going to the hut at all (other than that's where the S-Class monolith is located) is that the Black Fondue sells stat buffs that apply to the entire party (other shops sell buffs and debuffs that only affect one monster at a time).
Estark:
Also when you're exploring, you may find numbered cards that read something like "Hell Demon 3" or "Hell Demon 2". There are five of these. Three can be found in out of the way stealth chests, one is in a chest under the wreckage used for Point Zero, and the final card you get as a reward for beating round 3 of the event battles. When you have all five cards, visit Ace, and he'll tell you that you need to get some more Madulite. Use Ruler to teleport to floor 3 of the Cyborg tower, and inspect the control console there. You'll hear a huge roar from the roof. Teleport up there, and you'll find Estark, a giga monster, sleeping in the caged enclosure. Save your game. Approach him and he'll wake up and attack. If you can beat him in 10 rounds or less, he'll join you. Estark has AI3, letting him take 3 actions per round. His skill spells include multi-attack meteor showers that can take out your party pretty fast. You can either use a two 2-slot monster party approach, putting elemental guard skills on them and play it safe, or use four 1-slot monsters with nothing but AI2-3, Renzoku-5, Tension Vampire, and Party Healing skills, and go for broke. Once you defeat him, Estark is not that strong or useful. I bred him to make a Cyborg Estark, but that's still not all that great. I think the best use for him is as fodder to assign the AI3 ability to a different monster, or to spawn his Estark skills book for use by monsters that have high Mnd stats.
Breeding:
Basics:
After you have restored power to the Central Building, the one Nocho-ra, Ace, will let you start breeding monsters. The only requirement is that both parents have to be at least exp. Level 10. Talk to Ace and choose the first menu item - Breed. Press A to select the first monster, and scroll through your inventory until you find the one you want. Press A to confirm the monster, then Scroll down one line, press A to select the second monster, scroll through your inventory, and press A again to confirm the monster. You will now see the list of potential offspring - 3 different monsters, plus one slot for each parent (this lets you breed a lizardman to create a lizardman offspring). If both parents are the same type, you'll only get three + one options. Use the cross controller down button to step through the offspring to see what the stats are for each one. Press B to cancel the selection; press A to continue to make the desired offspring.
Fondues:
When you first start the game, your scouted monsters will be Rank F, and the offspring will probably become F+2 (or maybe F+6, depending on what level you've reached). This is called the Rank+number. This number will continue increasing as you keep breeding offsprings to make new offspring. If the +number is under 25, your offspring will not be able to level up above exp. level 50. If the +number is 50 or over, the offspring can level up to 75. You really want to get to +99 on all of your party member monsters as fast as you can. The easiest way to do this is to use the Scout Master Q quests to get the ability to make "mutated" monsters (hunt them until they get angry and turn black, then scout them). Breed the mutated monster to free out a Color Fondue. Then just keep breeding the Color Fondue to make a Color Fondue offspring until it hits +99. Finally, breed the SS+99 Color Fondue with your monsters to bring them to SS+99 fast. Note that whenever you breed a monster with a Color Fondue, a clone of the original Fondue is born along with whatever monster you're trying to create. This way, you never run out of fondues no matter how often you use them for breeding, unlike for all the other monsters.
SS+100:
After finishing the first story scenario, Ace will be able to breed monsters up to SS+100. When the offspring are SS+100, you can customize their innate abilities as part of the breeding process, which are also inherited from the parents. Say that one parent has AI2-3 (can take two or three actions per round), and the other has Renzoku-3 (each attack hits three times). And further that the offspring normally has Lovely (can paralyze the enemy at the beginning of the turn). If the offspring is SS+100, then you can choose for it to have AI2-3, Renzoku-3 AND Lovely. This is the only way to create super-powerful monsters that can survive the Arena Event Battles at the end of the game.
Caps:
When you look at a potential offspring, the stat numbers you're looking at are absolute caps that class of monsters can reach for their projected Rank+number. While you can apply skills that increase those stats (Atk+10) above the caps, as you're leveling up, the monster will not be able to level over it. That is, say the cap on Atk is 900. You level up to level 40, and Atk is at 899. You will get the message Atk+1, and the character will freeze at 900, even if you manage to reach exp. level 100. However, if you have the AtkUp-1 skill and max that out for skill points, that skill will give you +40 points, and your monster will go to Atk 940. But, when you breed that monster with something else, the skill bonuses will not be included in the breeding calculations, and the offspring will again be capped at Atk 900, maximum.
Drawbacks:
If the offspring is Rank+100, you can customize its size as well as its abilities. Normal monsters are 1-slot, Mega are 2-slot and Giga are 3-slot. (4-slot monsters are "cho-giga" (super big)). If the parents have different body sizes than the offspring, you can change the offspring's size based on the size of the parents. So, you can take a 1-slot slime and make it 3-slot if one of the parents was 3-slot. This can increase the slime's HP and MP caps by 50% to 100%, but the other stat caps (Atk, Def, Spd and Mnd) can either remain unchanged or even decrease somewhat. The same thing happens if you assign AI1-2, AI2, AI2-3 or AI3 to the monster - all of the stats go down 10%-20%. This sucks, because one 2-slot monster that can attack twice per round is fundamentally weaker and slower than two 1-slot monsters that can attack once each per round. The reason you'd want a larger monster is that they can equip more skills and abilities at one time that could potentially build on each other to make a customized behemoth that's harder to defeat.
Scouting:
On the plus side, if you have four 1-slot monsters with AI2-3 each, they can take 8 to 12 swings when trying to scout enemy monsters. This is what I did for my initial scouting party and it worked pretty well. But, this party did not last long in the Arena Event Battles and I bred AI2-3 out of them to use them for battle purposes.
The Disk System:
You get the Disk System (kind of like a holodeck) on the B1 floor of the Central building relatively soon after restoring power. Initially, you only have one "fun" disk, where you can do a quest to defeat a scout master to get experience. When you're about done with Chapter 3, you can find the Metal Area disk in the Ice field village. This lets you hunt metal slimes for 10-15 minutes at a time (required for leveling up). When you get to Point Zero, the disk system is upgraded so you can make your own disks (your own fields) using three code words. That's what I'll talk about here.
Code Words:
As mentioned previously, if you look at the main menu screen, you'll see a gold, a silver and a bronze star, followed by a number. These are the levels and numbers of the accomplishments you've unlocked (scout 10% of the zombie family, beat a boss monster, beat a round of the Arena Event battles, save 100,000 gold in the bank, etc.) Accomplish more in the game, you get bigger numbers after the stars in the main menu, and more code words for the disk system.
The Disk Menu:
1: Use an Existing Disk
2: Create a New Disk
3: Throw Away a Disk
4: Add More Energy to the Disk System
Energy:
When you start the game, the energy bar only goes up to 50 units (when the battle arena opens up, the bar can go to 200). Using a disk burns up as many units of the energy bar as the level of the disk. So, a level 29 disk uses 29 units to play. The system recharges energy at a rate of about 50 units in 4 hours real time (the 3DS can be off during this). You can recharge the system up to max from its current level by spending money. In general, 1,000 gold per unit. Using a level 29 disk will burn 29 units. And this will cost about 29,000 gp to recharge if you do it immediately afterward.
1-Day Free Pass:
If you select option 4, you can either recharge the disk one time, or pay a fixed 100,000 gold for unlimited plays of the disk system for 24 hours. I've found that running through the Metal Slime Area a few times will eventually earn me my 100,000 gold back. It's actually much better than break-even.
Use an Existing Disk:
Select this option. If you have enough energy on the bar to pay for the level of the disk, then just say "Yes" when you're asked if you want to play. You will also be asked if you want Quest mode or to just explore the disk freely for disks you create (there's no quest mode for the Metal or Golden Area disks). Pick the mode you want. When you finish Quest mode, the level of the disk will increase depending on how well you did. The energy bar will drop the number of units equal to the starting level of the disk.
Throw Away a Disk:
When you use Code Words to create a disk, you can't use them again to make another disk until the first one is deleted. You can't delete the Metal Area or Golden Area disks once they're installed. This is good, to avoid accidents. Just select the disk to delete, press A, and confirm to delete.
Create a New Disk:
This is a requirement for getting past Point Zero in the storyline. Afterward, you can delete the disks you made to get the accessories, and create new disks as desired.
You are asked to enter three code words. The first one selects the types of monsters that may appear in the disk (zombies, slimes, dragons, unknown, cyborgs, etc.) The lower the color of the medallion next to the word (bronze or silver), the more types that will be chosen from, and the harder it is to get the specific type, or specific monster you want. The fewer types associated with the color (silver or gold) the better.
The second code word selects the type of quest. You can have battles, races, and other stuff. Most of these types are designed to prevent you from getting S-Rank endings when you finish. If you're trying to win a specific monster or item, I suggest picking a 競争 (relay chase) type. In this type, you go from one checkpoint to the next, trying to avoid getting into battles (0-1 battles gives you an S-Rank rating). A silver quest is 8 checkpoints, and gold is 5 checkpoints (but there may be more monsters around the check points during the quest).
The third code word selects the reward type (items, experience, gold, monsters, or one of the three fixed accessories). Gold code words will give you SS-Rank monsters.
After you've entered the code words, select the level you want to start at. You don't know what the specific reward will be until you click "create", so if there's one monster you want, starting at level 40, for a cost of 40,000 gold to make a disk that has the wrong monster is dangerous. I always chose to start at level 1 for 20 gold, create the disk, and if I didn't want the monster, I'd simply delete the disk and try again. If you do choose to keep the disk, then at level 1 and an S-Rank ending, there's a 0.01% chance of winning the promised award (you get a Ko Genki-Dama as consolation). Up to about level 28, all of the monsters will run away from you when you approach. Above that, they start attacking. Ground-based monsters can be easily avoided - just fly over them. Fliers are much harder, especially if they hang right around the checkpoint in the race games. Fortunately, the quest route layout is kind of random, and you can get lucky occasionally with a route that has no or few fliers. You get about 25% on winning the prize at level 70 at S-Rank. At level 100, it's 50% for an S-Rank ending. A- and B-Rank endings drop the percentage of getting the award drastically, and C-Rank makes it almost 1% even at level 100.
When you finish the quest, the level increases by a certain amount - a couple levels for a bad ending, 4-8 levels for a good ending (less if you're just starting out the quest at level 1).
If you start the disk at level 1, it can take 1-2 hours to get up to level 50, and have any realistic hope of winning anything at all. But, this is much, much better than having to breed ultra rare monsters through scouting and breeding (which can take days to weeks for one).
You can't get Unknown monsters until late in the game, but once you have the right word list for Code One, you can try to win all the chapter bosses, and weird monsters you'd never know were in the game.
Continued...
While you're exploring the fields, you may encounter a green stealth chest in a hidden room, a hard-to-get-to cavern, or an underwater air pocket. In the chest is one of 5 Color Fondues, of one of 5 different colors. The Fondue will thank you for rescuing it, and then blink out. If you go to Woodpark, the hut in the Chapter One field, you'll see the ones you've rescued. If you get all five, they will thank you, then split up to different parts of the building. They will give you hints about using the Color Palette for customizing the colors of the monsters you make, then ask for a bunch of rare Red, Green, Blue, etc. jewels. These jewels are hard to get, and can be used to make accessories. So far, I've donated jewels to them several times and got nothing back. The only upside to going to the hut at all (other than that's where the S-Class monolith is located) is that the Black Fondue sells stat buffs that apply to the entire party (other shops sell buffs and debuffs that only affect one monster at a time).
----------------------
Estark:
Also when you're exploring, you may find numbered cards that read something like "Hell Demon 3" or "Hell Demon 2". There are five of these. Three can be found in out of the way stealth chests, one is in a chest under the wreckage used for Point Zero, and the final card you get as a reward for beating round 3 of the event battles. When you have all five cards, visit Ace, and he'll tell you that you need to get some more Madulite. Use Ruler to teleport to floor 3 of the Cyborg tower, and inspect the control console there. You'll hear a huge roar from the roof. Teleport up there, and you'll find Estark, a giga monster, sleeping in the caged enclosure. Save your game. Approach him and he'll wake up and attack. If you can beat him in 10 rounds or less, he'll join you. Estark has AI3, letting him take 3 actions per round. His skill spells include multi-attack meteor showers that can take out your party pretty fast. You can either use a two 2-slot monster party approach, putting elemental guard skills on them and play it safe, or use four 1-slot monsters with nothing but AI2-3, Renzoku-5, Tension Vampire, and Party Healing skills, and go for broke. Once you defeat him, Estark is not that strong or useful. I bred him to make a Cyborg Estark, but that's still not all that great. I think the best use for him is as fodder to assign the AI3 ability to a different monster, or to spawn his Estark skills book for use by monsters that have high Mnd stats.
----------------------
Breeding:
Basics:
After you have restored power to the Central Building, the one Nocho-ra, Ace, will let you start breeding monsters. The only requirement is that both parents have to be at least exp. Level 10. Talk to Ace and choose the first menu item - Breed. Press A to select the first monster, and scroll through your inventory until you find the one you want. Press A to confirm the monster, then Scroll down one line, press A to select the second monster, scroll through your inventory, and press A again to confirm the monster. You will now see the list of potential offspring - 3 different monsters, plus one slot for each parent (this lets you breed a lizardman to create a lizardman offspring). If both parents are the same type, you'll only get three + one options. Use the cross controller down button to step through the offspring to see what the stats are for each one. Press B to cancel the selection; press A to continue to make the desired offspring.
Fondues:
When you first start the game, your scouted monsters will be Rank F, and the offspring will probably become F+2 (or maybe F+6, depending on what level you've reached). This is called the Rank+number. This number will continue increasing as you keep breeding offsprings to make new offspring. If the +number is under 25, your offspring will not be able to level up above exp. level 50. If the +number is 50 or over, the offspring can level up to 75. You really want to get to +99 on all of your party member monsters as fast as you can. The easiest way to do this is to use the Scout Master Q quests to get the ability to make "mutated" monsters (hunt them until they get angry and turn black, then scout them). Breed the mutated monster to free out a Color Fondue. Then just keep breeding the Color Fondue to make a Color Fondue offspring until it hits +99. Finally, breed the SS+99 Color Fondue with your monsters to bring them to SS+99 fast. Note that whenever you breed a monster with a Color Fondue, a clone of the original Fondue is born along with whatever monster you're trying to create. This way, you never run out of fondues no matter how often you use them for breeding, unlike for all the other monsters.
SS+100:
After finishing the first story scenario, Ace will be able to breed monsters up to SS+100. When the offspring are SS+100, you can customize their innate abilities as part of the breeding process, which are also inherited from the parents. Say that one parent has AI2-3 (can take two or three actions per round), and the other has Renzoku-3 (each attack hits three times). And further that the offspring normally has Lovely (can paralyze the enemy at the beginning of the turn). If the offspring is SS+100, then you can choose for it to have AI2-3, Renzoku-3 AND Lovely. This is the only way to create super-powerful monsters that can survive the Arena Event Battles at the end of the game.
Caps:
When you look at a potential offspring, the stat numbers you're looking at are absolute caps that class of monsters can reach for their projected Rank+number. While you can apply skills that increase those stats (Atk+10) above the caps, as you're leveling up, the monster will not be able to level over it. That is, say the cap on Atk is 900. You level up to level 40, and Atk is at 899. You will get the message Atk+1, and the character will freeze at 900, even if you manage to reach exp. level 100. However, if you have the AtkUp-1 skill and max that out for skill points, that skill will give you +40 points, and your monster will go to Atk 940. But, when you breed that monster with something else, the skill bonuses will not be included in the breeding calculations, and the offspring will again be capped at Atk 900, maximum.
Drawbacks:
If the offspring is Rank+100, you can customize its size as well as its abilities. Normal monsters are 1-slot, Mega are 2-slot and Giga are 3-slot. (4-slot monsters are "cho-giga" (super big)). If the parents have different body sizes than the offspring, you can change the offspring's size based on the size of the parents. So, you can take a 1-slot slime and make it 3-slot if one of the parents was 3-slot. This can increase the slime's HP and MP caps by 50% to 100%, but the other stat caps (Atk, Def, Spd and Mnd) can either remain unchanged or even decrease somewhat. The same thing happens if you assign AI1-2, AI2, AI2-3 or AI3 to the monster - all of the stats go down 10%-20%. This sucks, because one 2-slot monster that can attack twice per round is fundamentally weaker and slower than two 1-slot monsters that can attack once each per round. The reason you'd want a larger monster is that they can equip more skills and abilities at one time that could potentially build on each other to make a customized behemoth that's harder to defeat.
Scouting:
On the plus side, if you have four 1-slot monsters with AI2-3 each, they can take 8 to 12 swings when trying to scout enemy monsters. This is what I did for my initial scouting party and it worked pretty well. But, this party did not last long in the Arena Event Battles and I bred AI2-3 out of them to use them for battle purposes.
----------------------
The Disk System:
You get the Disk System (kind of like a holodeck) on the B1 floor of the Central building relatively soon after restoring power. Initially, you only have one "fun" disk, where you can do a quest to defeat a scout master to get experience. When you're about done with Chapter 3, you can find the Metal Area disk in the Ice field village. This lets you hunt metal slimes for 10-15 minutes at a time (required for leveling up). When you get to Point Zero, the disk system is upgraded so you can make your own disks (your own fields) using three code words. That's what I'll talk about here.
Code Words:
As mentioned previously, if you look at the main menu screen, you'll see a gold, a silver and a bronze star, followed by a number. These are the levels and numbers of the accomplishments you've unlocked (scout 10% of the zombie family, beat a boss monster, beat a round of the Arena Event battles, save 100,000 gold in the bank, etc.) Accomplish more in the game, you get bigger numbers after the stars in the main menu, and more code words for the disk system.
The Disk Menu:
1: Use an Existing Disk
2: Create a New Disk
3: Throw Away a Disk
4: Add More Energy to the Disk System
Energy:
When you start the game, the energy bar only goes up to 50 units (when the battle arena opens up, the bar can go to 200). Using a disk burns up as many units of the energy bar as the level of the disk. So, a level 29 disk uses 29 units to play. The system recharges energy at a rate of about 50 units in 4 hours real time (the 3DS can be off during this). You can recharge the system up to max from its current level by spending money. In general, 1,000 gold per unit. Using a level 29 disk will burn 29 units. And this will cost about 29,000 gp to recharge if you do it immediately afterward.
1-Day Free Pass:
If you select option 4, you can either recharge the disk one time, or pay a fixed 100,000 gold for unlimited plays of the disk system for 24 hours. I've found that running through the Metal Slime Area a few times will eventually earn me my 100,000 gold back. It's actually much better than break-even.
Use an Existing Disk:
Select this option. If you have enough energy on the bar to pay for the level of the disk, then just say "Yes" when you're asked if you want to play. You will also be asked if you want Quest mode or to just explore the disk freely for disks you create (there's no quest mode for the Metal or Golden Area disks). Pick the mode you want. When you finish Quest mode, the level of the disk will increase depending on how well you did. The energy bar will drop the number of units equal to the starting level of the disk.
Throw Away a Disk:
When you use Code Words to create a disk, you can't use them again to make another disk until the first one is deleted. You can't delete the Metal Area or Golden Area disks once they're installed. This is good, to avoid accidents. Just select the disk to delete, press A, and confirm to delete.
Create a New Disk:
This is a requirement for getting past Point Zero in the storyline. Afterward, you can delete the disks you made to get the accessories, and create new disks as desired.
You are asked to enter three code words. The first one selects the types of monsters that may appear in the disk (zombies, slimes, dragons, unknown, cyborgs, etc.) The lower the color of the medallion next to the word (bronze or silver), the more types that will be chosen from, and the harder it is to get the specific type, or specific monster you want. The fewer types associated with the color (silver or gold) the better.
The second code word selects the type of quest. You can have battles, races, and other stuff. Most of these types are designed to prevent you from getting S-Rank endings when you finish. If you're trying to win a specific monster or item, I suggest picking a 競争 (relay chase) type. In this type, you go from one checkpoint to the next, trying to avoid getting into battles (0-1 battles gives you an S-Rank rating). A silver quest is 8 checkpoints, and gold is 5 checkpoints (but there may be more monsters around the check points during the quest).
The third code word selects the reward type (items, experience, gold, monsters, or one of the three fixed accessories). Gold code words will give you SS-Rank monsters.
After you've entered the code words, select the level you want to start at. You don't know what the specific reward will be until you click "create", so if there's one monster you want, starting at level 40, for a cost of 40,000 gold to make a disk that has the wrong monster is dangerous. I always chose to start at level 1 for 20 gold, create the disk, and if I didn't want the monster, I'd simply delete the disk and try again. If you do choose to keep the disk, then at level 1 and an S-Rank ending, there's a 0.01% chance of winning the promised award (you get a Ko Genki-Dama as consolation). Up to about level 28, all of the monsters will run away from you when you approach. Above that, they start attacking. Ground-based monsters can be easily avoided - just fly over them. Fliers are much harder, especially if they hang right around the checkpoint in the race games. Fortunately, the quest route layout is kind of random, and you can get lucky occasionally with a route that has no or few fliers. You get about 25% on winning the prize at level 70 at S-Rank. At level 100, it's 50% for an S-Rank ending. A- and B-Rank endings drop the percentage of getting the award drastically, and C-Rank makes it almost 1% even at level 100.
When you finish the quest, the level increases by a certain amount - a couple levels for a bad ending, 4-8 levels for a good ending (less if you're just starting out the quest at level 1).
If you start the disk at level 1, it can take 1-2 hours to get up to level 50, and have any realistic hope of winning anything at all. But, this is much, much better than having to breed ultra rare monsters through scouting and breeding (which can take days to weeks for one).
You can't get Unknown monsters until late in the game, but once you have the right word list for Code One, you can try to win all the chapter bosses, and weird monsters you'd never know were in the game.
Continued...
Thursday, January 16, 2020
Diamond Burger Truck Art

Yamakataya department store, in Tenmonkan, ran a Hokkaido foods event for a couple weeks during November. As part of this, they also had a food and beverages patio in the open space in front of Lotteria. One of the food trucks was from Diamond Burger, which I didn't get around to photographing until the final night when all the tents were torn down and the trash was being collected. That's the face of a very fat man.
Wednesday, January 15, 2020
Revo Swordsman Chalk Art

I don't know this character, but it's on the sidewalk sandwich board for Revo Chiropractic Center. I guess waving a big hunk of metal around is hard on your back, too.
Tuesday, January 14, 2020
Dragon Quest Monsters: Joker 3 notes #7
Battle Menu:
When you go into battle, you are told to pick an action. Actions are:
Fight:
Starts the battle right away.
Command:
Lets you tell your monsters individually whether to attack, defend, increase tension, or use one of the action skills (attack magic or healing) they have learned, and which enemy to aim at.
Strategy:
Lets you tell your party monsters whether to attack full out, heal when necessary, or try to conserve MP.
Scout:
Try to scout one of the enemy monsters.
Item:
Lets you use a battle item. Battle items include HP or MP recovery, buffs and debuffs, tension increasers, scouting meats, or rocks you can throw for 1-2 damage each.
Ride:
Lets you pick which monster you want to ride in battle, or to dismount. Riding a monster boosts its stats a little. If the monster you are riding is defeated, you are unable to take any actions other than fight or run for 2-3 rounds.
Escape:
Try to run away from the current battle. May or may not succeed at any given time.
As you progress through the game, you'll be given the ability to double the battle speed. This just cuts down the time for the animation sequences. Press the R button.
Also, you will eventually get the ability to use "Auto", where the screen will turn black, and the game runs automatically until either you win the battle, or one of your monsters is defeated. This is also selected with the R button.
R button:
Sequences from Normal, x2 Speed, Auto, to Normal again.
Y Button:
Move party members between the primary and secondary parties. This allows you to pick a replacement if someone on your front line is about to die, or if you need to put a magic user on the front line of a bunch of fighters.
----------------------
Accessories Shop Menu:
When all the Nocho-ra reach Central, and you have power turned on to the building, you can start making accessories. Queenie, the female to the left of King, asks you to bring her specific found and drop items. Doing so will unlock higher level accessories in the shop. Options in the Accessories Shop menu get unlocked as you go through the game:
Make Accessory:
This gives you a list of accessories you currently know how to make, and whether you have enough materials to make them. The rarer materials, like orbs and Madulite, are monster drops, and can take hundreds of battles to just get one of them, even if you've equipped the "Item Boost Large" accessory on your party members. To make an accessory, scroll through the list and press A on the desired one. This will expend the required items as indicated by the recipe.
Break Up Accessory:
Recovers the rare component of the accessory so it can be reused. The recovered component will be shown as you go through the list. Select the desired accessory, press A, and confirm you want to break it up.
Make Star:
Each accessory can be configured to hold up to three seals. These seal slots are called "Stars." Some accessories you find in Stealth Boxes, or you get from King in exchange for coins, automatically come with one or two stars. You can have up to three stars per accessory. This works just like creating an accessory.
Make Seal:
Each accessory can be configured to hold up to three seals. You can use drop and found items to create a desired seal, such as a small amount of protection against fire attacks, or small boosts in overcoming enemy resistance to fire. Works just like the process for creating an accessory.
Break Up Seal:
Recovers the rare component of the seal so it can be reused. The recovered component will be shown as you go through the list. Select the desired seal, press A, and confirm you want to break it up.
Assign a Seal to an Accessory:
Once you've created the seal, you can assign it to an empty star on an accessory. Go through the list of accessories, press A, then go through the list of seals, and press A.
----------------------
Slime Challenge:
The Slime Challenge in the Central building lets you try to compete against three NPCs to see who can round up and drag the most slimes to their goal point in the allotted time. The first time you play the game, you have to go through a long, boring tutorial. After that, you need to pick a ride monster, and the level you want to play at (you start with only Rank C). When you pick a ride monster, you are shown its ratings in terms of how many stars for speed, defense, etc. I've never beaten Rank SS, and I really dislike playing this game. No strategy to offer.
----------------------
Queenie's Accessory Item Quests:
Queenie is the female Nocho-ra standing to the left of King. She'll ask for a specific found or drop item. When you give it to her, she'll give some items to you and create new accessories that can be made in the Accessories shop.
Need to find:
1: 4 Marokku Dirt
2: 2 Hana no Mitsu
3: 1 Fushigina DoroDoro (Mysterious Mud)
4: 2 Kouri no Jumoku (Ice Shrubs)
5: 4 Small Fossils
6: 1 Madulite
7: 1 Red Orb
8: 1 Kagayaki
Everything else can be found pretty easily, but Kagayaki reportedly can only be found rarely in a black chest on a high cliff in the area at the left side of the enemy hideout in the Chapter 1 field. Also maybe from the B1 Disk System, but (at the time I write this) I can't confirm that. The rewards for Kagayaki are some other rare items used for making accessories.
----------------------
Scout Master Q Quests:
1: Put a monster with healing in your party (breed a Drakky with a Doroid to get a Mage Drakky).
2: Put a Priest Knight in your party (scout from the Undead Garden).
3: Put monsters from four different slime families in your party.
4: Put an Elder Dragon in your party (breed a Gamegon with a Lizardman).
5: Put a "mutated" monster in your party (keep hunting the same monster until it gets angry and turns black, then scout it).
6: Have a monster in your party that is Rank+25 or higher.
7: Have a Ganesha Evil in your party (scout from the cyborg tower).
8: Have a monster with the DefUp+2 skill in your party (find a monster that has DefUp+1, max its skill points, then breed it to get the DefUp+2 skill).
9: Have a cyborg slime in your party (from the volcano island, yellow frame structure).
10: Have a Rank+50 or higher monster in your party.
11: Have a Dark Nebula in your party (can be bred, or obtained from the Disk System quest disks).
Breeding a Dark Nebula:
Breed a Baron Knight with a Red Fighter to make an Akatsuki Shogun.
Breed the Akatsuki Shogun with a Pikki to make a Black Bridegroom (黒き花婿).
Breed a Metal Slime with a Goldman to get a Slime Gold.
Breed a Metal Dragon with a Slime Gold to make a Mekaburn.
Breed the Mekaburn with the Black Bridegroom
12: Have a Moonlight General (月夜の将) in your party.
Breeding a Moonlight General:
Breed an Akatsuki Shogun (see Quest #11) with Beautiful Swordswoman Oren to make the General.
Oren is hard to breed for, and it may be better if you win it from the Disk System quests.
13: Have a Rank+100 monster in your party.
14: Have a Belmud (破戒王ベルムド) equipped with the Master Fencer (剣豪) skill.
Breed a Leon Byuburo (scout from the world map) with the Moonlight General to make a Belmud.
To get the Master Fencer skill, buy two Soldier Skills (戦士) from the skill shop and assign them to two different monsters. Max their skill point assignments, then breed those two monsters to get an offspring with Master Fencer. Bring the offspring to level 10, and breed it with Belmud to create another Belmud with the Master Fencer skill selected.
15: Have Zelodorado (魔元帥ゼルドラド) in your party. Now, this one can literally take weeks to breed. Just win it from the B1 Disk System quests.
Continued...
Monday, January 13, 2020
Blood Drive, Jan. 12

Red Cross Japan attempted to have another of their blood drives in the open space in front of Lotteria. This is always a challenge because of the Japanese fetish regarding blood.

Surprisingly, though, they did have a few donors this time.
Berg Plaza was one of the locations that was supposed to host the Tenmonkan mochi pounding event, but there was nothing here for that, which I guess was due to a scheduling error.
Sunday, January 12, 2020
Tenmonkan Mochi Event, Jan. 12, 2020

Yes, finally, we had the mochi pounding event for the rest of the Tenmonkan area, on Sunday. The posters indicated there were going to be 6 participating locations, although I could only find 4 of them. One was supposed to be at Berg Plaza, in front of Lotteria, but there was a Red Cross blood drive going on there. I have no idea where the sixth place was. The first I found was in front of the Tenpara movie theater complex.

They had mochi flavored with kinoko powder (toasted soy powder) and soy sauce, or placed in red bean soup (called zenzai). The line here was only 3-5 people long when I arrived at 11 AM, and I got the bowl of zenzai pretty quickly.

Zenzai doesn't photograph well, but it tastes good. However, it was extremely hot, and took close to 5 minutes to eat.

Mochi, and the flavorings.
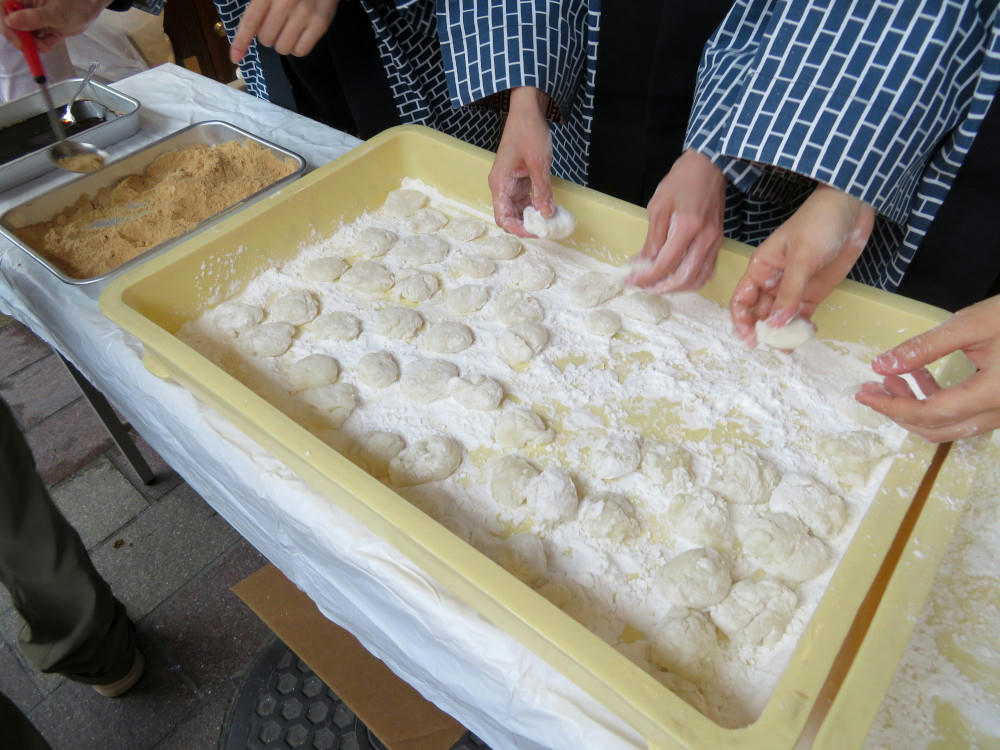
Pounding.

Over at Yamakaya, the guy doing the pounding insisted that I try my hand at it. I'd been trying to avoid this because I know I'll embarrass myself. Several other people there goaded me on and grabbed my backpack and camera, so I didn't have much choice.

You've got to be careful to not hit the stone bowl, because that will put splinters in the rice cake. Plus, that mallet really is heavy.

After four solid whacks, I was getting tired, and I was more than happy to hand the thing back to the guy. However, if I could be part of a team working on pounding mochi, I think this would be a decent way to get exercise.

The woman mostly hidden at the front of the line was handing out prewrapped pieces of mochi.


A couple of blocks over, other shopkeepers were handing out the zenzai to people that then stood in line for the mochi pieces, I didn't feel like standing in line that long, so I went over to Maruya Gardens to do a book search in Junkudo bookstore (I was trying to find cryptography books). Close to noon, I went back outside to KFC across the street.

The people here were only handing out zenzai.

They also had pickled daikon.
After getting my second bowl of zenzai, I went up to Amu Plaza. There wasn't anything interesting going on there, though, so I went back home and processed the photos for the blog. The rest of the day was spent studying Python. Overall, it was a quiet weekend.
Saturday, January 11, 2020
City Hunter's Got the Shingles

Japan has a pretty good health-care system, and they try to focus on preventative care as well. When you turn 60, you're invited to come to City Hall for a check-up, and to be assigned a counselor. This person checks on you every couple of months to see if you're maintaining the health and diet regimen you agreed to at the first meeting. Also at the City Hall health desk are fliers featuring the City Hunter characters, warning you of the danger of Shingles if you're in the 30 to 57 age range.
Friday, January 10, 2020
Dragon Quest Monsters: Joker 3 notes #6
Notes continued:
Main Menu:
Generally, when you press the X button, the main menu will open up. Some of the icons here activate as you go through the tutorials, but they'll all be activated by the end of chapter 1 or 2. They are, more-or-less in the order of left to right, top-down:
Item Inventory:
This icon looks like a bag. It will have pretty much everything you find in the field, separated by type. Types are HP recovery, MP recovery, status recovery (antidotes, anti-confusion potions, etc.), and resurrections. Buffs and Debuffs. Stat boosts (+2-3 points to Atk, Def, Spd, Mnd, HP or MP, etc.) Skill books. Accessory items. Scouting meats.
HP and MP recovery can be used freely outside of battles, or one at a time per round during a battle. Stat ailments disappear after the battle ends, so status recovery can only be performed once per round during battles. Buffs and Debuffs can affect one monster or the entire party, for a fixed number of battle rounds. "Permanent" stat Boosts only affect one monster, and are not inherited by any offspring you breed from that monster.
Accessory items are used for making accessories at the Accessory shop in Central. They can be found items from the field, or monster drops.
Scouting meats can be found items, or purchased from the meat shop in Central. To use them during a battle, when you are setting up your actions for the round, select the desired meat, then press the Scout icon from the battle menu. Follow this by selecting the monster you want to scout. The scout meter will advance a little, depending on the type of meat used. You can use scouting meats in several successive rounds, until the monsters become full and stop eating.
Skill Books can be obtained several different ways. Every monster has at least one skill when you scout it, or breed it. If you fill that skill up with skill points, then breed that monster, if you choose to not attach that skill to the offspring monster, you will receive a skill book for that skill at the end of the breeding process. This book goes automatically into inventory. Or, you can buy certain skill books from the skills shop in Central. If you find "skill title part 1" or "part 2" in a stealth box in the field, bring it back to Central and give it to the Skills shop. The shopkeeper will turn it into a skill book you can buy for inventory. From the inventory menu, select the skill book you want to teach one of the monsters in your primary or secondary parties, then select the monster to learn it. If the monster already has a full complement of skills (three for a normal monster, four for a mega monster, and five for a giga monster), you will be asked to pick a skill to unlearn. Unlearning a skill means you lose that skill book and all the skill points assigned to it. It's better to breed the monster first, don't assign a skill to a given slot, receive unused skills as skill books, then assign the desired skill book from inventory to the open slot for that monster.
Note, two of the items are Ko Genki-dama and Genki-dama. These items will double the exp. and gold you receive at the end of a battle. You can use them anytime prior to a battle and they will remain dormant until you engage an enemy monster. Ko (small) only works for one battle, while Genki-dama remains in effect for 10 battles. You can find Genki-dama in chests on the field, or receive them by defeating the scout master in the Time and Space Eyes. You get Ko Genki-damas as consolation prizes from the disk system when doing quests with the disks you create. Ko Genki-dama and Genki-dama work best in the Metal and Golden areas in the disk system for leveling up fast.
Save:
Open Book icon. You can only save your current game to one slot. You can only load your saved game from the start menu when you turn on the 3DS.
Battle Strategies:
Slime with arrows icon. This icon lets you assign battle strategies to your party monsters, including "Battle Full Out," "Heal If You Can," "Conserve MP," etc. Strategies can also be assigned from the Battle Menu, but they only apply until you breed the monster. The default is "Battle Full Out."
Party Selection:
You can freely move your monsters between the primary and secondary parties from the main menu. Otherwise, select Party Selection. The first menu option is Move Monsters Around. Use this to move monsters from inventory to one of the two parties. The second menu option discards the selected monster, and the third allows you to assign skill points for any monster in inventory to whatever skills they have.
Assign Skill Points:
Sideways Trident icon. Allows you to assign skill points for any monster in your secondary or primary parties to whatever skills they have.
Accessories:
Ring icon. Allows you to assign accessories in your inventory to one of the monsters in your primary or secondary parties. If the accessory is already assigned, you will be asked if you want to reassign it.
Library:
Books icon. Lets you look at the stats for any skills, monsters or items you have found or bred.
Remote:
Antenna icon. Lets you battle your friends, or access the Nintendo website through a wireless connection.
Hint:
Hint icon. This is a list of instructions you've received throughout the game. You can review the hints if you forget how to do something, like scout monsters or use the Ruler.
Magic:
Staff icon. Lets you use healing magic outside of battle, for any monster in the primary or secondary parties that has healing skills assigned.
Ruler:
White feather icon. Initially, Ruler just lets you teleport to any ruler marker you've activated on the field maps. Later, you start getting other functions for it as well.
Mantan: Restore your monsters' HP to Max. Has a fixed number of uses at any one time.
Ranaru-ta: Change day for night. Obtained from Point Zero.
Ranarion: Change weather. Obtained from Point Zero.
Image Change: Let's you recustomize your character's design. Obtained from Point Zero.
Ride Monster:
Red figure riding a slime. Every time you succeed at going up in scouting rank by completing the monolith fights, you get the ability to ride new types of monsters (ground, swimming, flight and World Map). You need to assign the monster through the Ride Monster system first. Either pick something from one of your parties, or from inventory, and drag the icon to one of the four buttons on the cross controller. Only giga monsters can be assigned to the down button (putting them on the other buttons just means that it will be pinned in place when you're in the field). Normal and Mega monsters can be assigned to either of the left, right or up buttons. To switch between monsters in the field, just press the desired cross controller button, or the down button to dismount.
Medallions and stars:
If you look at the top screen in the main menu, you should see medallions of some kind, a bronze, silver and gold star followed by a number. These represent the accomplishments you have unlocked, such as collecting 10% of all zombie-type monsters, exploring most of the field map, beating a boss monster, or saving a certain amount of money in the bank in Central. They also represent the number of Code Words you can choose from in the B1 Disk System when creating new disks.
Gold:
How much gold you have in inventory, not in the bank. Note that if you fall off the field map for some reason, you don't lose gold or exp. But, if all your monsters die in battle and you are resurrected in Central, you lose half the gold (and I think half your exp., but I've never confirmed this; I just reboot the game if that happens) you have in inventory, which is why it's a good idea to save your money in the bank if you're not planning on spending it right away.
Party Rank:
You get a number of stars based on how many of your monsters are maxed up for exp. level and Rank+number. If all of the monsters are maxed, you get Professional. As far as I can tell, party rank is just a "feel-good" ranking, and doesn't affect anything that happens in the game.
Pressing the L and R buttons will scroll the top screen display from party stats, primary party monsters, secondary party monsters and ride monsters.
Continued...
Thursday, January 9, 2020
Yume Monogatari

Found this banner over the front windows of a storefront near the Kotsuki river, for Yume Monogatari (Dream Story). The manga designs are very 1960's, but the name "Yume Monogatari" seems to be only a reference to a song by Tackey and Tsubasa.

Turns out it's for a new restaurant/bar. Breakfast is 300 yen ($3 USD) from 7 AM, and drinks are 100 yen from 7 AM to 5 PM. The place bills itself as "tachi nomi", meaning you stand and drink. I assume the breakfast service is a piece of toast and jam, plus coffee or juice. I may have to go there to try it out sometime. My favorite breakfast place, though, is still Ran, across the river from me (and near Yume Monogatari). 650 yen for fried eggs, toast, jelly, coffee and a small salad.
Wednesday, January 8, 2020

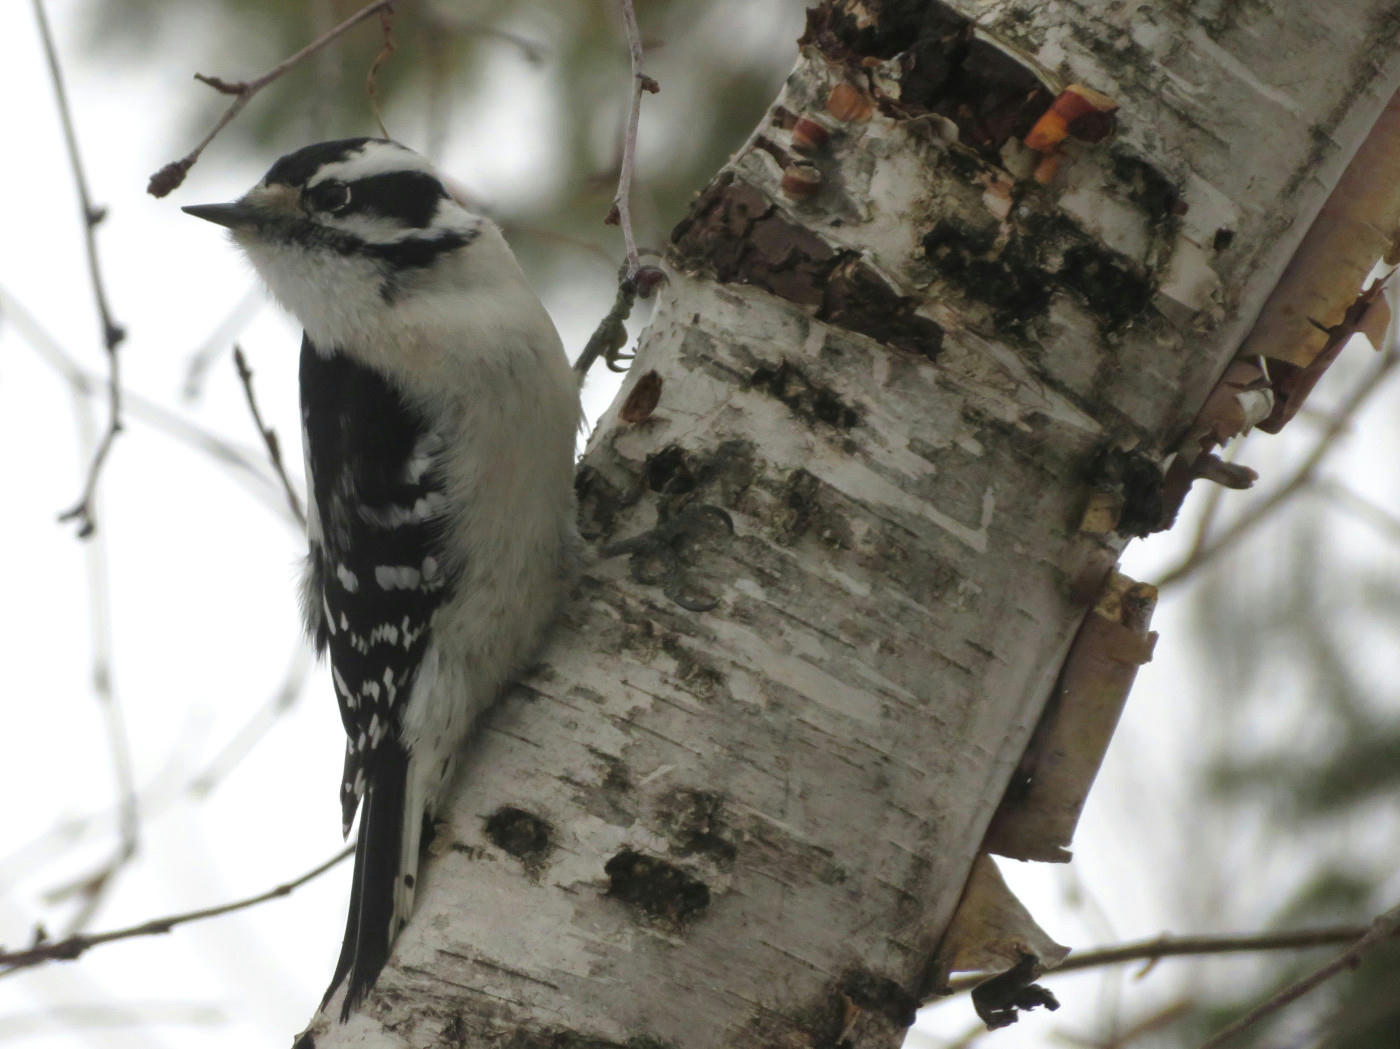


Tuesday, January 7, 2020
Snoopy Sweater

Found in Minneapolis airport.

Did you know that "sweater" is "something or someone that sweats?" Snoopy is a snazzy sweater.
Monday, January 6, 2020
New Year Mice

2020 is the Year of the Rat.

Display boards at Terukuni Shrine.

"Got cheese? Willing to share?"

Poster at Dolphin Port.
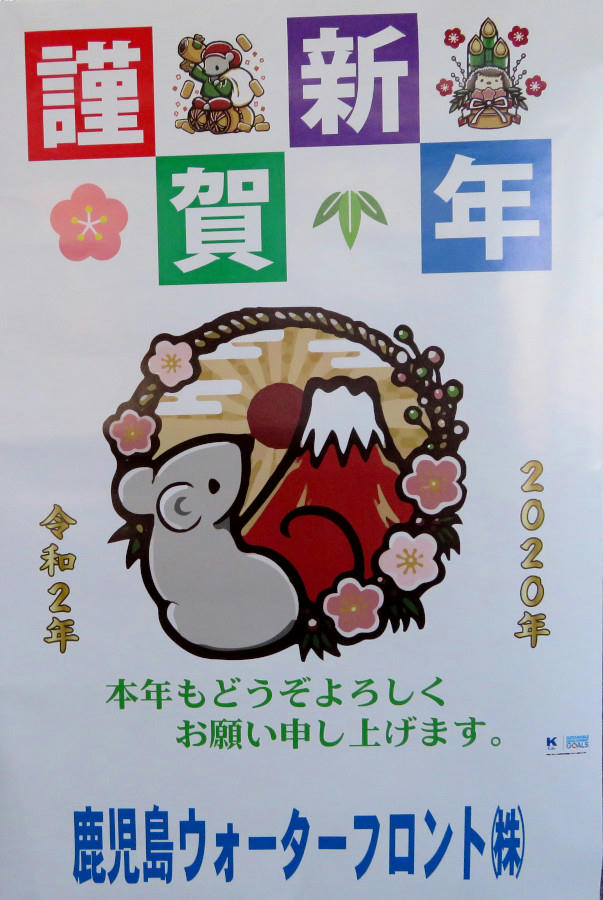
Sign outside Cortes aroma shop in Tenmonkan.
"chuu."
Subscribe to:
Posts (Atom)


