Sunday, June 30, 2019

Q.E.D. iff volume 13 review


(All rights belong to their owners.
Image from Amazon.jp used here for review purposes only.)

Q.E.D. iff, vol. 13, by Katou Motohiro. Grade: B
Satsujin Fuukei (Homicide Crime Scene, Magajin R 2019 2)
Kuniaki Kaibashira and Akinori Ikada are sitting in rental massage chairs in Yodakawa Camera (maybe a play on Yodabashi Camera). Kuniaki takes a pull on his whiskey bottle, and starts a conversation with his partner. He runs a cram school, and he's getting bored with his life. He wants to get out from under a bunch of debts, and run off to have more fun. He recalls the second home the two of them had grown up around when they were kids, and he develops a plan. A little later, he invites Yuri Ebisawa, Rukurou Tako and Kyouzou Kanie to the old cabin in the woods for dinner. Yuri is the daughter of a pawn shop owner, training to take over the business. Rukurou and Kyouzou both work at different kinds of banks. All three of them have loaned money to Kuniaki, and he's now trying to sell the cabin to them. While Yuri is enjoying the food, the other two men threaten Kuniaki over his implied inability to pay off his loans.

After the meal, Yuri is walking outside the cabin when she hears Kuniaki describing a plan to Akinori to kill their guests. The plan is that there's a false ceiling in their current room, with heavy timbers and boulders above it. All he has to do it pull a rope to trigger everything. Akinori tries to get him to stop, but Kuniaki won't listen, and instead heads for the door. Akinori pulls the rope and the ceiling, timbers and rocks come crashing down on his boss. Yuri goes into shock. When she recovers, she calls the police. They quickly arrive at the cabin, along with a recovery crew. They remove the rubble, but there's no body. The two bankers show up and say Yuri is lying. In fact, they saw Akinori kill Kuniaki in completely different places. Rukurou had been invited out to the road to talk about something, and as he got close to the meeting place, he witnessed Akinori ramming into the victim with his car. Kyouzou had been invited out back, where he saw Akinori stab the victim in the chest with a knife before pushing the body down a well. The police check - Akinori's car is slightly damaged, but there's no body near the road; and the only thing in the well is a knife with no blood on it.

Yuri is friends with Kana, so she begs her friend for help, asking her to bring in Touma. Unfortunately, the boy is in France and won't be back for two days. The two women interview the two bankers for clues, but come up empty. They camp out in front of Touma's house until he returns. The police can't do anything, and the case looks like a deadend.

Questions: Who is lying? If they all are, why? If not, what exactly is going on?

Science: Nothing.

Note: All of the character names contain kanji for sea creatures (kai = mollusk; ikada = skewered baby eel (ika = squid); ebi = shrimp; tako = octopus;  kani = crab).

===== Spoilers 1 =====

Touma comes up with the answer pretty quickly, and has Yuri drive him, Kana and Akinori out to the cabin. The girls want to know why the killer is with them. Touma says that the original plan had been to get all three witnesses into questioning each other, and eventually wanting to give up and drop the whole thing, which would include no longer pursuing Kuniaki in getting him to pay off his loans. That is, he would officially disappear and the bankers and Yuri would write off the money he owes as a business expense. To fake his death, first Kuniaki rigged the ceiling so it would only drop at one end, leaving a safe pocket for him to huddle within at the other end of the room. While Yuri was still in shock, he clambered out from under the false ceiling and up the main beam into the cabin's rafters. There, he cut the rope holding up the far end of the fake ceiling so that it would drop flat on the floor. Elsewhere, Akinori had a stuffed dummy set up, which he drove into close to the appointed time with Rukurou. As that guy had to walk out of the way to get to a bridge to cross a gorge along the road, Akinori put the dummy in his car and took it to the well at the back of the house. There, he stabbed it with a knife as Kyouzou approached, and threw it in the well. Kyouzou moved away to call the police, and that's when Akinori pulled the dummy out by a rope, and hid it somewhere before the police arrived. Akinori tells them that Touma has it exactly right, except that he hasn't seen his boss in the last 4 days, and he wants to know what Kuniaki has been doing since then.

Question: What has Kuniaki been doing?

===== Spoilers 2 =====

When Akinori and Kuniaki were kids, they'd climb a tree growing next to the cabin to get up on the roof. With all of his planning, rigging the fake ceiling and everything, he hadn't noticed that the tree had been cut down to improve the view of the countryside from inside the cabin. After getting up into the rafters, he worked his way to the roof somehow. When the police arrived, he realized the tree was gone, and his only option to avoid being seen was to sneak back into the cabin through the big fireplace chimney. Unfortunately, he also forgot that his family had had problems with monkeys getting into the cabin through the chimney, and had installed a fixed grating in it to keep them out. Kuniaki got into the chimney, discovered the grating, and couldn't climb back out. The group gets to the cabin and Touma takes Akinori to the fireplace to show him his boss passed out above the grating. The chapter ends with Kuniaki and Akinori in the massage chairs at Yodakawa Camera, and the boss saying that they're back at square one.

#####

Tokuiten no Onna (Singularity Woman, Magajin R 2019 3)
Touma and Kana are in a bus in Germany, because the French airports are closed during a strike. Kana complains about this, while Touma is more pragmatic. She's hoping for a chance to do sightseeing in Frankfurt, when there's a gunshot and the bus screeches to a halt. Ahead of them on the street, three masked men are robbing an SUV, and carrying a large metal case to a van that then drives away. As witnesses to the crime, Kana gets her wish because she and Touma are now stuck in Frankfurt for questioning. Surprisingly, the lead investigator is Bia Brust, who has been introduced to Touma by Shinra (presumably, Shinra is busy and he'd rather let his cousin handle this one). Bia states that the robbers had thrown a mannequin in front of the van, to make it look like a traffic accident. The van then panic-stopped right in front of the SUV. The masked robbers jumped out of the van to grab the case from the guards in the SUV, then escaped along with a scooter (thrown into the back of the van) and the mannequin. According to the shipping manifest provided by the guards, the case held 5,000 heart medicine tablets, worth 4,000 Euros each. That's $22.7 million on the open market. It's an easy target because the tablets are light, easy to carry, and the pharmaceuticals company making them didn't think they'd need that much security to transport them. The operation was lightning quick and well-planned. The only monkey wrench was the unscheduled presence of the charter bus due to the French airport strike. The only thing Touma can add to the witness accounts is that there'd been a fourth person sitting in the front seat of the van.

Soon after, one of the gang members turns himself in, demanding leniency for cooperating with Interpol on "apprehending that scary woman." The guy's name is Blue Hadley. He says that he's a friend of Gabe Mients, and the two of them worked on construction sites during the day and occasionally hijacked cars at night. A few weeks ago, Gabe showed up at their hideout with this drop-dead gorgeous woman named Rouge Blen, and the promise of a big score if they worked together. Rouge spelled out her plan, and Blue interrupted a couple of times to try to suggest his own ideas, which were dangerous and stupid. The first time, Rouge slapped him in the face and warned him to not try to out-think her. The second time, she just insulted him, and he smashed a beer bottle and threatened to cut her. Rouge just pulled a pistol out of her bag and asked if he was feeling lucky. Gabe got between them to get them to calm them down. However, the plan required a fourth person to handle the mannequin, and Rouge brought in a friend of both Gabe's and Blue's - Berudora Fracky - for this purpose. On the day of the crime, Blue positioned himself, with a pair of binoculars, in a building opposite the pharmacy office where the case with the medicine would be handed over to the delivery team. After he witnessed the transaction, he then joined Gabe and Rouge and they drove out in the van to cut off the SUV in the deserted countryside. Fracky was waiting at a little hillock to throw the mannequin in front of the van to justify the panic stop and to get the security guards to step out of the SUV to investigate the accident and call for an ambulance. The robbery went smoothly and the gang returned to the hideout only to discover that the case was empty beyond a couple of magazines to add the appropriate amount of weight. When the men accused Rouge of duping them, she reminded them that they'd been in contact with the case the entire time, she never got close to it. But, she didn't act upset, so the men still think that she'd tricked them somehow. Blue hates her, and hopes to walk away scot-free if he cooperates with Interpol in having her captured. Bia doesn't make any promises.

Bia and some of his men capture Gabe and Fracky, using the information provided by Blue. They are willing to talk, and they paint a further picture of a mysterious ghost. Rouge had approached Gabe with the plan, and demonstrated that she knew everything about him and Blue in advance. Gabe turned her down at the beginning, but she talked about how society is biased against certain kinds of people, and that it's only fair to right things by fighting back when and where possible. She said this as "an outsider looking in." Gabe agreed to go along with the plan then. Fracky confirms Gabe's story, and adds that Rouge must be a witch or something; when she left the hideout after the case was found to be empty, he followed behind her. She turned a corner, and he was right behind her, but when he got to the intersection, she was nowhere to be seen. And none of them have been able to find her since then. It's like she disappeared into thin air.

Bia can't find anything on her in the international agency databases, and the only photo of her was from a security camera in a parking lot near the hideout. Touma likens her to a black hole, and references Stephen Hawking while suggesting that the only option is to examine the "radiation" around her. That is, they can learn about Rouge by interrogating the other gang members, which is what led to Gabe and Fracky getting picked up. Bia tries getting more evidence to corroborate their stories, but Blue hid the scooter and bag with the mannequin at a bridge construction site, and they're now completely covered in concrete and used as part of the bridge anchor block. Fracky threw the case into a trash dump, where it had been incinerated, as per Blue's orders. And Gabe drove the van into the ocean, again under Blue's orders. It looks like there's nothing but deadends, but Touma says he knows how the robbery really went.

Questions: How did the heart medicine disappear from the case if Rouge didn't have any way of touching it unobserved?

Science: Just the mention of Hawking, and singularities.

===== Spoilers 1 =====

Rouge was an executive at the pharmaceutical company, tasked with sending the case to its final destination. She'd brought the two transport guards into an empty meeting room at the pharmaceutical headquarters, where she showed them a case with fake tablets, and had them sign a fake transaction sheet, while she switched cases with the one containing the magazines (the guards walked away with the empty case). She then dressed up as a delivery guard and went to the company's real rep and signed for the real case with the real tablets in full view of Blue as he watched through binoculars from the other building (she supposedly hid the real case and tablets before joining up with the gang for the robbery). The entire point of the "robbery" then was to give her the opportunity to switch transportation papers so that the real delivery people had the real signatures. At the end of Touma's explanation, Blue demands to be let free for having cooperated with Interpol. Bia says that will have to be up to the courts.

Questions: What happened to the real tablets, and where is Rouge now? Do Blue, Gabe and Fracky skate free?

===== Spoilers 2 =====

6 years pass, and Fracky shows up at a beach in southern France. He joins a shadowy figure and orders a beer. They start talking about what happened about 1 week after Touma's revelations. There'd been a junk yard the gang used to use for hiding cars they'd jack. After switching plates, they'd occasionally have the car run through the compactor, and it would never be found in the stacks of other cars. A different shadowy figure goes through the stacks, looking for the crushed van. They find it, and pry open the back end to pull out a large canvas bag. The lights in the yard come on, and Bia, Fracky, Gabe, Touma, Kana and two Interpol agents are standing below, watching Blue holding the bag. Touma says that Blue had been dreaming of retiring on the French Riviera and drinking beer all day. When the medicine case turned out to be empty, Blue had snapped and vowed revenge. The reason Fracky couldn't find Rouge when she got to the intersection is that just below the street was a canal, and Blue had killed the woman and dumped her body in a boat at that point. To get rid of the corpse, he cut it up, putting the head in the carrier compartment of the scooter, the arms in the case and the legs in the bag with the mannequin. The torso went into the back of the van. Gabe lied about driving the van into the ocean, instead following Blue's orders to have it compacted. After having the other two dispose of the van and case, and he had poured concrete over the scooter and mannequin at the bridge construction site, Blue turned himself in. The idea here was to create a cover for Rouge's murder, while trying to find the missing tablets before the police did. Touma's explanation hinted at the possibility that she'd kept the tablets in her jacket, which is why Blue returned to the van.

The shadowy figure at the beach is revealed to be Gabe. Fracky asks him how such a brilliant woman could have let herself be killed by a thug like Blue. Gabe shrugs, suggesting that Rouge was so focused on watching what was going on in front of her that she'd never thought about checking if something was sneaking up from behind. The chapter ends with an image of Blue, in a rage, about to hit Rouge in the back of the head with a pipe.

#####

Summary: Again, not much science this time. Homicide Crime Scene was a silly drama that obviously involved dummies and a trick ceiling. The motivation wasn't clear, though, and the part about Kuniaki getting stuck in the fireplace results in a big plot hole. The police were in and around the cabin for a couple days as they tried to find bodies, and Kuniaki had ample opportunities to call for help once he realized he couldn't climb back out of the chimney. Singularity Woman showed a lot of promise, and I was praying that Rouge would escape to reappear in later books. She'd be an excellent Moriarty to Touma's Holmes. I was very disappointed when she got offed that quickly and easily. This creates another plot hole - if she had done that much research on Gabe and the others before approaching them, Rouge should have known that at least one of the men would resent being shown up by a woman. There's no explanation for why she just didn't disappear before the others discovered the case was empty. In fact, the whole robbery is farfetched if the only point was to disguise the fact that she'd been the one to sign for the real heart medicine. There are much easier ways to cover your tracks than this. Recommended only if you like the series.

Saturday, June 29, 2019

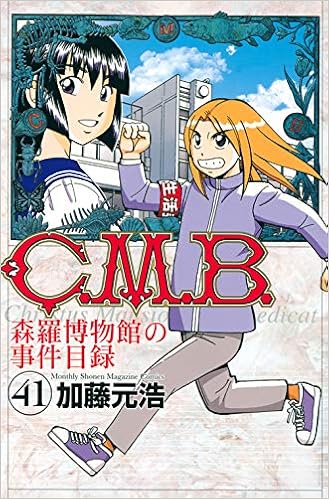
C.M.B. volume 41 review


(All rights belong to their owners. Image from Amazon used here for review purposes only.)

C.M.B., vol. 41, by Katou Motohiro. Grade: B
Seikatsu Iin (Life Committee, Monthly Shonen Magajin, 2019 #1)
Japanese schools have a "life committee", which is effectively a problem-solving group of students tasked with things like unclogging toilets and replacing burned-out lights. This week, it's Shinra's and Tatsuki's turn, much to Shinra's displeasure. And, it starts out rough, with an altercation between a group of moving company workers and the Gardening club. The workers have been contracted to move the garden and a small wooden weather station, and the students howl about this being done without their consent. Tatsuki's grandfather is the school principal, so she goes to ask him what's happening. He answers that the wooden weather station housing is rotting and becoming dangerous, and no one uses the measuring equipment anymore. And, the garden bed is in the way of a building expansion he wants to make to allow for displaying an expensive new painting he's acquired for the school. He just forgot to notify the students of the project, and because he's busy now, he wants Tatsuki to handle everything.

Of course, the Gardening club vows to fight back, and one of the students kicks a wooden plank with the nails sticking up under the truck as it backs up, causing a flat. The moving company manager sees the student do this and demands the kids take the tire to a gas station for repairs and refilling. As Tatsuki is dealing with all this, Shinra is called to unplug a toilet in the boy's stalls, replace a burned out fluorescent light, clean up muddy footprints in the front hall of the school, and try to deal with a food thief. Eventually, Tatsuki discovers the reason the boys in the club don't want the flower bed moved - the school had been visited by a pretty transfer student from Australia, and she'd given them a packet of flower seeds as a memento. The boys stupidly fought over who would be able to plant the seeds, and they ended up spilling the seeds haphazardly all over the place. Since they have no idea which plants are the Australian girl's, they just want the flower bed left alone. When Shinra learns of this, he gets upset, since these seeds are of an invasive species banned by the Japanese Invasive Species Act. He and two of the other boys have to put on booties and clean suits in order to avoid accidentally spreading the plant seeds further around the school, and find all of the seedlings starting to sprout right now in the flower bed.

Questions: Is this the end of a really long, bad day, or is something else waiting to happen? Are these events all connected in some way? Is there a reason why one of the moving crew decided to take the day off to go play pachinko?

Natural History: Nothing.

Payment: Nothing mentioned.

===== Spoilers =====

Actually, yes, some of this is connected. The missing worker had been the one that had tracked the mud into the school as he made his way to the boy's room. He jammed the toilet with paper badly enough that Shinra had to put up an "Out of Service" sign on the door. The worker then hid in that stall to wait until the school closed. Unfortunately, he'd gotten hungry, and slipped out to grab a couple sandwiches from the desks in one of the classrooms. His plan was to steal the Principal's painting while it remained in unprotected storage. Shinra figures all this out, and the crew is waiting outside the stall when the would-be thief emerges from hiding. To add the final insult, Shinra's classmates tell him "as to be expected from the Life Committee."

#####

Fuuin Soukitan (Tales of Sealed Castle, Monthly Shonen Magajin, 2019 #2)
Shinra is commissioned by the final heir to the Funagawa banking group family to assist in mapping out one of the abandoned mansions the family owns in order to prepare it for sale. The place is out in the countryside, on a cliff overlooking the ocean. It had been built incorporating both Japanese and Australian architectural elements towards the turn of the century, and is rumored to be the site of a murder, and is therefore haunted. The assessment company's team is headed by Mansaku Sugimoto, and consists of four other workers, including one Tatsuhiko Kusunoki. Tatsuhiko constantly rants about the building being haunted, and how they all need to get out of there now before being cursed, and he gets two of the other workers riled up as well. Mansaku is more pragmatic, and says if they don't work, they don't get paid. They spend the day flying drones over and around the mansion, and using laptop software to draw up the floor plans as they go along.

When they go into the building, they eventually discover a hidden trapdoor leading into a basement. And in the basement is a kind of prison cell, with heavy wooden 2x4s making an interlaced front wall (adding to the murder rumors). The door to the cell has a padlock, and the only key is on the ring given to Mansaku. At the end of the day, Shinra and Tatsuki go to town to stay at a hotel, and the crew plans to sleep near the dining room inside the mansion. Mansaku is the only one that thought ahead to bring food and just enough beer for himself. One member, Yoshio Tsuge, is sent to town to buy cup ramen for the others. Tatsuhiko claims to see a white shadow out in the woods at the base of the mansion and goes out to check. He's followed by Tatsuji Kuromatsu, leaving the last guy, Masaki Natsume, inside (Mansaku got drunk and fell asleep in his sleeping bag). Tatsuhiko falls down the cliff, apparently pushed, and Tatsuji is shoved down the cliff as well and hits his head against a tree. When Masaki hears a noise in the basement, he goes down the stairs to check it out, and is hit from behind. Yoshio returns from town with the food, and encounters both Tatsuhiko and Tatsuji as they work their way back up the cliff. The trio enter the mansion, and see the door open leading to the closet with the trapdoor, and they go downstairs to find Masaki unconscious in the prison cell, the padlock still on the door where Mansaku had left it locked up.

Questions: Is the house haunted? Is there someone else in there with them? Who is the attacker and what does it want? Is there a secret to the prison cell, and how did Masaki get put in there if the door had been locked and Mansaku had the only key?

Natural History: Nothing much.

Payment: The Funagawa heir offered Shinra a rare pearl to take on the assessment job.

===== Spoilers =====

The wooden prison cell frame beams are interwoven like the straps you see on folding beach chairs. Generally, this would be an impossible puzzle object, since the beams aren't flexible like cloth webbing is. However, this is an example of Japanese chidori (woven) woodworking exemplified by Kumiko Hida. The trick is that the joint cuts are deeper than they look, turning the prison cell frame into a VERY large 3D wood puzzle. If you pull one horizontal bar forward, and push a neighboring horizontal bar back, it creates enough of a gap for 2 of the vertical bars to slide up and leave an opening at the floor that someone could crawl through. The perpetrator is Tatsuhiko, who had recognized the trick when he first saw the prison cell frame. He then tied a rope to a tree near the cliff at the base of the house, and claimed to see a white shadow to get Tatsuji to follow him outside. He grabbed the rope and pretended to fall down the hillside, clambered back up the rope, and pushed Tatsuji down the hill. The idea was to steal the drones and computer equipment for sale later, and hide them in the prison cell overnight. But, Masaki heard him, so Tatsuji knocked him out, locked him in the cell, and moved the gear into the woods. Shinra figures this all out, and Mansaku takes his wrath out on his insubordinate.

Note: All of the workers have kanji for trees in their last names, except for Masaki (which translates to "True Tree").

#####

Hamaguri-ke no Hitobito (The Hamaguris, Monthly Shonen Magajin, 2019 #3)
Saburou Hamaguri is a retired apartment block ("mansion" in Japanese) owner, who runs several different complexes. He's always been successful, so his adult children had been able to grow up in luxury and free to pursuit their own interests. After Saburou's wife died, he became more of a shut-in, with a very strict routine he would follow each day. Recently, he'd fallen under the spell of a young woman living in a neighboring apartment, Maya (Ma = magic, ya = question mark). After this, one of Saburou's daughters sees her father give money to Maya, and then checks his bank book only to learn he'd taken out $5,000 at a time, several times in the last week. When she confronted her father about this, he just told her "it's my money, I can do what I want with it." The daughter, and the rest of her siblings and their children, go to the police to report a possible crime (scamming an old person), but there's no evidence of anything wrong, and the police claim their hands are tied. Instead, the Hamaguri's latch onto Shinra and Tatsuki after they leave the police department building (Shinra had been helping Det. Kujirazaki on something). The family pours their story out, and Shinra tells them to hire a lawyer.

A few days later, a couple of the family members burst into Shinra's museum to report their father has gone missing. Tatsuki joins them, and tracks Maya down to a cave hidden behind a Shinto shrine out in the mountains. Maya is in the middle of a strange ceremony involving a gold skull and a pair of interlocking wands that indicate she's a member of an ancient banned Buddhist sex cult. Tatsuki reports what she's learned to Kujirazaki, and he follows her out to the shrine, where they now find Saburou's corpse leaning against the cave wall. Kujirazaki calls it in, and forensics determines that he's been dead for a while, probably of natural causes. The speculation is that the old man had decided to follow the cult's premise of Sokushinbutsu (Buddhist mummies), and had crawled into the cave to die. The Hamaguri family attacks Kujirazaki, yelling that this is why they'd been pushing so hard for the police to investigate Maya - It's all the police's fault.

Questions: Is this the end of the story? Can Maya be arrested for assisted suicide? What happens next? Why is Shinra so interested in looking at the old man's smartphone, which has no data on it?

Natural History: Just a discussion of the difference between Sokushinbutsu and Sokushinjoubutsu.

Payment: None mentioned.

===== Spoilers =====

The gold skull and interlocking maces hint towards Tachikawa-ryu, an ancient form of Buddhist esotericism founded in 1114 by the monk Ninkan. The problem is, Ninkan taught Sokushinjoubutsu, which means that everyone is a LIVING Buddha. Sokushinbutsu are the mummified priests, and are a completely different thing. So, Maya is a fraud, but so is everything else. Shinra states that one day, about a week ago, Saburou had died at home of a heart attack, without leaving a will. His children panicked at the idea being cut off from the estate, and the oldest daughter came up with the idea of their father being the victim of a con artist. They started pulling money out of their father's account using his ATM card, and then used some of that to hire an actress to play Maya. When the police failed to take the bait, the family targeted Shinra and Tatsuya as having some kind of connection to the cops. The entire thing of Maya worshiping at a shrine in the cave was just an act. Afterward, the family moved Saburou's body from where it had been kept cold to the cave for it to be found. The flaw in the Hamaguri's plan was in mistaking the Tachikawa sect's beliefs for the Buddha mummies group. The proof of the scam is that Saburou was a man of habit, and one habit was to take a long walk every day, and record it on his Fitbit to be downloaded to his phone afterward. This phone app shows that he'd stopped exercising at the time the family claimed he first encountered Maya. Now, it's time for Kujirazaki to yell at the Hamaguris.

#####

Ito to Shashin (Stone and Photograph, Monthly Shonen Magajin, 2019 #4)
Shinra and Tatsuki are in Peru to visit Machu Picchu, but their trip is interrupted by a hiker who had just been crushed under a stone. The hiker, Alma Molina, from Spain, had been part of a group of female friends that included Viviana Hollis, Elza Duran, and Tina Lee. The group had been hiking the trails, and had stopped for a break near a stone ruins. Elza took a few photos of flowers at the base of something that looks like a stone hut, and Alma said she wanted to take photos next. A few seconds later, a cylindrical stone fell off the roof of the structure and landed on Alma below, crushing her head. The police, and Shinra, investigate the scene, and it doesn't make any sense. The cylinder had originally been standing at the back of the roof, and a large stone bench in the middle of the roof would have prevented it from simply rolling forward to the front of the structure. The assumption by the police is "ghosts of the slain Inca" exacting revenge against tourists. But, Shinra finds half a broken glass bead, and part of a walnut on the roof. He and Tatsuki then interview the friends, and check the photos they've posted to their SNS sites. Mostly, the pictures are of the hobbies the friends have (travel, flowers, etc. Lee is a motorcycle enthusiast, and Viviana is a chef). However, some of the comments on Alma's page are trollish, and she'd been accused of being a thief.

Questions: Does someone have a thing against Alma? Is there a stalker, or are there ghosts? Do the bead and walnut have anything to do with anything? How did the stone cylinder get from the back of the hut roof past the bench thing?

Natural History: Just a mention of the Pocketbook flower, and a little history of the Machu Picchu region.

Payment: Nothing mentioned. Shinra might just be helping out the guide that was going to be taking him on the tour.

===== Spoilers =====

While the photos posted on sites like Facebook by the four women would normally look like just the results of four friends having great times together, a closer examination hints that Alma was an "idea thief." Anything the others did, she'd do too, only trying to do it better. Confronted with the evidence, Elza breaks down and admits that Alma had stolen her ideas, causing her to lose her job and her boyfriend. In revenge, Elza had bought a pair of large glass bead art pieces (shown in one of the Facebook photos) that could be separated into 6 wedge-like shapes. She'd put the wedges on the roof and set the cylinder on the wedge towards the back of the roof. The cylinder would then roll slowly forward, following the path made by the glass beads of the wedges, in a curve that bypassed the bench thing in the middle of the roof. Elza also put a walnut on the roof near the front, so that when the cylinder made a noise while crushing it, she'd have time to take a few pictures of the flowers, which would cause Alma to come up and automatically want to take photos of her own. The final proof is that the half bead fragment Shinra found matches a broken bead on the artwork (it's like a large hexagonal placemat) Elza had in her luggage.

#####

Summary: Nothing really exciting this time. Life Committee was kind of silly, and Tales of Sealed Castle has a big plot hole (the house has been abandoned for a long time, so there should be dust on the floor of the basement that would have been disturbed by stuff being dragged through the gap in the prison cell frame at floor level). I really liked the design of the interwoven prison cell bars, though. I couldn't really follow the cultural aspects of the Hamaguris story because of the more difficult kanji involved. Stone and Photograph was also a straightforward detective story, but the best part was the artwork of Machu Picchu and the surrounding area. Recommended if you like the series.
Friday, June 28, 2019

Ajin, vol. 14 review


(All rights belong to their owners.
Image from Amazon.jp used here for review purposes only.)

Ajin, vol. 14 (Good Afternoon, 2017), by Gamon Sakurai. Grade: A-.

Just a short write-up this time, since most of the story has everyone running around a lot. We left off with the heroes trying to figure out where Satou has his arm hidden. He's flying out on SDF fighter jets and ramming them into various targets (buildings containing people from the Ajin Research project), and then resurrecting back somewhere at the base only to have his arm amputated again and then run to the next jet. Izumi and Tanaka check one location that has a young punk Ajin capable of controlling two black smoke ghosts. However, the guy is really weak and Izumi knocks him off the roof. He lands on a corrugated metal fence that cuts him in two. Tanaka leaves him there, so that when he recovers, he's embedded in the wall.

Kou and the fireman locate an older guy in a building. The guy triggers the sprinkler system so the fireman can't use his ghost, and he's also equipped with a tranq gun and a regular pistol. The fireman pulls loose a section of wall and uses that as an umbrella to protect his ghost with, and they subdue this guy too, leaving him locked up in a store room. Kei and the Anti-Ajin forces eliminate the last of Satou's human minions, and Kei realizes that the two cokeheads and the arm have to be in an underground bunker beneath the airstrip. They split up, with the soldiers going down into the facility, and Kei trying to find an unlocked car in the parking lot. The idea now is to wait for Satou to pick a target far enough away that he can't suicide and get back to the arm in less than 5 minutes.

As all of this other stuff is going on, Tosaki calls a news conference and publicly announces the existence of the Ajin Research group, who the members are, and the fact that it's headed by the politician that was last seen surrounded by dead bodyguards out by the airfield. Tosaki has mailed ALL of the records from the research HQ to a reporter at a newspaper (a small mountain of boxes of materials), saying that the proof of his allegations will be made public soon. He then goes out to a hallway to slump on a bench against the wall, and apparently bleeds to death (he'd left his engagement ring on the dash of his car in the parking lot of the building).

Time goes by, and Satou blows up the TV studio that has one woman news anchor who is in the middle of another of her famous anti-Ajin diatribes. The building collapses, and rescue workers swarm the rubble for survivors. They find the woman, her arm pinned under the wreckage, and she's being repaired with black smoke (yes, the irony is that she's become an Ajin). Finally, Satou picks a target using the jet's planning system that alerts the Anti-Ajin soldiers that he'll be just barely over the time limit away. Kei agonizes for a few seconds, then barks the order to "do it." The soldiers kill the one cokehead (ending the flashback started in the previous volume), and tranq the other one. Tanaka has his ghost race into the bunker to grab the arm and a bomb belt and take them outside to Kou. Kou's job is to find a hole that's "just the right size" to put the arm in. Too narrow and it won't fall in deep enough to contain Satou when he resurrects. Too wide, and Satou will eventually be able to escape. The plan is to embed him in a concrete coffin underground that he'll never get out of. Kou eventually realizes that Japanese concrete telephone poles are hollow, and they fit all the requirements. He uses the bomb pack from the ghost to blow the nearest utility pole in half, and drops the arm into it as the seconds tick down. The chapter ends with the arm disappearing into the darkness, and Satou noticing that something seems "off" about this last target.

Summary: Lots of action and suspense this time, mixed in with a little gallows humor. The artwork has come a long way from volume 1, too. Great stuff if you like thrillers. Recommended.

Thursday, June 27, 2019

Bravely Second Follow-Up


I doubt anyone is going to have any interest in this, but I do want to record my thoughts right now. A little over a month ago, I wrote about the Nintendo 3DS game, Bravely Second - End Layer. It's a Japanese RPG sequel to Bravely Default, and is similar to Final Fantasy, and in fact, Bravely Default was first planned to be the sequel to Final Fantasy: The Four Heroes of Light (2009). I currently have 200 hours in the game, and I'm both close to finishing it, and 3 weeks from reaching the end.

This is going to take a bit of set up first. Both Bravely Default (BD) and Bravely Second (BS) are turn-based combat games. You have four characters in your party, and each one can either attack (with a weapon or magic), defend (in the game, called "Default"), use an item, call a "friend" (either an avatar of someone else that has a copy of the game you've played against, or an NPC character), or try to run away. There is also a "BP" (battle point) system, where you start the battle at 0 BP. If you Default, your defense increases for that turn, and you gain 1 BP (for a normal total of 3 max at any one time). If you use the Brave option, you can perform up to 4 actions in one turn, but then it will take one turn to recover 1 BP for every point you've gone negative.

For example, say you start the battle with 0 BP on one character, and you Default on the first turn. On the next turn, you will be at 1 BP. If you select Brave 3 times, you will have 4 actions for the turn, but you'll be going to -3 BP (-1 just for doing a normal action rather than defending, -3 for Braving, and +1 for having started the turn a +1). If you want, you can choose to attack 4 times, or whatever mix of actions you like. If you defeat all of the enemy, no problem. Otherwise, you'll gain one BP for the start of the next round, leaving you at -2 BP, and unable to do anything with that character for 2 more turns. Braving is great if you think you can end the battle fast, but if you don't, you're a sitting duck while you're at negative BP. Hence, the "brave" part.

Something that's new with BS is "spiritual power" (SP, or "soul power"). You gain 1 SP (for a max of 3 SP) every 8 hours that the 3DS is turned on but the cover is closed. Normally, there is a cap of 9,999 HP on the amount of damage one character can deliver in one attack. This is very silly, since there are a lot of weapons and skills that can raise your Atk stat up close to the 999 cap. What's the point of super-charging a fighter to 999 Atk if you can't do more than 9,999 HP damage, especially if you're facing an enemy with 200,000 HP? That's what SP is for. If you press the Start button (Select on the Japanese version), you go into a special "Bravely Second" battle screen. This lets you take one free action from the battle menu, even if you haven't started the round yet, or if your character is minus BP. It also removes the 9,999 cap on damage. So far, using SP, I have been able to deliver a maximum of almost 600,000 damage on one enemy at one time. This is a good thing.

One last piece of explanation. Like BD, BS has a "village" that needs repairing during the game. In BS, one of your party members arrives on a rocket from the moon, and wrecks the ship. You get one worker to do the repairs, which gives you various benefits for the game, such as special items you can buy from the save point in the dungeons (healing potions, MP recovery items, attack and defense items, etc.) You can also unlock special attacks for each of the weapon types (swords, axes, daggers, magic wands, etc.), and "parts" for the special attacks (attack with fire or water elements, pluses to sleep or blind the enemy, or pluses for HP or MP recovery). The thing is, each "repair" you make takes a lot of real time. You can have the 3DS case closed and the power on, but it's still going to take real time based on what you're repairing. For example, simply to access the ship takes 1 hour for fixing a bridge. Adding fire element to the special attack is 2 more hours, unlocking the first special attack (Piercing Bolt, for magic wands) is 2 more hours, and so on. Each new thing you unlock for a given part of the rocket base takes longer than the thing before it. The most powerful special attacks take 72 to 99 hours each to unlock. You can speed the repair up a lot by getting extra workers by battling your friends that have the game, or by logging into the Nintendo website. Unfortunately, Nintendo took the Bravely Second site down in Japan, and I don't know anyone with the game. So, I'm stuck with just the one worker.

And that's the problem. I have found every secret treasure in the game, fought every boss at least once each, if not three times, beat the game twice, and maxed out all the characters at level 99. All that's left is to beat the toughest optional boss in the game (the Adventurer), and I've done that once already. But, I want to do this while using the strongest special attack possible, and that's going to take 2 more weeks real time to unlock via the repairs to the rocket. The special attack shop has 10 levels, and as I write this, I've unlocked level 6 (the top special attack for swords and wands), and it's 72 hours to get to level 7. Another 72 to get to level 8, 72 more for level 9, and finally 99 hours for the top special attack for great swords, bare knuckles and bows.

To recap, I just want to beat the Adventurer one more time, using the bare knuckle weapon special attack, but that's going to require 72 + 72 + 72 + 99 = 315 hours = 13.125 days of real time to unlock. Sigh.

In every dungeon, just before the rooms containing the stage bosses, will be the Adventurer in his long brown coat and floppy hat. He provides a Save point, as well as allowing you to restock on replenishment and attack items, rest up to recover HP and MP, and occasionally to watch short videos of party chats (conversations between the 4 party members that add to the storyline). However, at the far end of the largest and hardest optional dungeon in the game, you can find the Adventurer waiting to give you the hardest boss fight possible. The Adventurer has 500,000 HP, high defense and a series of devastating attacks. Additionally, he has a fox named Companion, who has 50,000 HP, can afflict the party with blind, and will gift the Adventurer with 3 BP (to allow him to cast Meteor against you). Both Adventurer and Companion can heal, and resurrect each other if one of them gets KO'd. This means you need to KO both of them in the same round (difficult given the 9,999 hit cap and only being able to use 4 SP in one battle (you can charge the game up to 3 SP, and go negative by one SP if you started the battle with more than 0 SP)). There is a usable strategy, but it's a tricky one to explain.

The main goal of the game is to collect job classes by defeating bosses that have "asterisks" for a given job (if you play the game multiple times, you can defeat the same boss more than once for their asterisk, but this doesn't have an effect if you already know that job). So, beat the Black Mage and you get the Black Mage asterisk (general attack magic). The White Mage asterisk lets you do healing and attack with Holy magic, and there's a whole group of fighter classes, from Fencer and Charioteer to Pirate and Monk, for a total of 30 different jobs. Defeating enemies gives you money (pg), level experience (exp) and job experience (jp). If you level your jobs up to 11, you can access the strongest, best, or most worthless skill for that job. For Thief, you get Steal Rare Items, and for Monk, it's Double Atk and Physical Defense if you're not equipped with anything. The Freelancer job gives you a boost of 1% to every stat for every job that's leveled to 10 or 11. If you level all 30 jobs, that's a very significant boost of 30% to all stats, but to get that far, you have to fight so many battles that everyone in the party will be at level 99 before maxing even 15 jobs, and you'll have more money than you'll ever be able to spend.

So, the way I beat the Adventurer and Companion the first time was to make the two male fighters (Yew and Tiis, who have the slightly better Atk stats) Monks, and made their secondary job class Guardians (Guardians can possess other party members, so their stats add together). I made the mistake of making one of the females (Magnolia) a Merchant, which made her useless in the battle. Then, I made the other female (Edea) a Thief, which has the highest Agility of the classes, with a support job of Kaiser (which lets you cast Winter Storm).

The Monk usually uses knuckle weapons, but if you strip them of weapons, armor, and accessories, their Brute Force skill causes their Atk and Physical Def to double. If you add the Freelancer Late Bloomer skill, you boost all of the stats by 30%. That can get you an Atk of 800+ (999 max). The Guardian's Possession skill lets one Monk possess the other, so all of their stats add together. The Monk's special attack is knuckle-based. I only had the level 3 special attack unlocked from the rocket base, which could put 300,000 hits on the Adventurer in one shot, if I used the SP function to remove the damage cap. (The Monk class has a regular Qigong Wave attack, which uses 12 MP, and if two monks are stacked and you use 1 SP, can deliver 60,000 hits, which is enough to defeat Companion.)

For the Thief, I added accessories and daggers that boosted Agility, so that Edea would be more likely to act before the Adventurer could. Then, I'd cast the Kaiser's Winter Storm, which prevents all healing and recovery for 3 turns. Once Companion is KO'd, the Adventurer would try to revive him, and Winter Storm would block that, giving me more time to attack Adventurer with Qigong Wave twice per turn for 9,999 hits each. Every time I'd tried fighting the Adventurer before, I'd get my butt kicked. With the strategy described here, I had to cast Winter Storm 6-7 times, but I did succeed in KO'ing both Companion and Adventurer. The problem is that they automatically revive the first time you defeat them, and you have to repeat the process all over again. If Tiis possessed Yew the first battle and used Yew's special attack, then in the second battle, the roles have to be reversed. And this means that you need to burn 4 SP to remove the damage cap 4 times. If you fail to beat Adventurer and Companion twice consecutively, you have to reset the game, but now you're out the SP you used. Defeat them both twice, and it still takes 32 hours real time with the 3DS case closed to replenish back to 3 SP to try doing this all over again.

The level 3 special attack for knuckle weapons is the Ascendant Palm, which hits one enemy 16 times at 0.35 power. This is effectively the same as saying it's one attack with a 5.6 multiplier, but with the Adventurer's evasion stat, not all of the hits are expected to land. The level 4 special is Thunder Burst, which is base power times 6, in one hit on one enemy. Hopefully, the Adventurer won't evade that one hit.

As mentioned above, the rocket base store for special attacks has been repaired to level 6. It will take 72 hours real time to repair to level 7, another 72 hours to level 8, another 72 hours to level 9, and then 99 hours to get to Thunder Burst at level 10. I'm testing the other special attacks as I get them to see how they compare to two stacked monks using Ascendant Palm, but so far they're all really pathetic (somewhere around 100,000 hits, or less, in one shot). Since the Adventurer has 530,000 HP, the ideal would be for Thunder Burst to at least get me to 400,000, but I'm expecting to be disappointed. If I use my current monk stack on dragons, which have 200,000 HP and some kind of elemental weakness, and I tailor the special attack to use that element, I can deliver up to 600,000. But, the Adventurer doesn't have weaknesses. There may be a chance of using something like the Patissier class to inflict a 25% decrease to physical defense, but generally, the Adventurer is immune to status inflictions, so maybe it's just easier if I make Magnolia another monk, and have her spam the Adventurer with 9,999 hit Qigong Wave attacks, while Edea keeps activating Winter Storm every three rounds.

Anyway, what do you get for defeating Adventurer and Companion? The strongest sword and shield in the game. Are you kidding me? They don't even have specials on them (like absorbing elemental attacks, or inflicting status ailments). The strongest Spears, Axes and Great Swords are better than the strongest sword, and the Monk is the strongest job class in the game, but only if you don't have weapons, shields or accessories equipped. Sigh.

I've said before that Bravely Second is horribly unbalanced. Nothing is stronger than a monk, most attack items (bomb fragments, insect shells) aren't necessary to win battles, level 11 monks don't need to use the weapons or equipment you find in the dungeons, you reach level 99 long before you max out all of the job classes at 11, and there's nothing in the Japanese game to spend excess money on (in the U.S. release, there are novelty skins for the characters, like bunny girl suits and loin cloths, that you can buy for 200,000 to 999,999 pg each, but in the Japanese version those were only available as promotional codes from game magazines via the Nintendo website, which is no longer running). I have beaten every boss (except Adventurer and Companion) at least twice, and I have completely cleaned out the entire game of every treasure and secret item available (most of which I never used). All that's left is to unlock Thunder Burst, which won't be for 13 days as I write this. And then, face off against Adventurer again for a, hopefully, shorter battle that I want to finish in under 5 minutes. There are a whole bunch of shops and things that could still be unlocked in the rocket base, but none of them contribute to the game, and that still represents well over 600 hours of real time to pass. My last Nintendo 3DS burned out while I was repairing Norende village in Bravely Default. I'm not interested in spending another $100 to buy a third 3DS, so I'm not running the risk of burning out my current 3DS just so I can unlock the ability to buy insect wings I don't need from the shops.

So close, and yet so far.

Wednesday, June 26, 2019

Aeon Mall


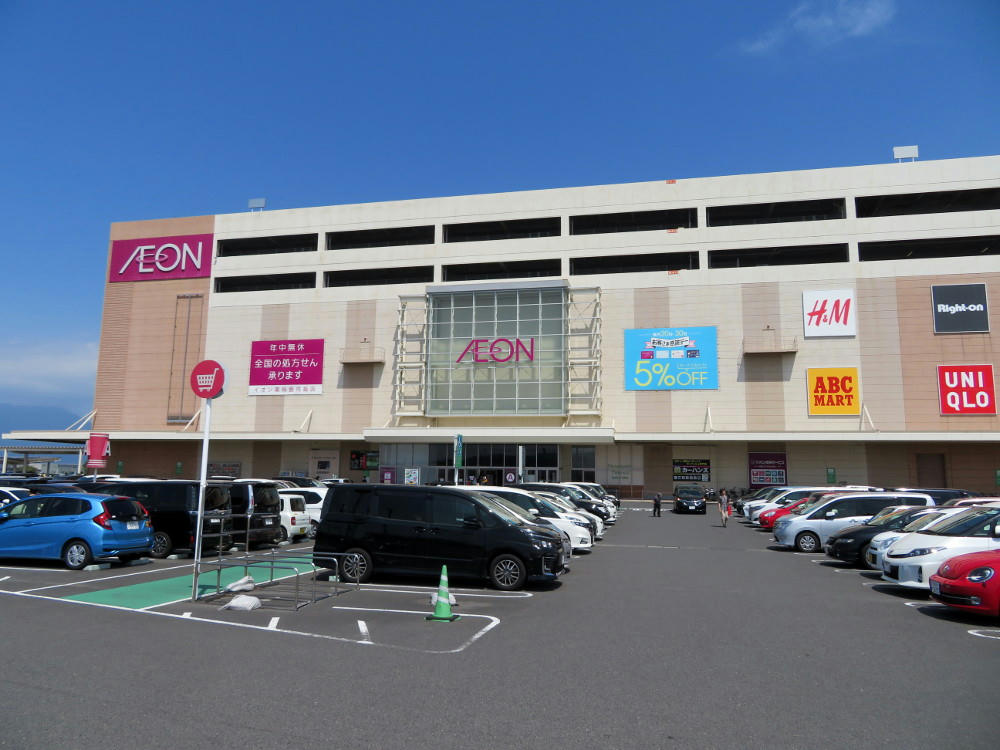
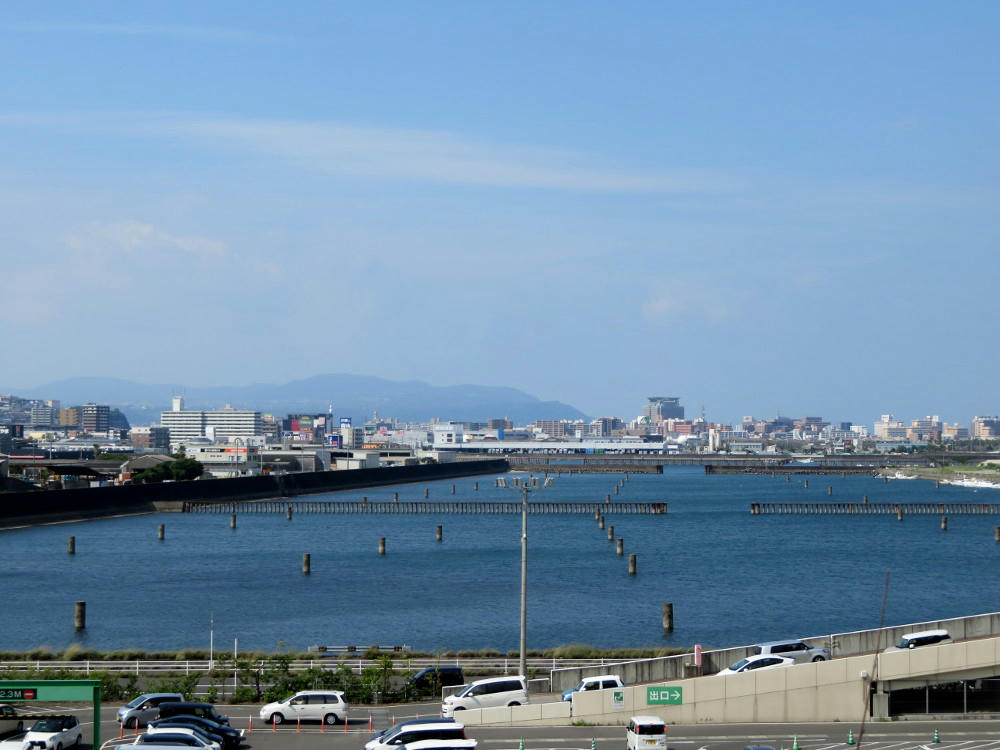
Aeon is a large shopping mall down at Taniyama, about 45 minutes by tram from Tenmonkan. In fact, the tram line ends at Taniyama station, which is about a 1 mile walk west of the mall (which is just off of Kinko bay). It opened a little bit before I moved to Kagoshima, and I'd only been there once since then (someone I met that had a mutual interest in Gakken kits offered to drive me down there once about 6 years ago). I've been wanting to go back for several months, in part to revisit the music shop, and the massive bookstore I remembered from the previous trip. I finally set aside the time to ride the tram down there back a couple Sundays ago. It was very nice weather for it.


Unfortunately, the bookstore got relocated to a much smaller space, and the music store contracted to just focus on keyboards, guitars, and school instruments. But, I spent an hour mall-walking for the exercise, and I had a small lunch at Saint Marc's, a kind of snack shop that has some sandwiches, a lot of parfaits, and drinks. They're the only place I know of that sells Vietnamese-style coffee, with condensed milk. I love that stuff. There's another Saint Marc's in Across Mall, much closer to home, but still a 20 minute walk from the tram line, near Tempozan.


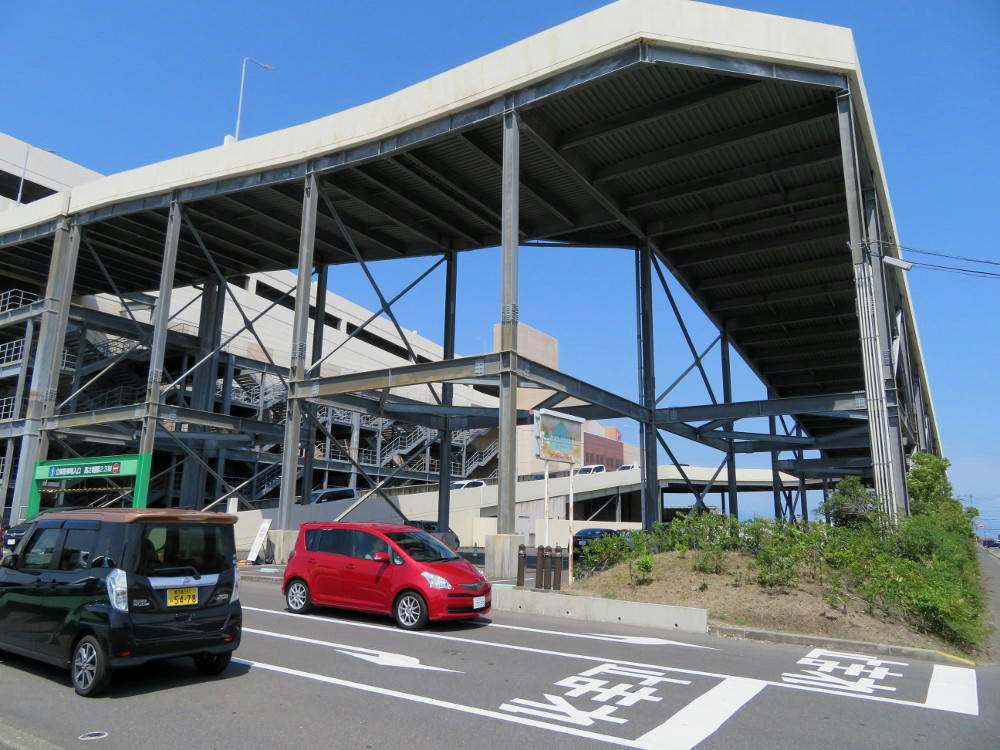
In a country often rocked by strong earthquakes, I have to wonder who approved this ramp to the top floor parking lots... There's no signal lights or cops at the bottom of the ramp to control traffic, so the line of cars waiting to get out of the lot is backed up all the way to the top. Not a good place to be sitting out a quake.


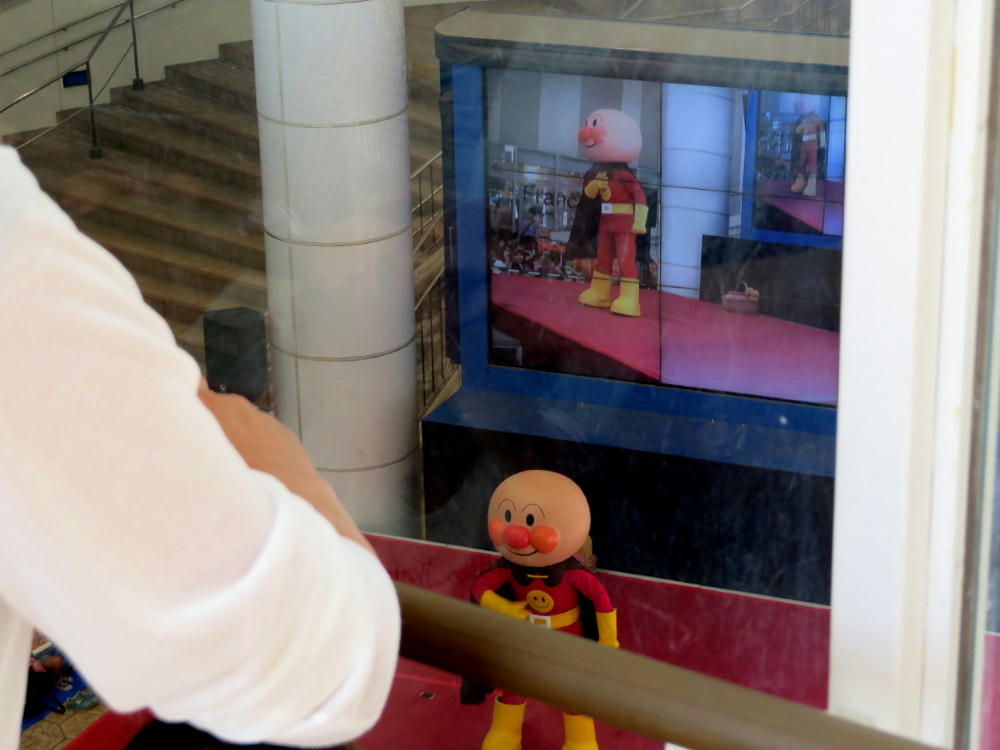
The one thing I found interesting that day was that there's an enclosed stage area separated from the mall proper that hosts 2 Apanman live stage shows a day on the weekends. There were well over 200 kids and their parents in the seats on the ground floor and another 50 plus standing up on the second floor balcony. Unfortunately, there were too many people between me and the protective plastic barriers to get a clear shot of the stage (I had to shoot through the barrier).


"Anpanman go!"


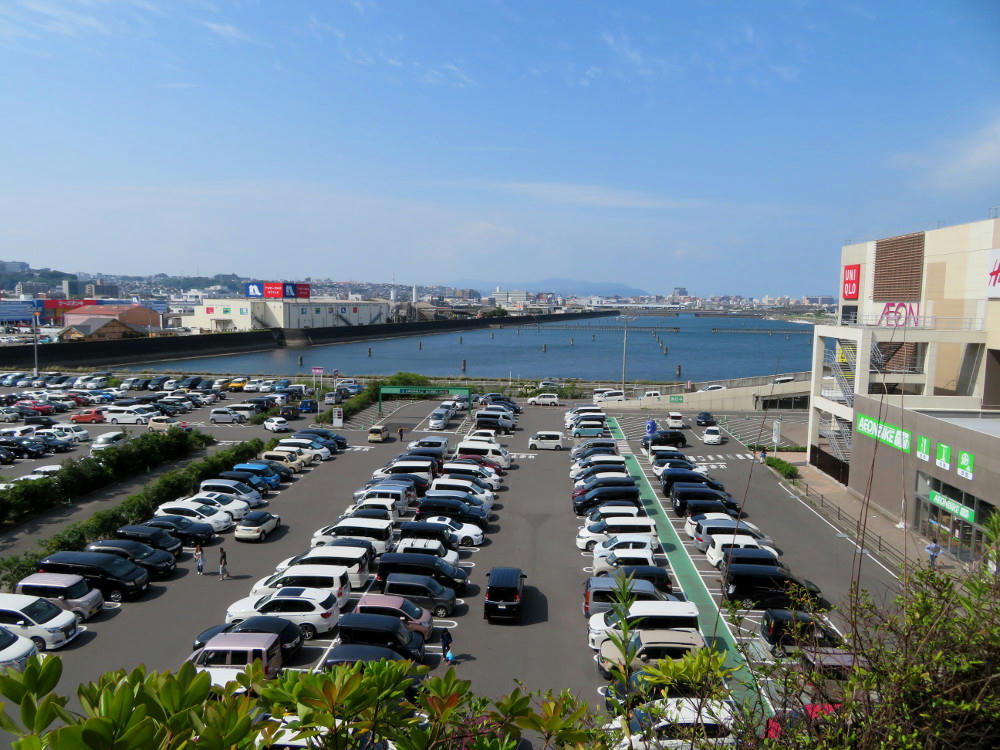
The view from the third floor outdoor food terrace.


Buses run between the mall and Tenmonkan every 30 minutes, and I'd just missed the one at 5:30 PM. So I walked back to the station, and took the tram back. I returned to Tenmonkan before the next bus did. The tram is 170 yen one way, while the bus is closer to 400 yen. It's 20 minutes to do the walk for the tram, but much cheaper overall.

I probably won't go back for a few years, now that I have this out of my system.

Tuesday, June 25, 2019

Waku Waku Kid's Market Fest


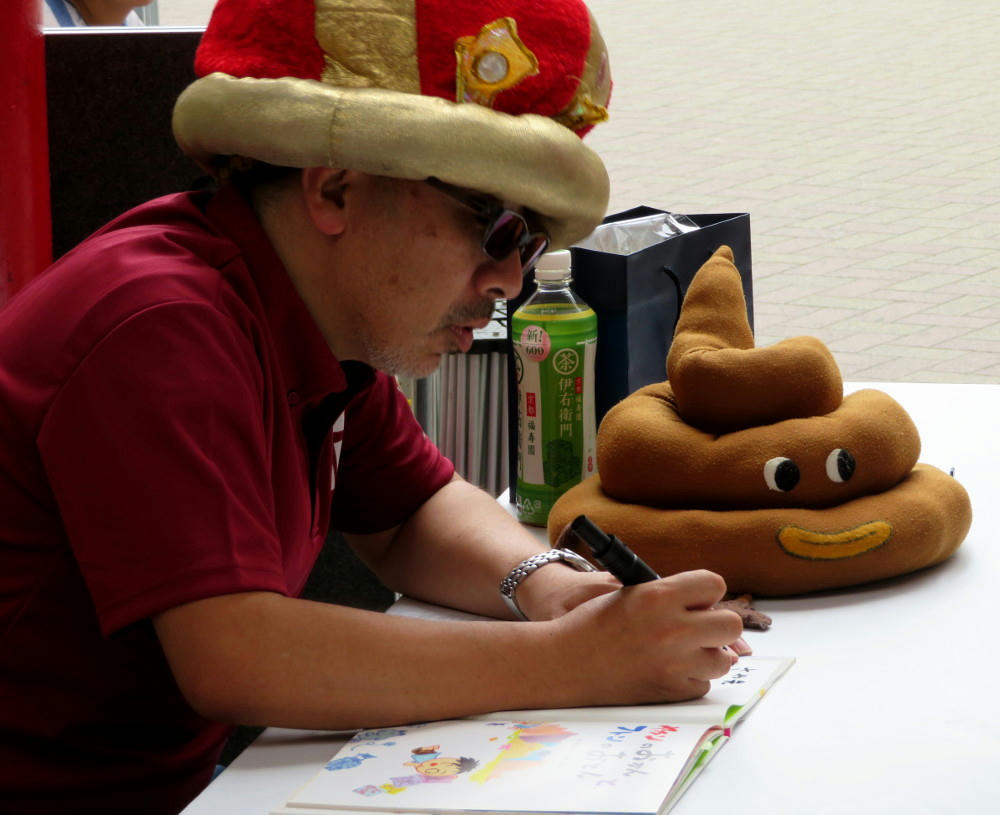
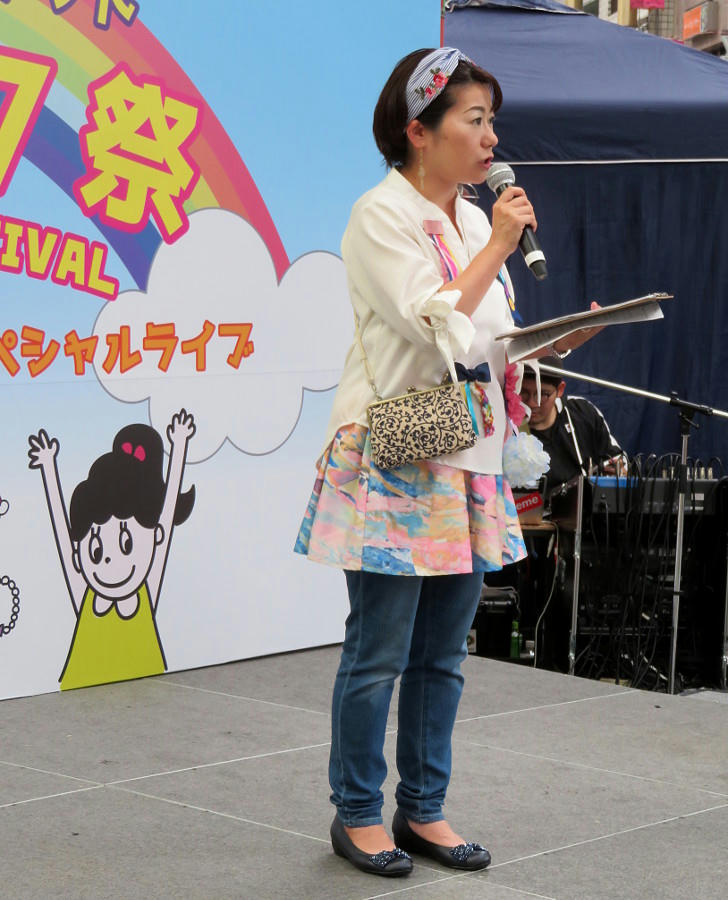
Last Saturday, as I was walking home through Tenmonkan from the school after my last lesson ended, I noticed some stage materials piled up at the corner of the intersection in front of 7-11. There hadn't been anything there when I went by earlier in the day, so I assumed there was going to be some kind of an event on Sunday. The next day, I came back, and found the stage fully set up for the Tenmonkan Kids Market Waku Waku (excitement) Festival. There were a few jewelry and crafts tables also in the area, but those were completely unrelated to the fest. I think it was just the stage show, and a signing by a children's book illustrator. The stage events alternated between some kind of promotional stuff, and music by groups that either do children's entertainment, or religious songs. I suspect that this was sponsored by some church group trying to recruit more members.


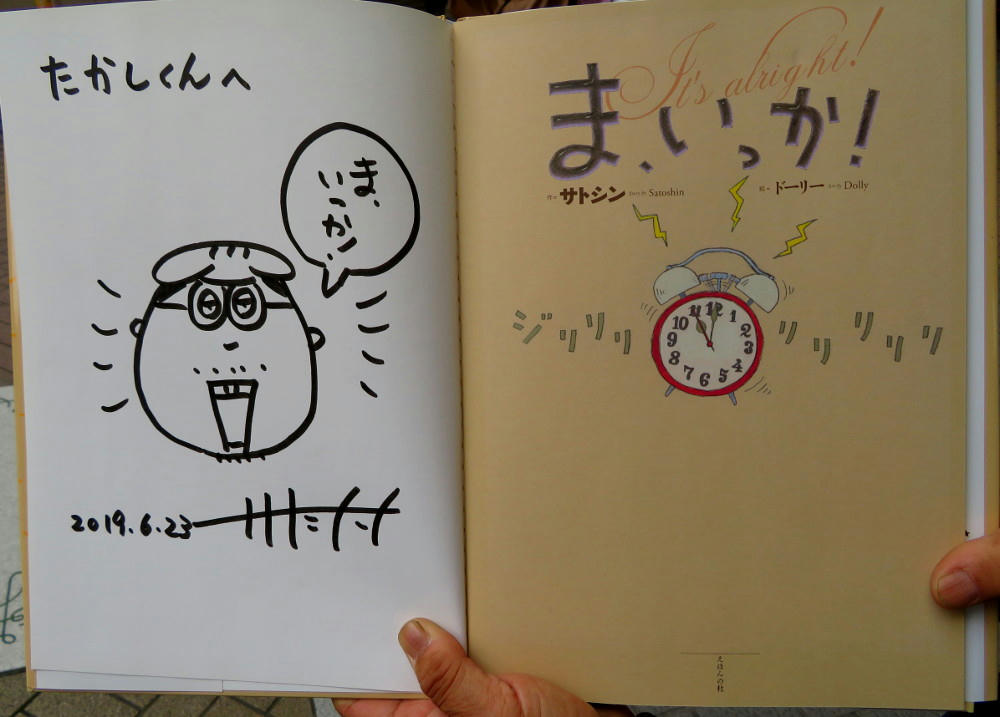
The artist was Satoshin, author of "Ma, Ikka" (It's Alright) and "Unko" (Turd). The plush Unko thing next to Satoshin is actually a hat. There was a short line of mothers and grandmothers waiting to have their copies of the books signed by the artist, and to pose with him for photos in the unko hat.


As I was standing around watching all this, waiting for the next stage act to start so I could find out what the event was for, an old man with no front teeth told me that Satoshi is one of the most famous children's books writers from Kagoshima. He also showed me his personalized copy of "Ma, Ikka", and told me the title is in Kagoshima dialect.


Finally, the MC got on stage and started talking about the music acts scheduled for later in the day. That seemed to be the only thing she was going to do, so I left to see if anything was happening at Amu Plaza. Unfortunately, there wasn't. Instead, I sat in Seattle's Best Coffee and read archived newsletters from the American Cryptogram Association. It was a good day. Next time, I may try on the hat.

Monday, June 24, 2019

Kirin Shin-Ichiban Sabori


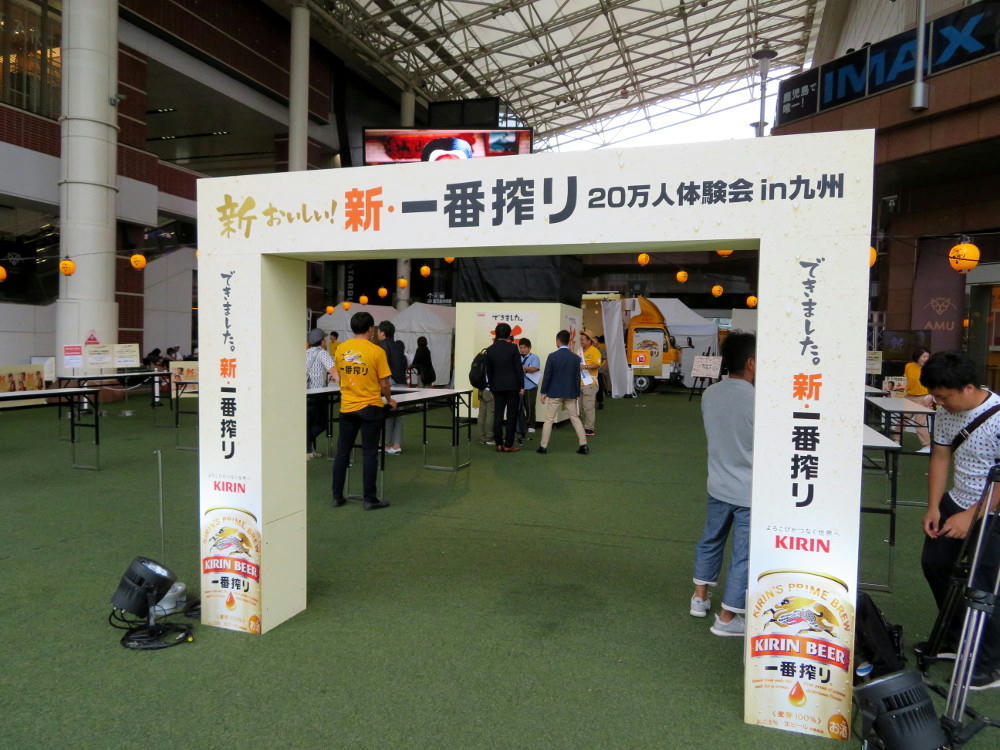
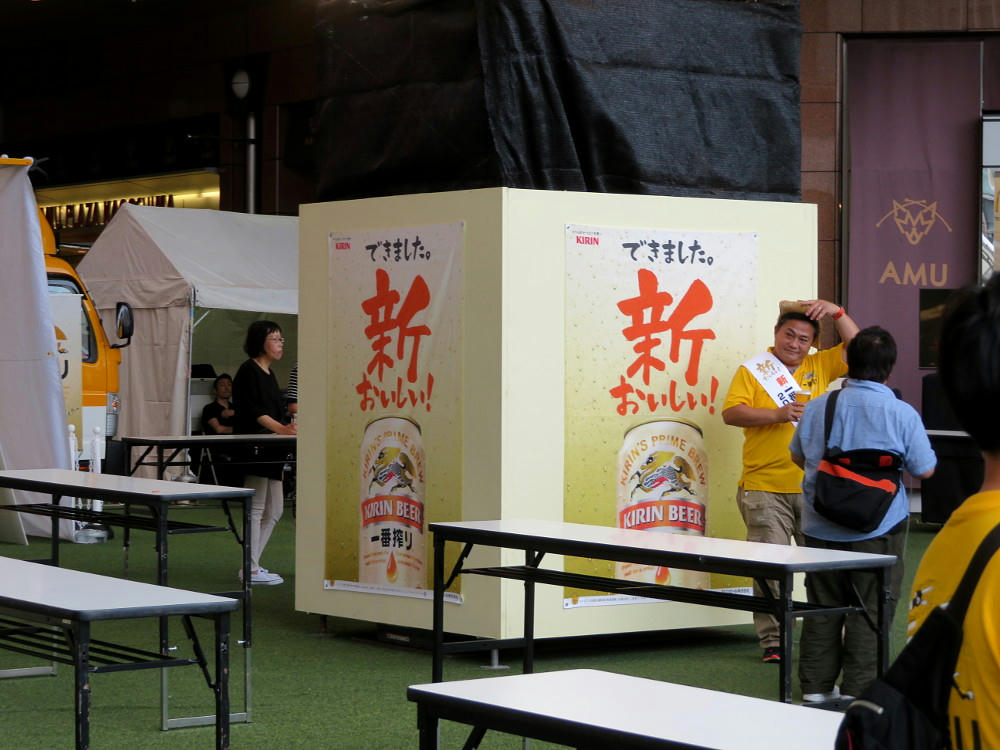
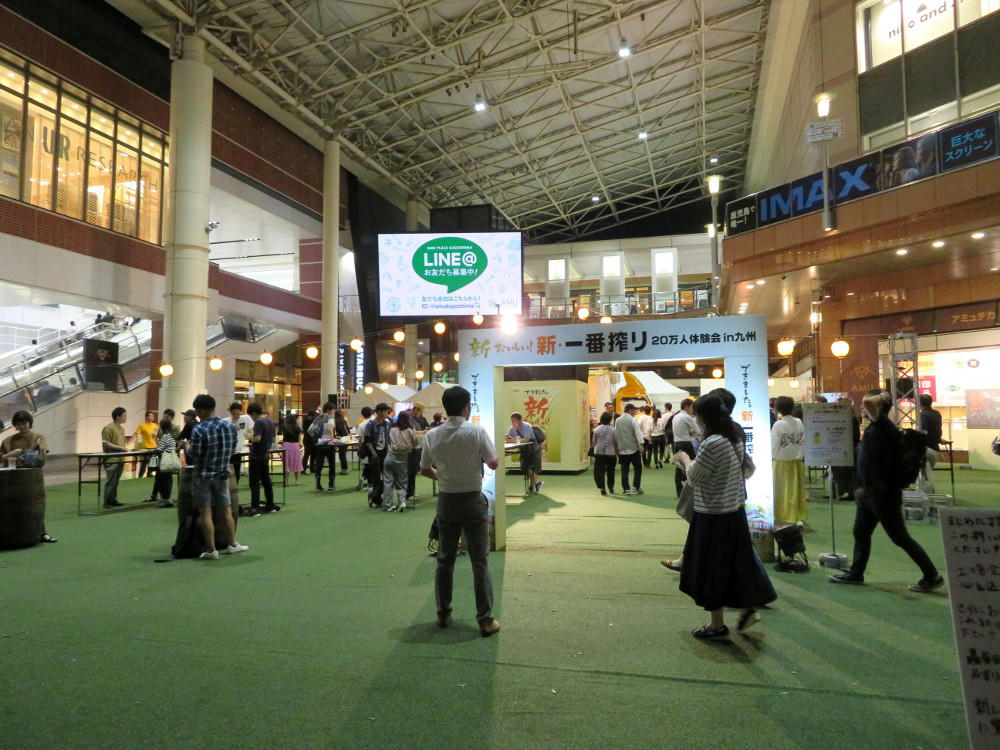
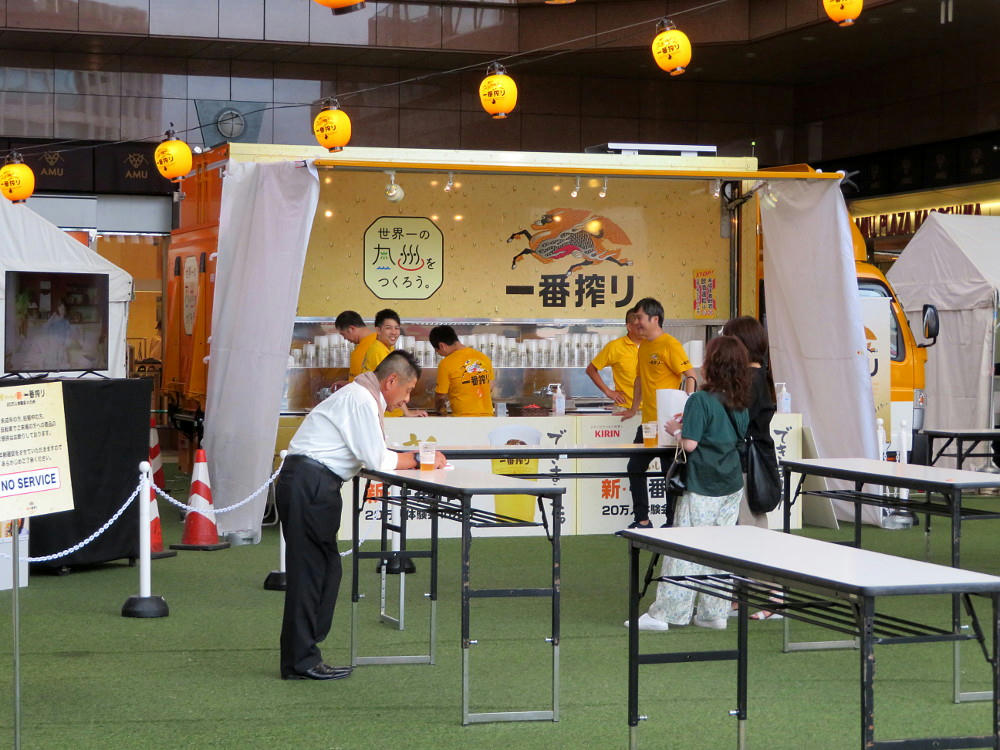
On Saturday, the 15th, Amu Plaza hosted a one-day beer event by Kirin. Kirin has this brand they call "ichiban sabori". There doesn't seem to be a good translation, except maybe for "number 1 hoppy/refreshing". To promote "shin-" (new) Sabori, they had their "200,000 people in Kyushu" tour.


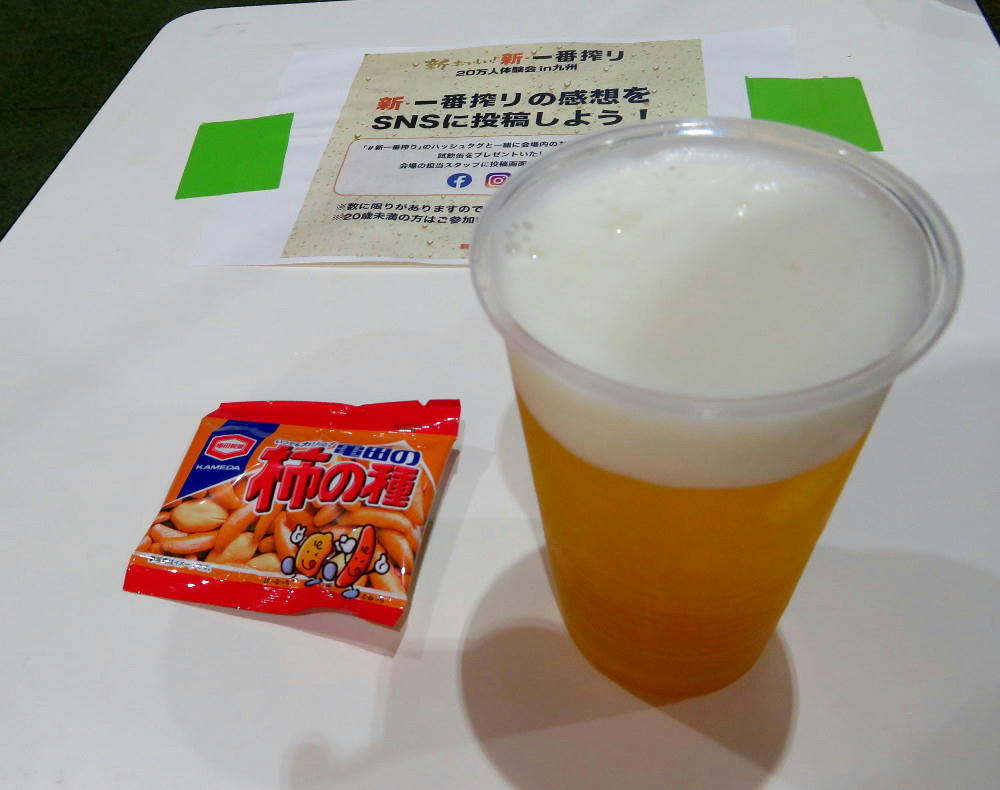
The idea was that from 11 AM to 9 PM, you could buy a plastic cup of beer (maybe about 12 ounces) for 300 yen ($2.75 USD) (beer is more heavily taxed in Japan than other forms of alcohol, and is fairly expensive by can in supermarkets, so 300 yen for a cup of draft beer is in keeping with other pricing) and a small bag of snack rice crackers and peanuts.


Then, if you uploaded photos, or comments to Line (kind of like the Japanese version of Twitter), the guy in the yellow shirt in the above photo would give you two half-cans of beer for free. I don't have a smartphone, so I wasn't eligible for this part of the campaign.


I had to work on Saturday, so I swung by Amu Plaza while I was doing my milk shopping for the week just to take a few photos for the blog, before going to the school. My last lesson ended around 7:45 PM, so I walked the mile to Amu Plaza, and arrived about 8:15. There were maybe 30 people at that point. I got a beer, and the snack rice crackers, and finished them off before going home for dinner.


It's ok beer, kind of silky and tastes a bit like grapefruit. Nothing all that special, but definitely better than most of the big U.S. brand stuff. While I was standing around, one guy and his friend posted to Line, and got two small half-cans each. The announcer claimed this was a 500 yen value, but that's awfully over-priced. I have no idea why Kirin didn't make this a 2-day thing. That would have made more sense...

Sunday, June 23, 2019

Stationery Show, June 15


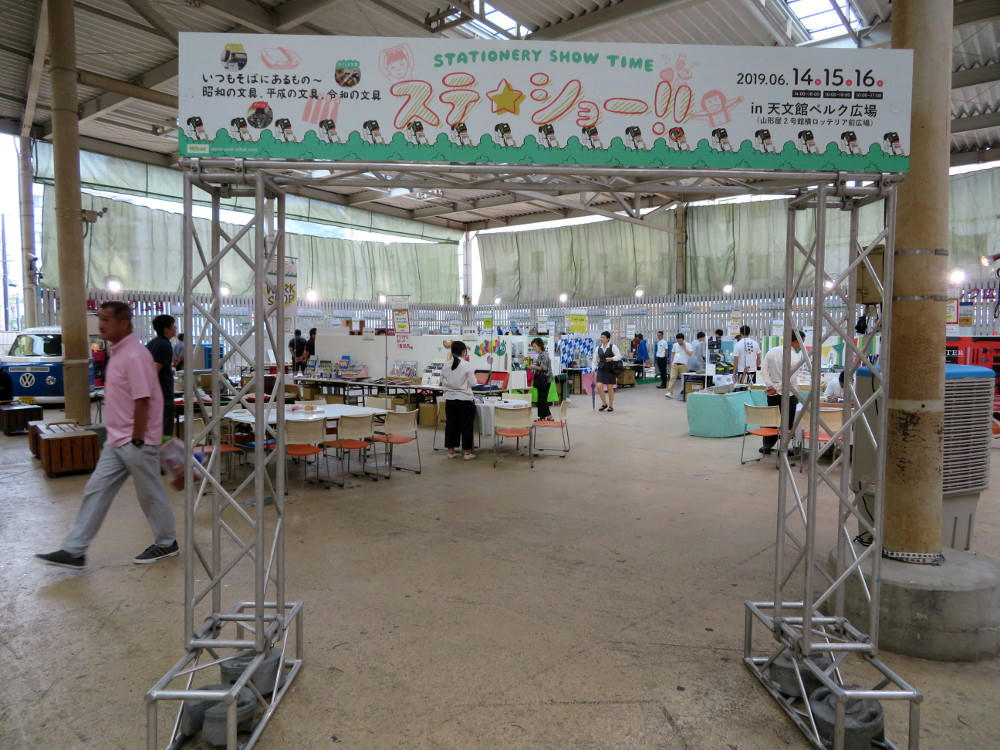
I've been playing Bravely Second on my Nintendo 3DS for the last couple weeks, so I haven't been taking the time to type up the blog entries lately. However, I've gotten pretty much close to the end of the game (which won't actually happen for 3 weeks, it's a long story), and it's now time to return to the blog. Back on the weekend of the 15th, the open space in front of Lotteria and Yamakataya hosted what they called a stationery show.


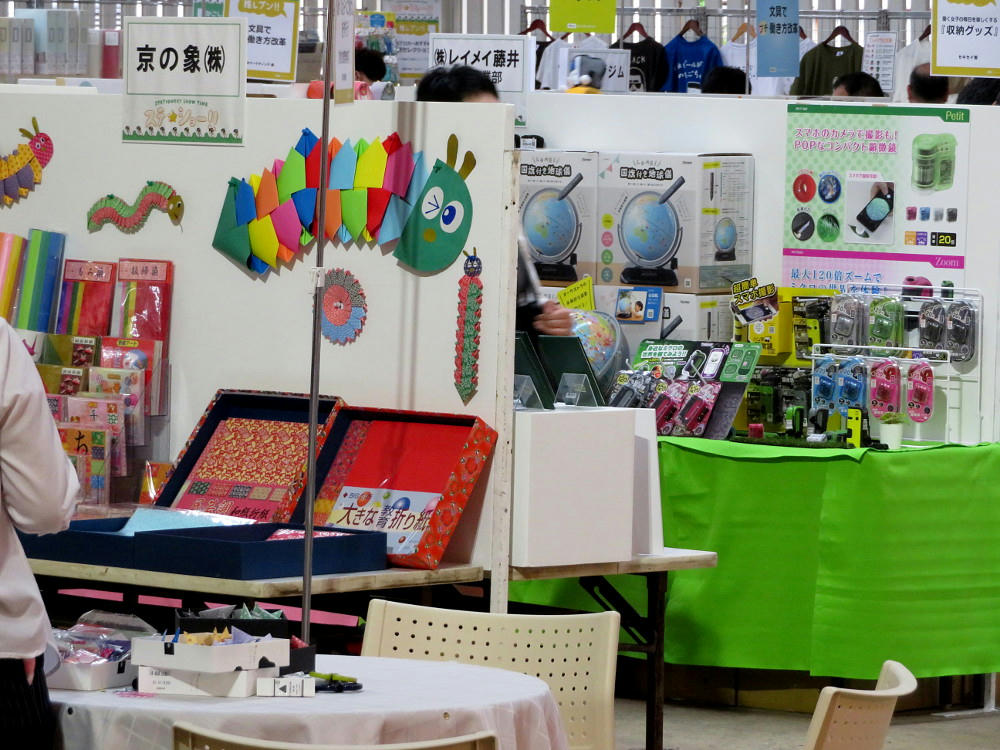
While some of the tables were selling colored papers and various markers and highlighters, others sold electronic globes (touch a stylus to a flag on the globe and it will speak out the name of the country for you), high-end pens, backpacks and t-shirts. There were a few hands-on tables, where you could pay 500 yen to make a hand-pounded leather nametag strap, or other crafts.


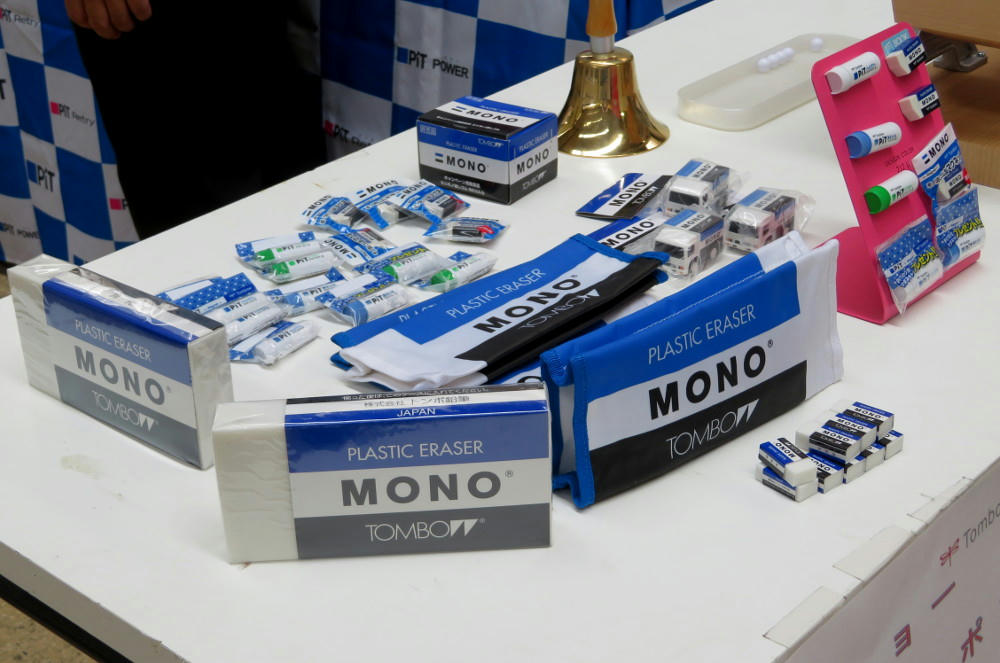
The best part was the display for Mono erasers. The small ones to the right are the regular sized pocket erasers. The big blocks I think are more display units that might be best-suited for carving stuff into, ala modeling clay.

Saturday, June 22, 2019

Y&M Staffless Kiosk


I found this thing in the Frespo Park shopping complex. It seems to be a housing consultation kiosk offered by Y&M (Yuu and Mi) construction company. The Japanese text at the top of the kiosk says "Staffless Box." You can now order a house (or apartment) without ever visiting an architect or an agent.

Friday, June 21, 2019

Standing Room


You know traffic on the streets is bad when people resort to taking the Kotsuki river to work.


The water is only 12 inches deep here. It's faster to get out and walk.

Thursday, June 20, 2019

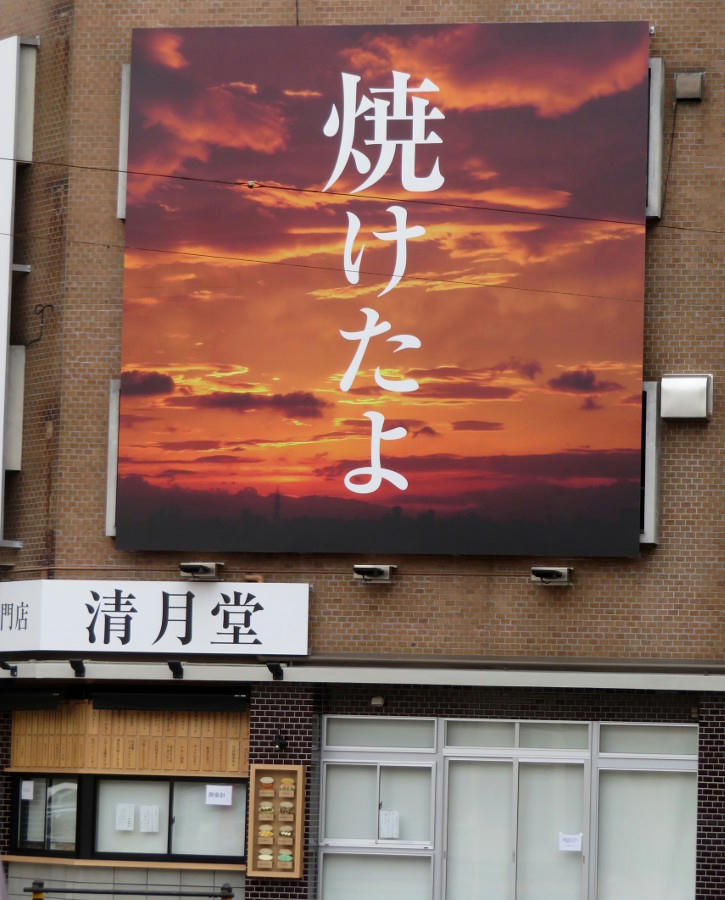
Fresh Baked


Sign over the entrance to a bakery near my apartment. It reads "Yaketa yo" (Just baked).
I wonder if it's partly a visual pun, since "sunset" is occasionally called "yuu yake" ("burning evening sun").


Wednesday, June 19, 2019

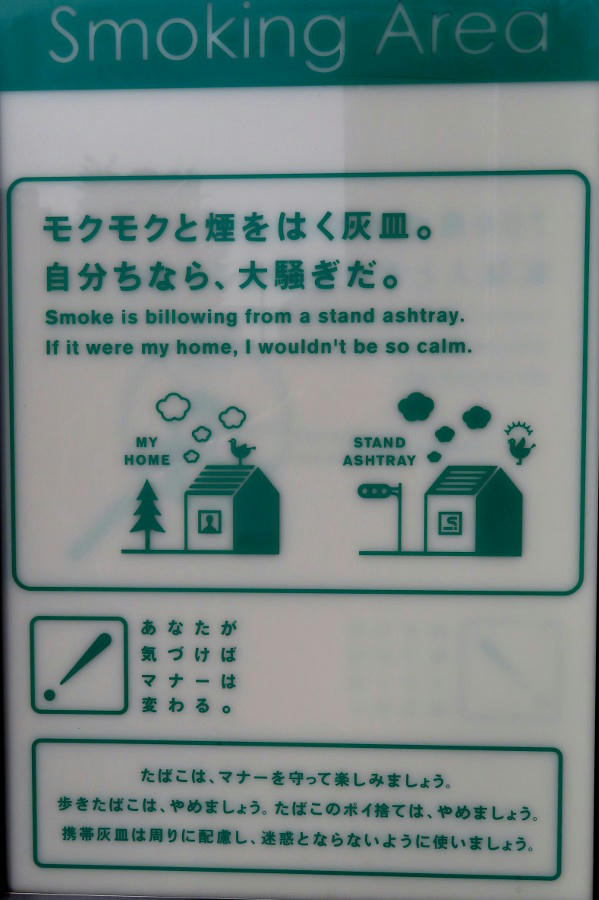
Smoke is Billowing


Sign over an outdoor ashtray.
"Smoke is billowing from a stand ashtray.
 If it were my home, I wouldn't be so calm."

Translation: "Put out your butts."

Tuesday, June 18, 2019

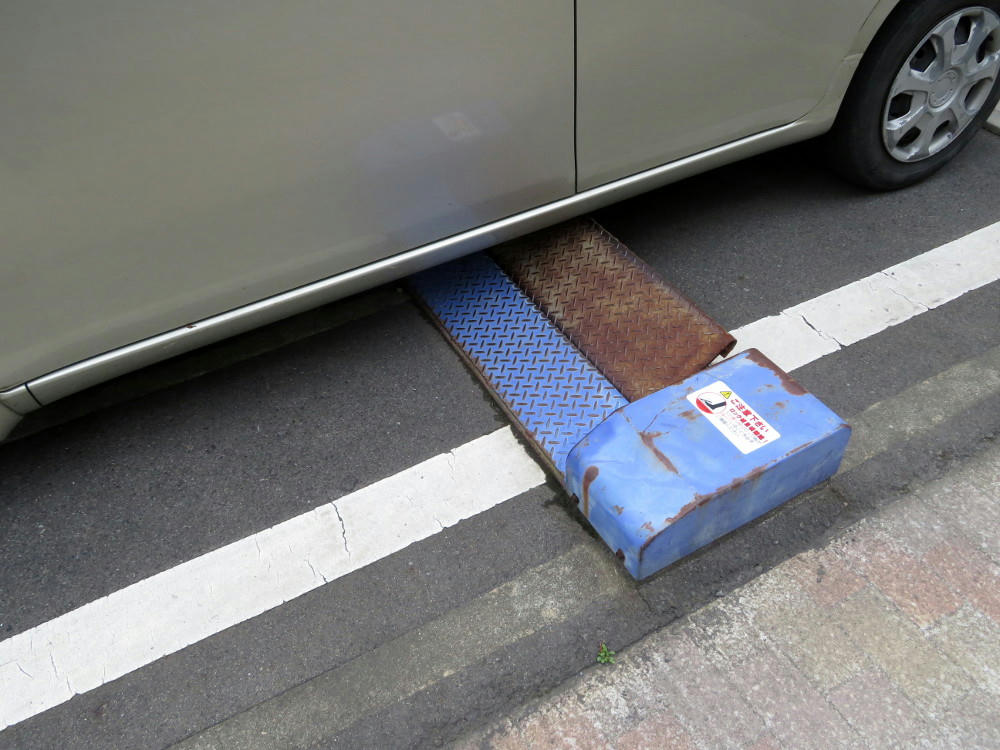
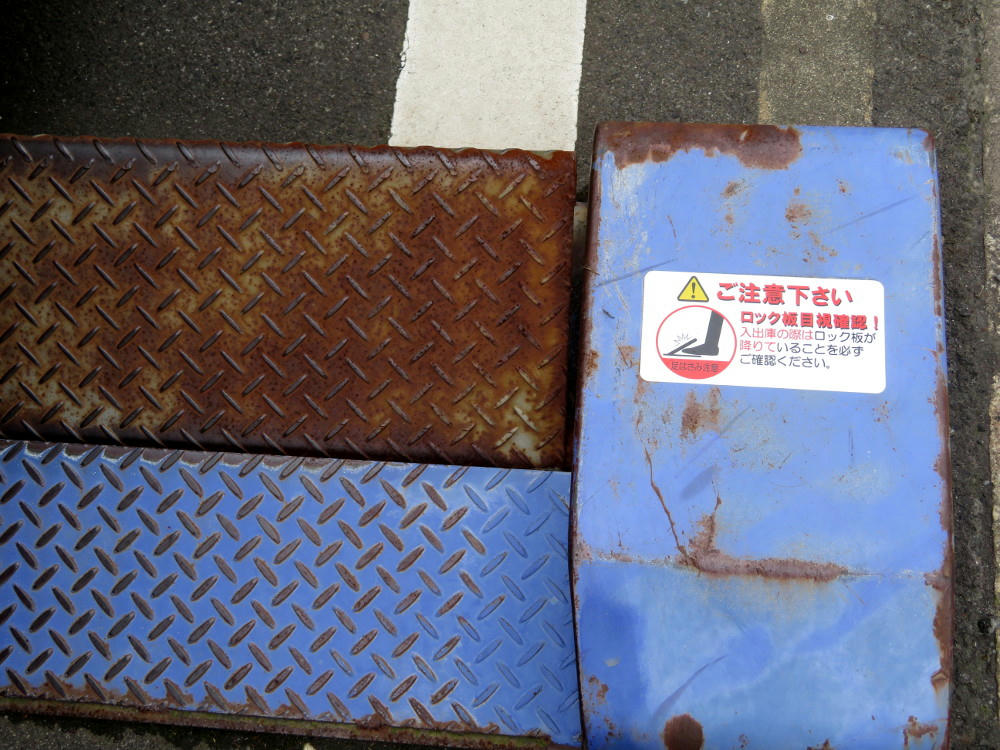
Crushing Hazard


I wonder how many people look down when they get in and out of their cars?


I then wonder how many people put their foot under the lock bar before the lawyers said "We need a sticker on these things."

Monday, June 17, 2019

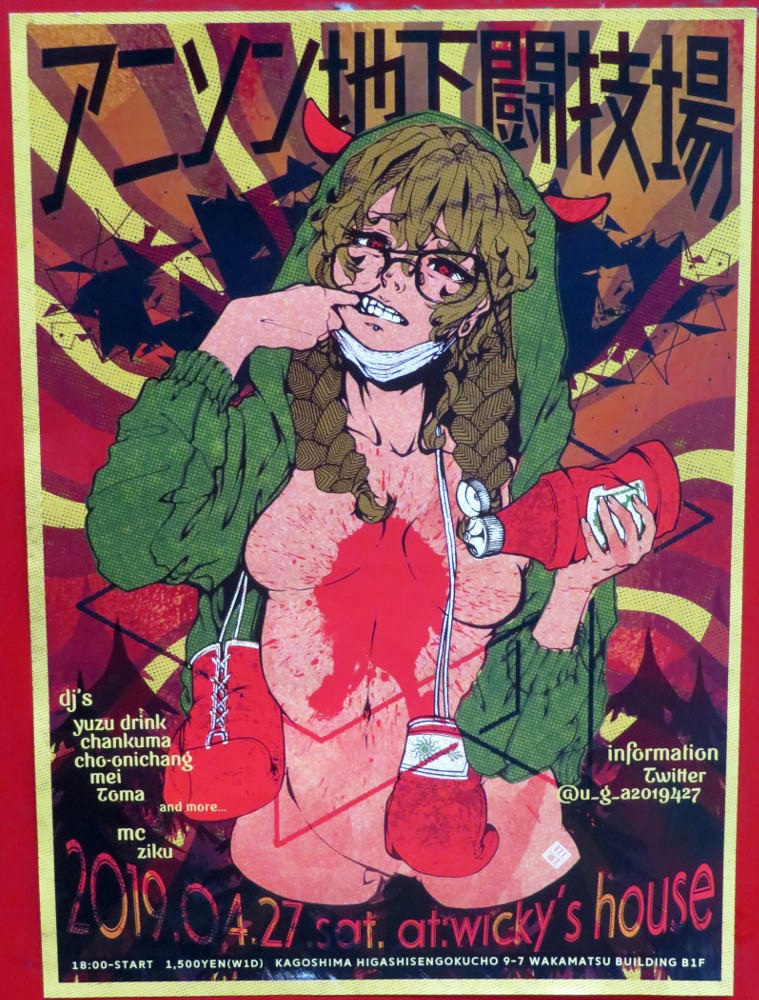
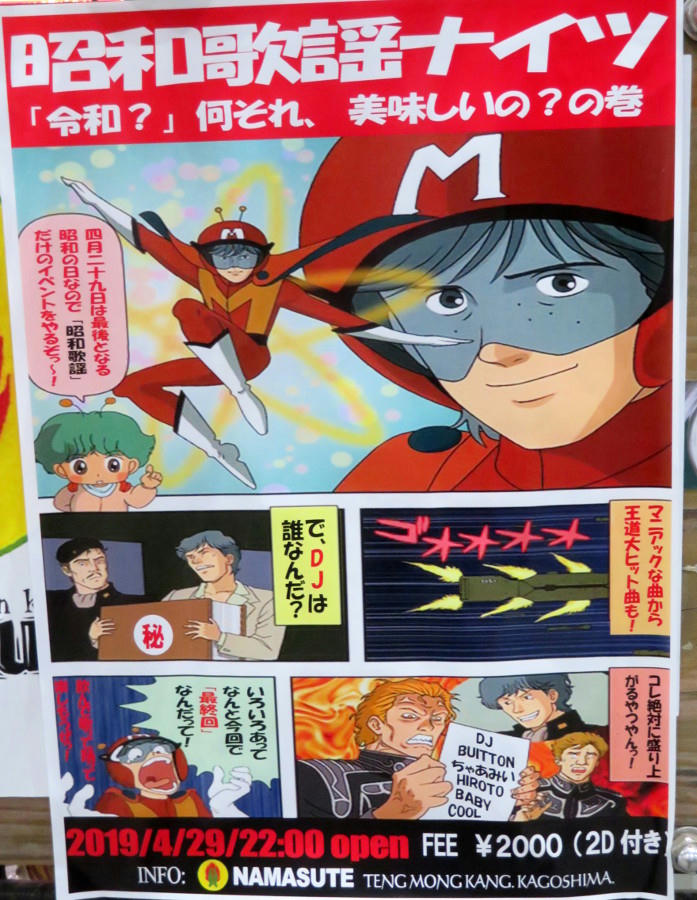
More anime-inspired posters for Music Nights


Wicky's House anisong night, now with more ketchup.


The Reggae bar next door, Namasute, has their Music Man artwork again.

Sunday, June 16, 2019

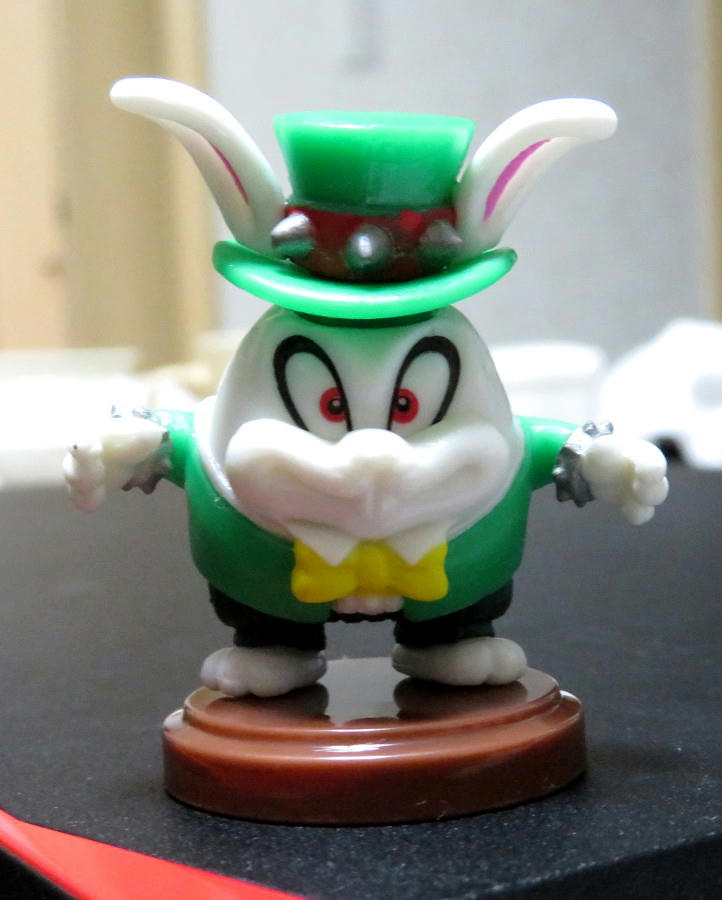
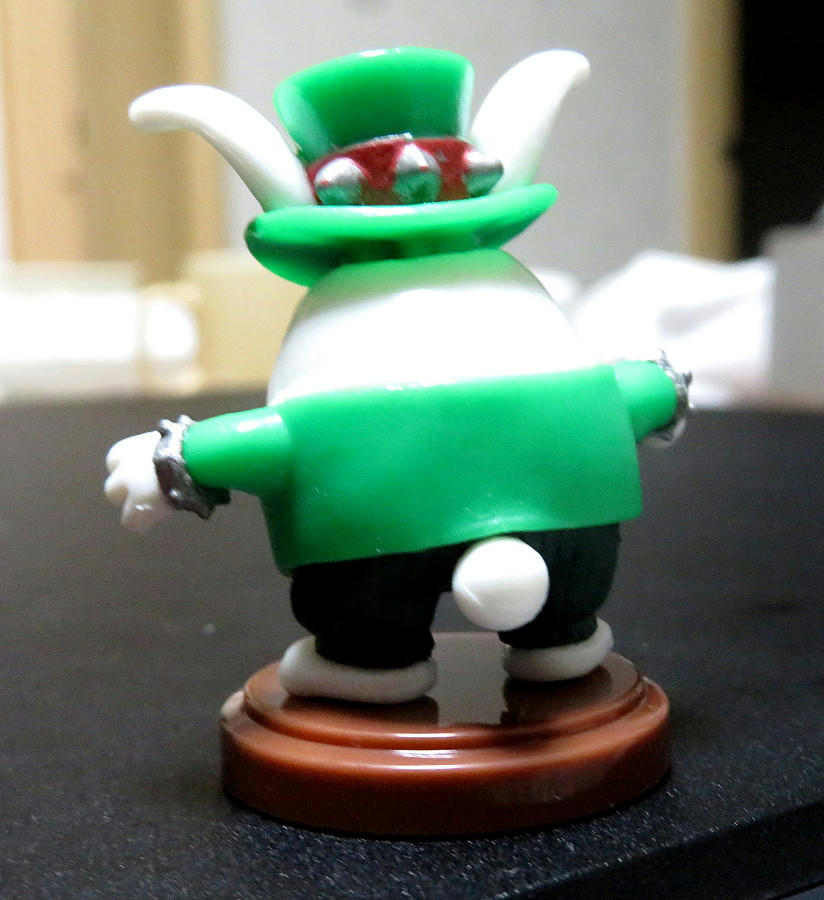
Mario Odyssey Rabbit Figure


I have to go to Donkey once or twice a week for toilet paper and tissues. I've kind of given up on buying the chocolate eggs that have the Mario figures in them, largely because they're 180 yen ($1.65 USD) each, and I kept getting the same two minor characters over and over. One day, though, I was bored and hungry, so I bought an egg. I got the rabbit, Topper, this time.


That leaves 5 other figures I don't have yet. Maybe if I get bored again.

Saturday, June 15, 2019

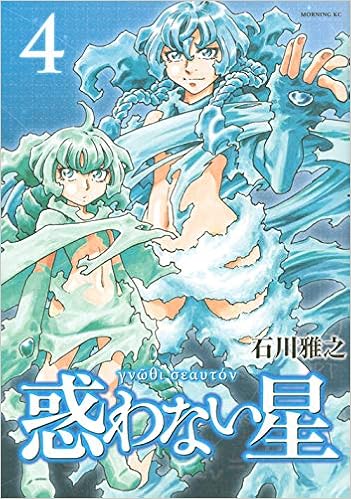
Madowanai Hoshi, vol. 4 review


(All rights belong to their owners. Image from Amazon used here for review purposes only.)

Madowanai Hoshi, vol. 4, Masayuki Ishikawa. Grade: A
Been a long time since volume 3 came out. In it, the Sun got showcased as a live-in video gamer that dominated the online gaming universe. When he finally got talked into returning back to his place in the center of the solar system, the Japanese inner dome newscasters go overtime in reporting on the "loser offspring" of the Sunsun family corporation group, and the rest of society moves on with their lives. Meanwhile, a pair of similar "burning" women (see cover above) make their approach towards Earth, and we're also blessed with the appearance of dwarf planet Sedna

S-zawa is a bit miffed at how quickly the "Insiders" (people who live and work in the inner dome, largely animators for entertaining each other) have written off Sun, but he's not that surprised. Back at the observation dome, Oikawa is finally starting her "due diligence." Her job has been to put on a hazmat suit and go out into the raging crap storm that is Earth's atmosphere now and rummage for salvageable items. But, she's begun wondering what the limits of her suit are. No matter how much time she gives herself, or how much air she brings with her in her little autocart, there seems to be a barrier around "Japan" (the name of the Japanese dome) that she can't get past. In general, her suit and the autocart will start beeping and flashing a "turn around" warning on her heads-up visor display, and that's what she does. One day, though, she puts on a new generation (and highly embarrassing) suit and takes 2 day's worth of air with her. When she gets to the barrier, the autocart screams at her to turn around, and she orders it to shut up. She takes one more step, then collapses to the ground, unconscious. She's rescued by Sedna, and returned to the dome unharmed. Oikawa wakes up, but complains about feeling really dopey. She suspects that she'd been drugged by something in the airline.

As Oikawa then searches the observation dome's records for what she can learn about Earth's, and "Japan's" past, and the universe in general, S-gawa is subjected to a series of "science experiments" to "teach" him about gravity, potential versus kinetic energy, and other simple elements of physics (he bruises more than he learns) under the tutelage of Moon, and with the help of Neptune and Saturn. Turns out that Sun had given S-zawa a switch board that allows him to summon all the planets, and right now, S-zawa's favorites (because they're cute) are Saturn and Neptune. Along the way, Moon tries to teach the two Earthlings about the speed and dual nature of light, and the paradoxical nature of things that travel near but not over) light speed.

Eventually, Oikawa decides to push her luck, and asks Sedna to show her what's beyond the boundary, and she leaves an email behind for S-gawa, asking him to follow after her (destroying the email after reading it so Moon doesn't learn about what she's doing). When Oikawa and Sedna reach the boundary, all they see is raging air-polluted clouds. Sedna warns her to stay back, and starts to advance. She gets hit in the head by something, and says that apparently there are machines out there that are shooting at her. They can't tell if the machines are intended to protect the humans in the dome from some unknown danger, or if they're intended to keep the "insiders" "inside." S-zawa gets the email and tries to sneak out of the dome, but he forgets to delete the email, and Moon (in bunnygirl form) soon joins him. S-zawa has never been outside for very long before, and he's awed by the idea that Oikawa has been working in this hell nearly daily up until now. He and Moon track down his partner and the dwarf planet, where they've just started to talk to the two new women, who remind Oikawa strongly of Sun. The taller woman claims to have been given a lot of names by humans in the past, and is obsessed with learning what her correspondent (S-zawa sent a letter to her as well) will call her. Actually, Moon had been filling him in on the way, and he says that they're the stars Sirius A and B.

There's a problem, though, and that's what sticks in Oikawa's craw. Sirius Alpha is 8.6 light years from Earth, so it should have taken 17 years for S-zawa's letter to reach her, and for her to come to Earth. But, S-zawa sent out his letters only recently, and Moon had said that faster than light travel is impossible. Someone must be lying to them somewhere. Sirius replies that the ancient humans knew stuff that the current generation is going to have to rediscover on their own. Oikawa then asks "what's beyond the barrier?" Sirius Alpha (Beta can't or won't speak) says that she's prevented from answering that.

The two humans return to the dome, and S-zawa uses Sun's call panel to summon all of the planets to Earth, but most of them are annoyed to find that all Oikawa wants is to ask them the same question. They all say either that they're prevented from saying, or it's a secret. When S-zawa pushes them on this, asking "who" is preventing them, they answer "you guys did." Sirius A adds that the humans need someone with a strong resolve, either from in the dome, or nearby. The volume ends with a short history of probes sent to Mercury, including the joint JAXA-ESA BepiColombo mission which, at the time of the release of this volume, should be completing its final swing-by of Earth for a December 2025 arrival at Mercury.

Summary: This is not an easy read. Lots of harder kanji, and overviews of astrophysics and quantum mechanics. Still, there are a lot of jokes, and now we have a true mystery on our hands. The artwork is great, and I love the personifications of Sirius Alpha and Beta, and the solar system planets. My new favorite is Sedna, although I also still like the goth portrayal of Pluto. Madowanai Hoshi shows that learning can be fun! Highly recommended.

Friday, June 14, 2019

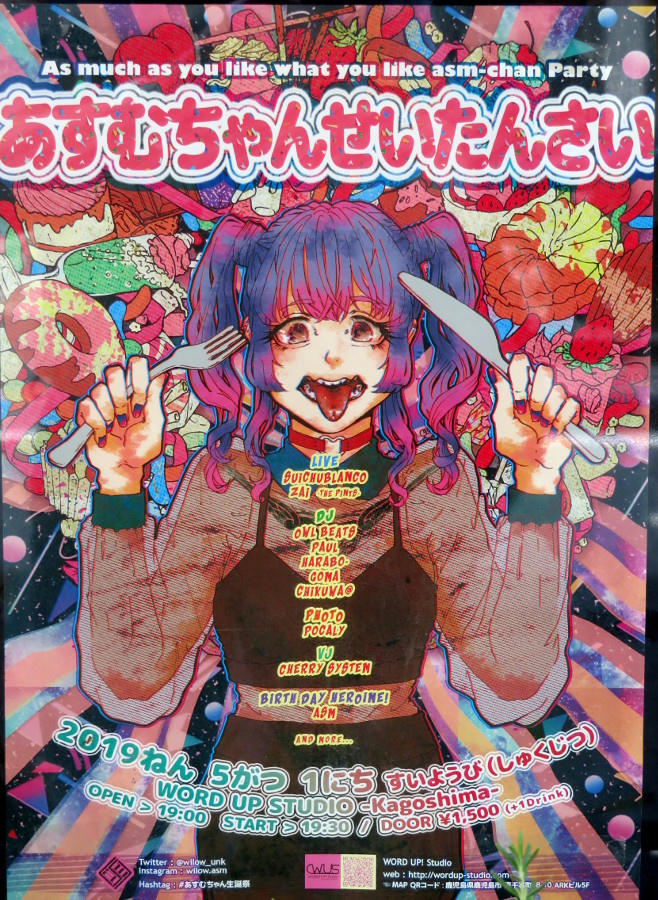
All you can eat beats


Poster outside a bar advertising a performer line up.
"Asumu-chan seitansai" (ASM-chan's Birthday Party).

Thursday, June 13, 2019

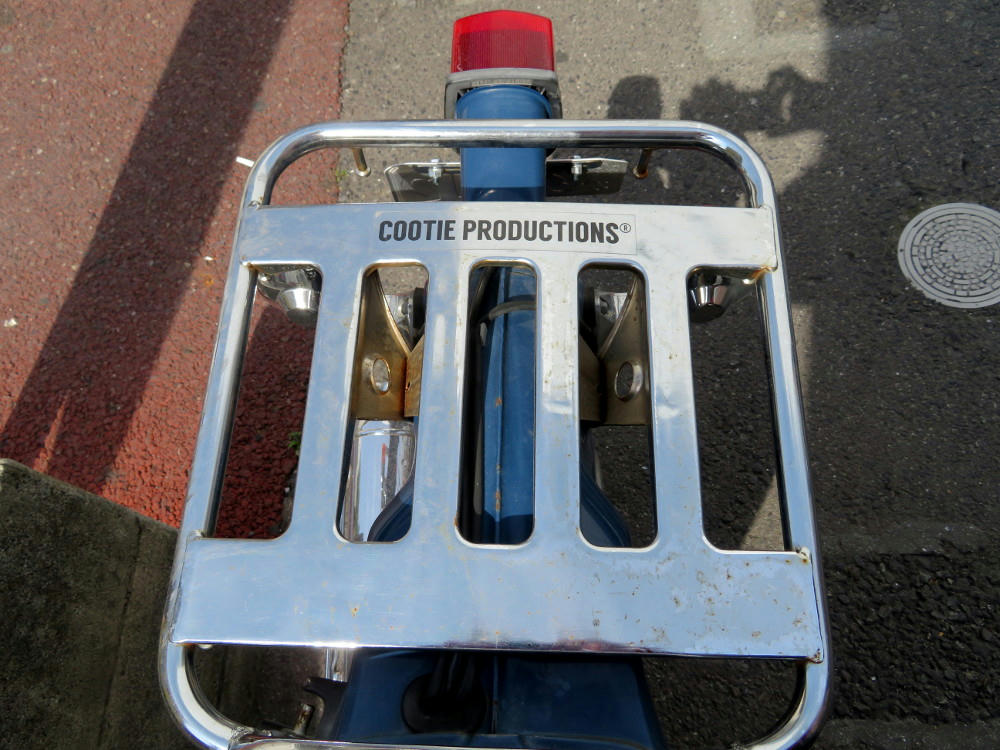
Cootie Productions


I found this sticker on the carrier of a scooter. Someone actually produces cooties. I wonder if anyone in Japan really understands what "cooties" are...
Wednesday, June 12, 2019

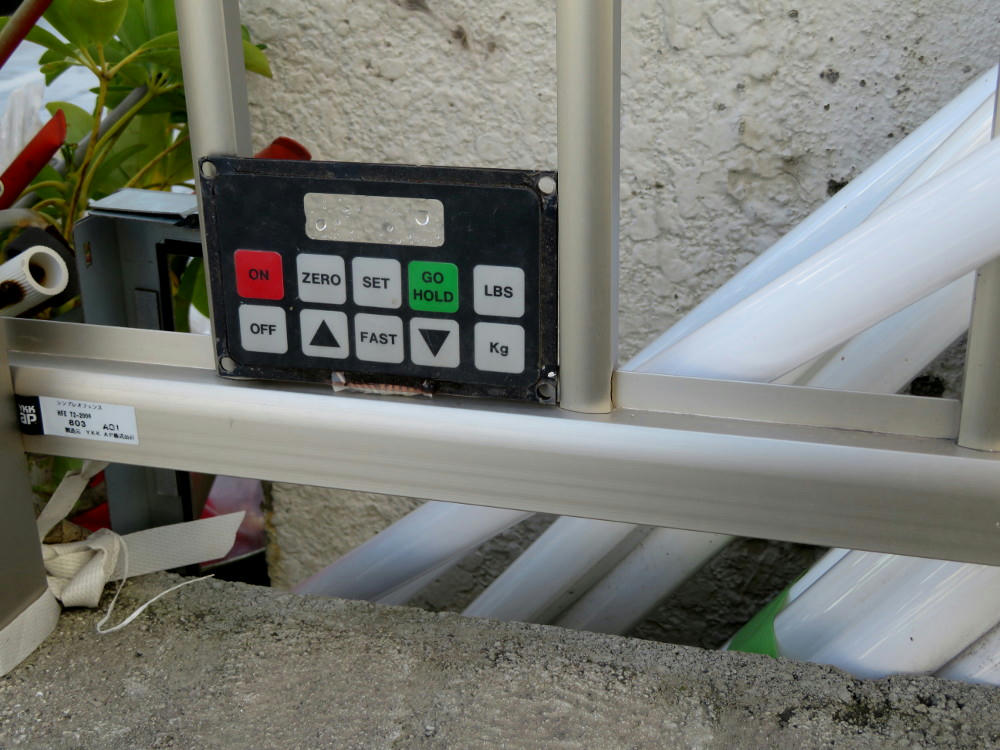
Light Controller


Japan is so technologically advanced, they have outdoor controllers for measuring light fixtures in pounds.

Tuesday, June 11, 2019

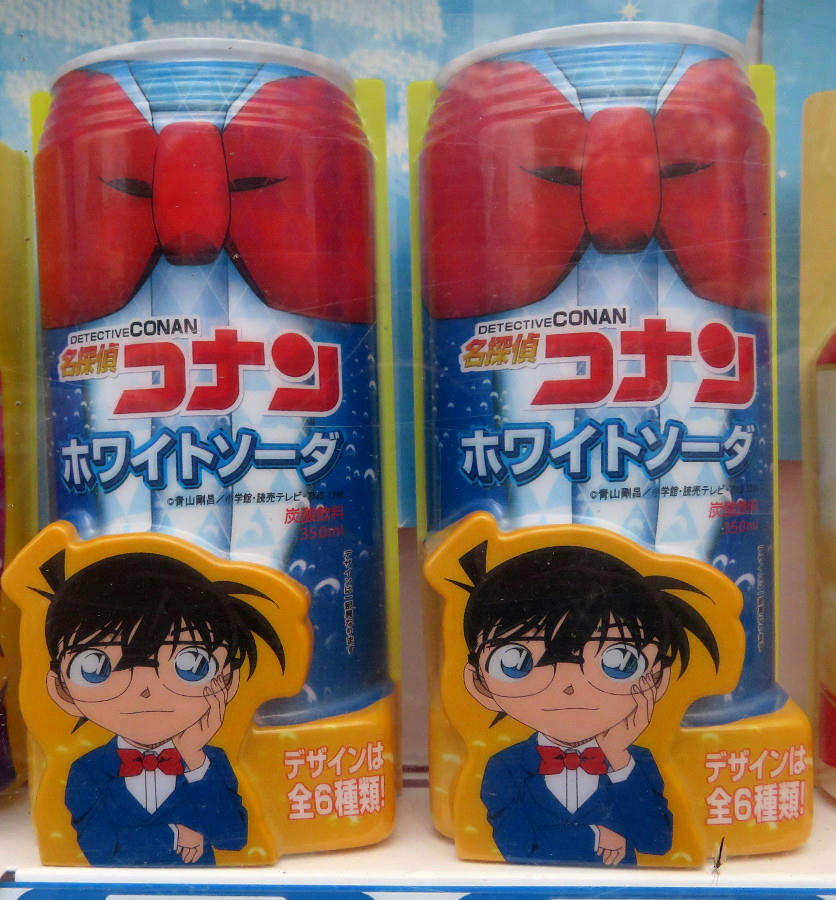
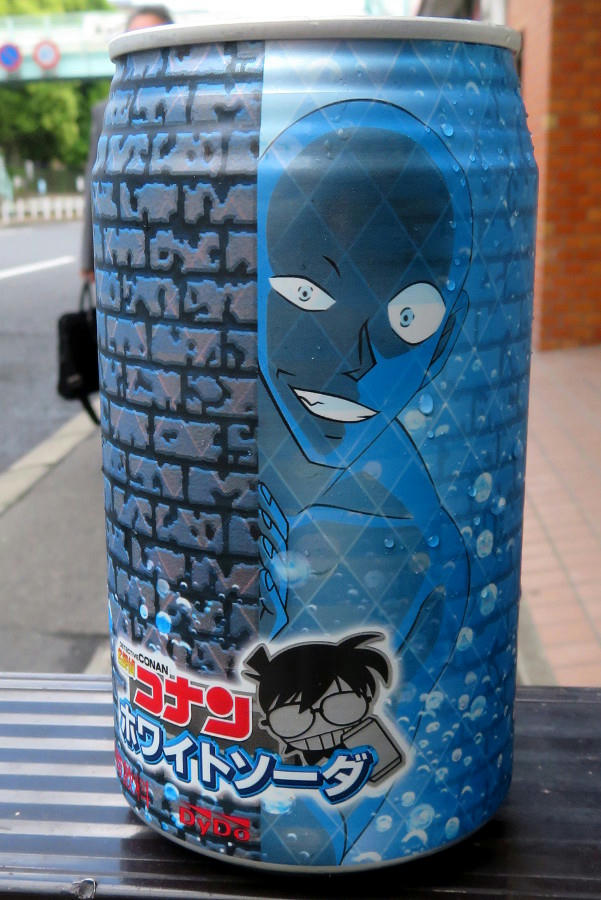
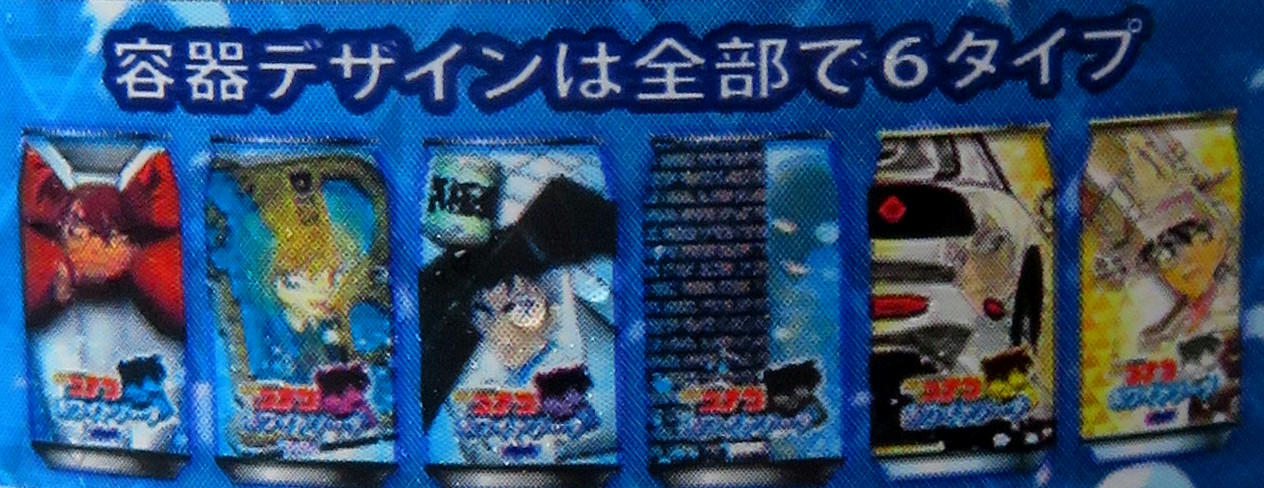
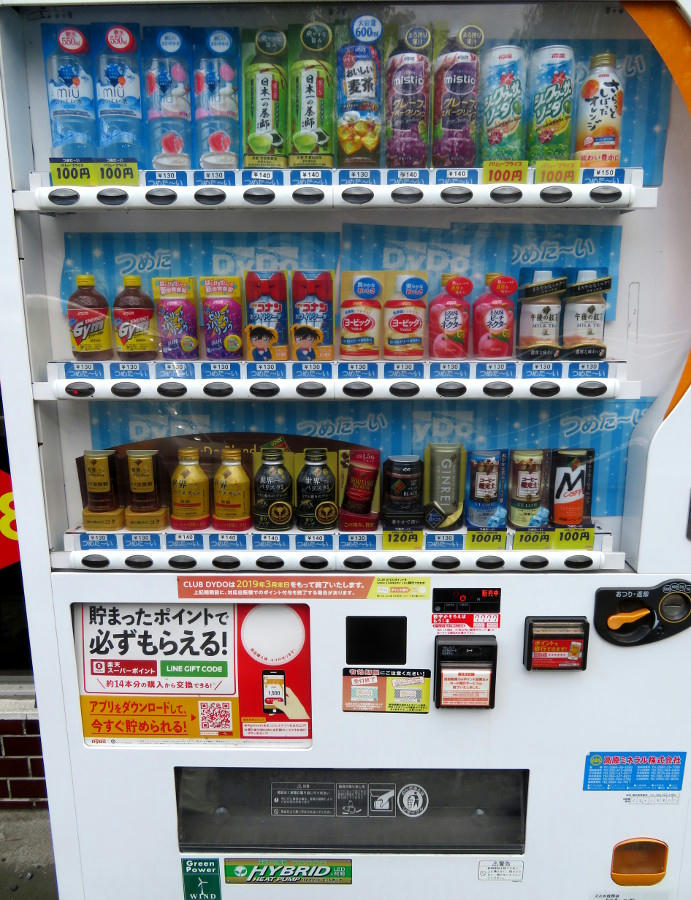
Conan White Soda


I was walking down the street outside of Tenmonkan one day, when I passed this vending machine.


It took a second for this image of Detective Conan soda to register. And a few more seconds to decide whether 130 yen ($1.15 USD) was worth the price for documenting this for the blog.


White soda is effectively a milk-derived carbonated, sweetened soda along the lines of Calpis. It's ok, but doesn't really taste like anything specific.


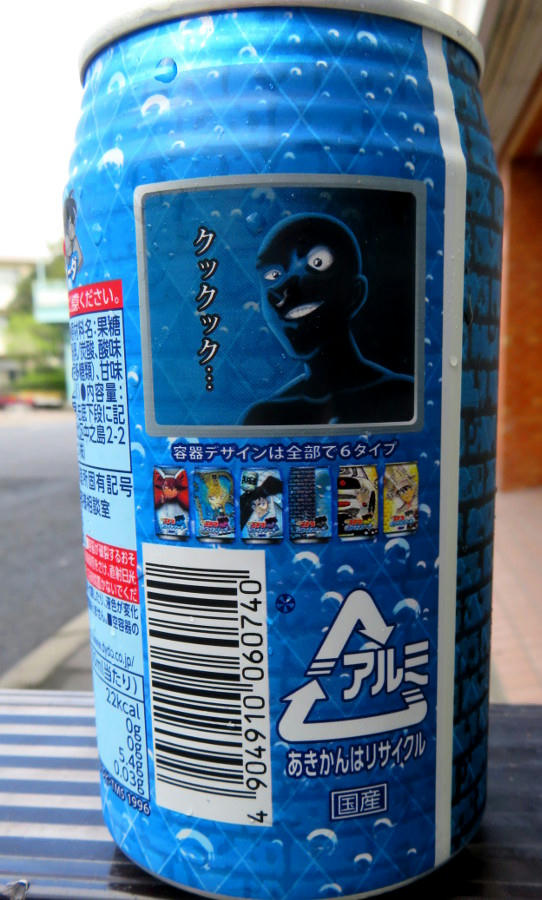
There are 6 can designs, and of course I ended up getting the most boring one. I'm not going to spend more money to try getting one of the other ones.


The little images of the other cans are almost impossible to make out on the can itself. Case closed.


Monday, June 10, 2019

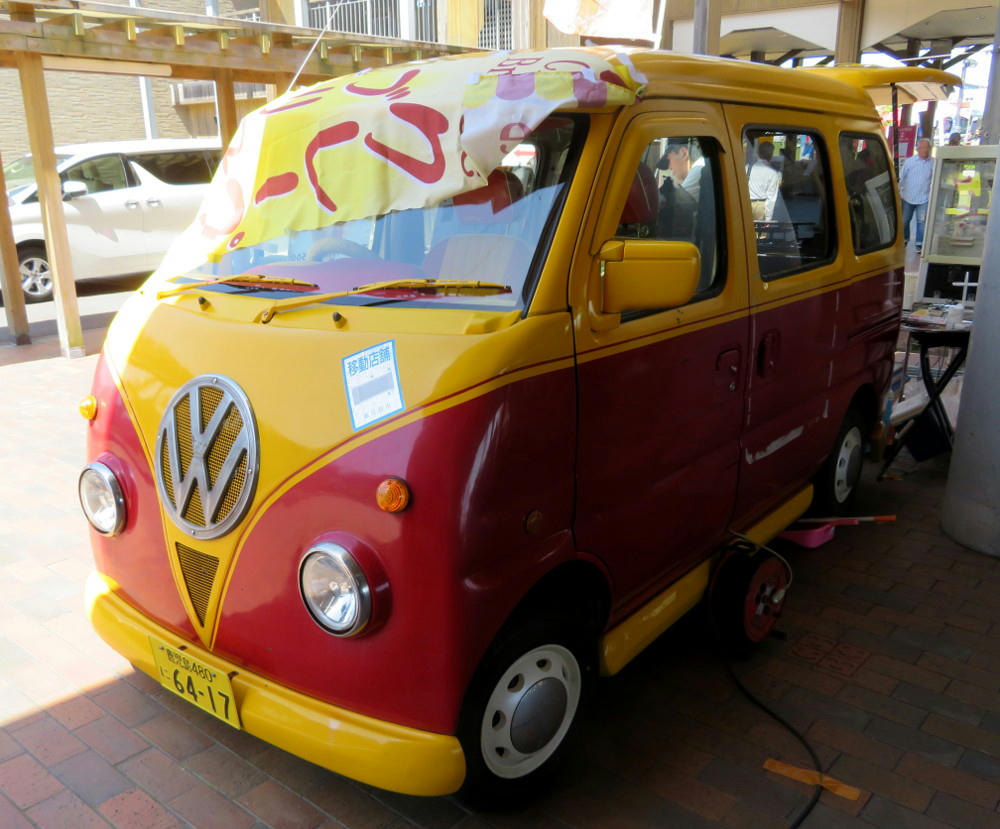
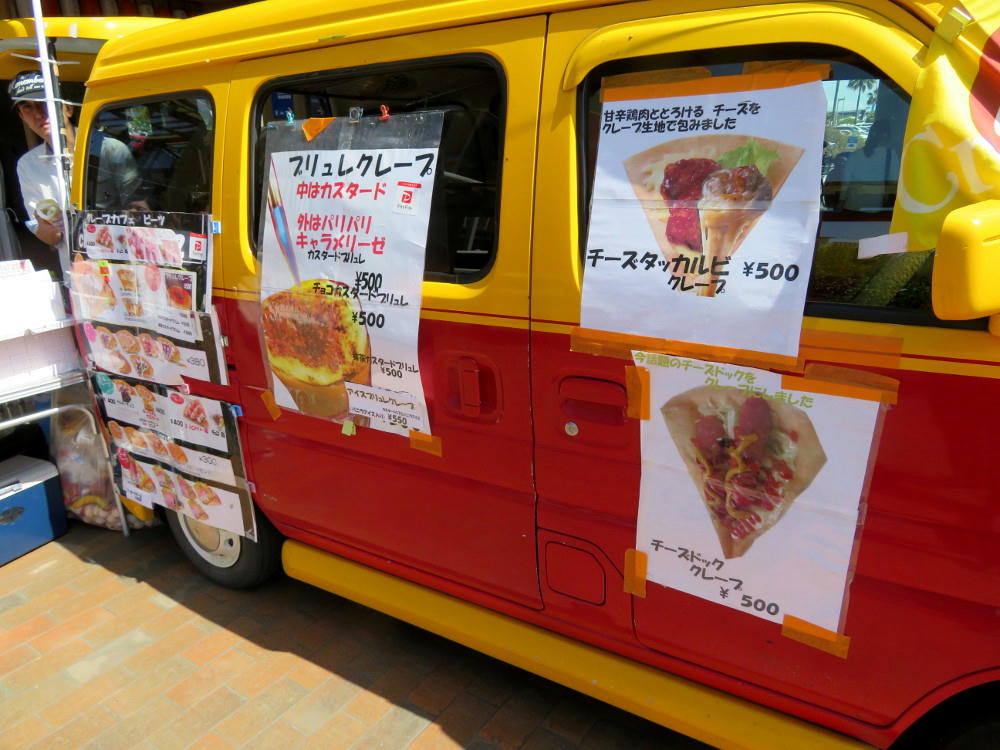
Crepe Mobile


"Excuse me, sir..."


"... but there seems to be a crepe in my bug."

Sunday, June 9, 2019

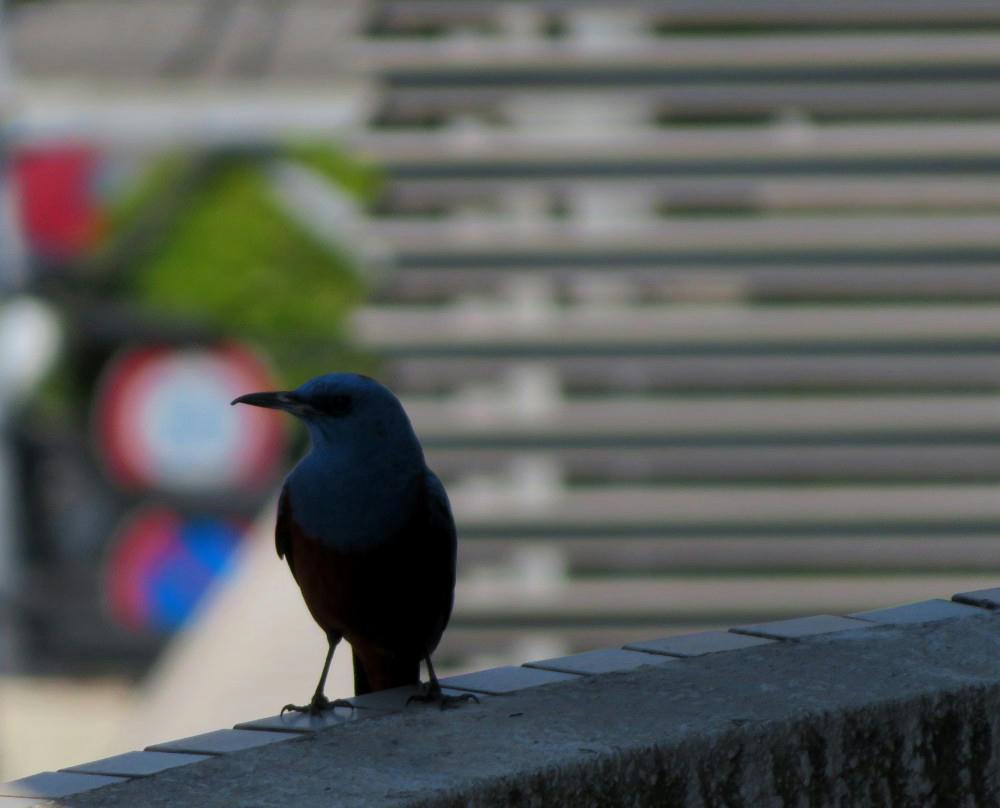
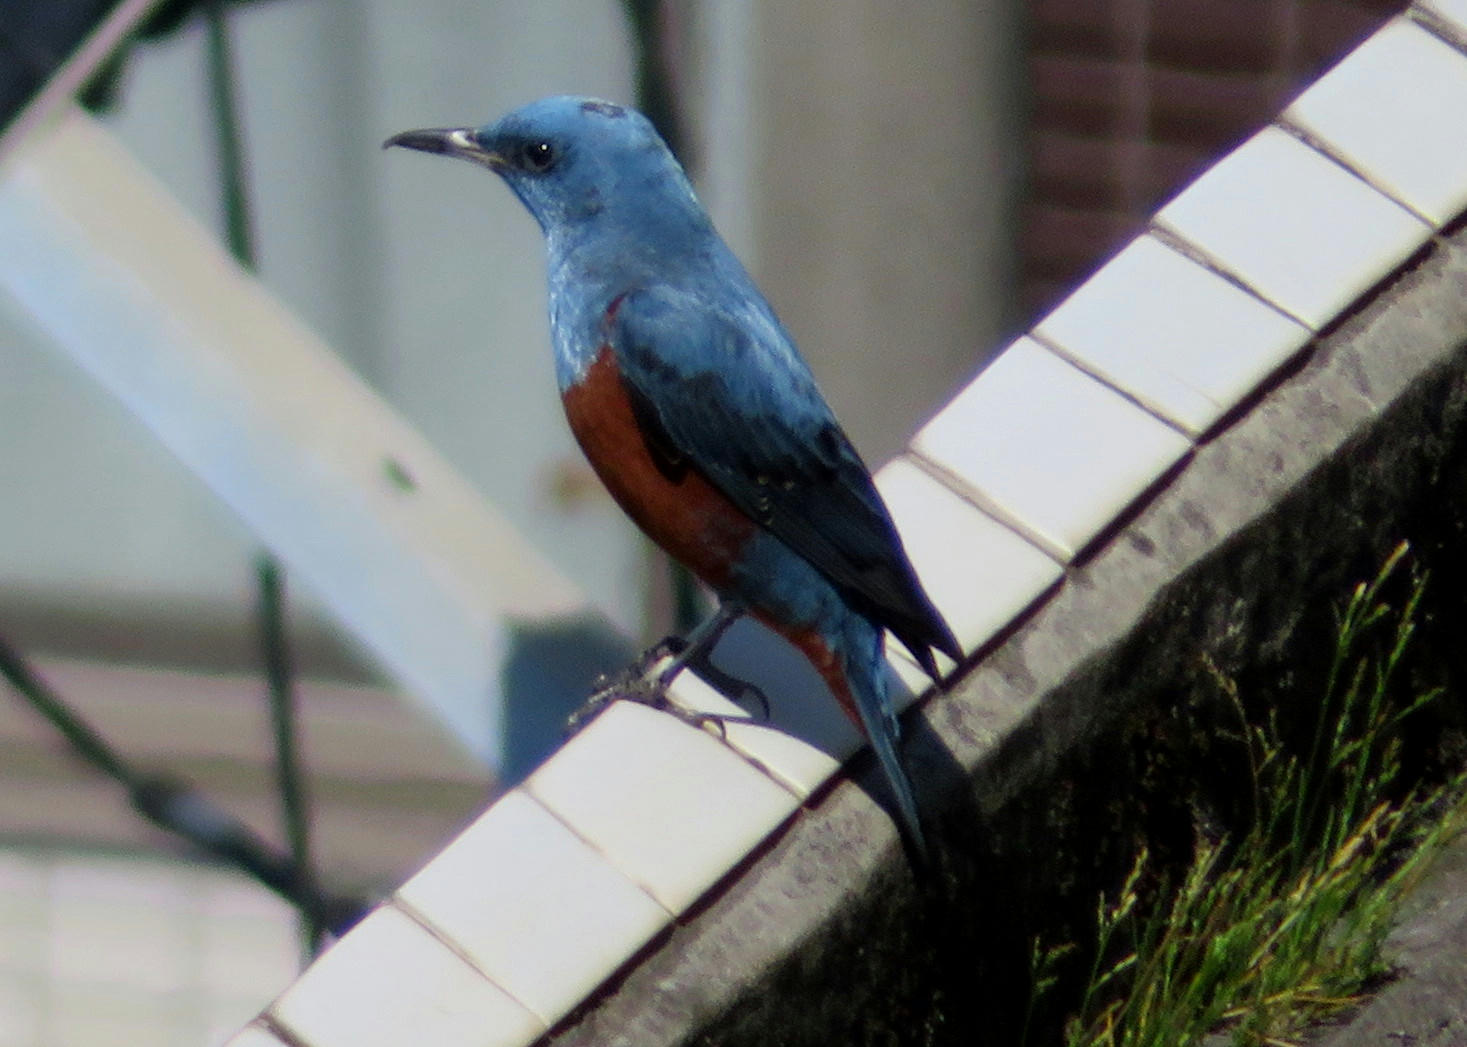
Stairwell Bird


One morning, I was leaving the apartment and there was this strange bird call. The bird making it landed on the stairwell railing of the apartment building opposite me, and in the shade I couldn't tell what the colors were. To me, it just looked like a dark blob. But, I had the camera with the zoom lens, so I took a few shots to see if I could get more detail that way.


Then it hopped in the air and dropped down to where I could see it better in the direct sunlight. The way it flew, it looked like it was chasing insects. Then it flew away. Bye-bye, blackbird that is more blue and brown.
Saturday, June 8, 2019

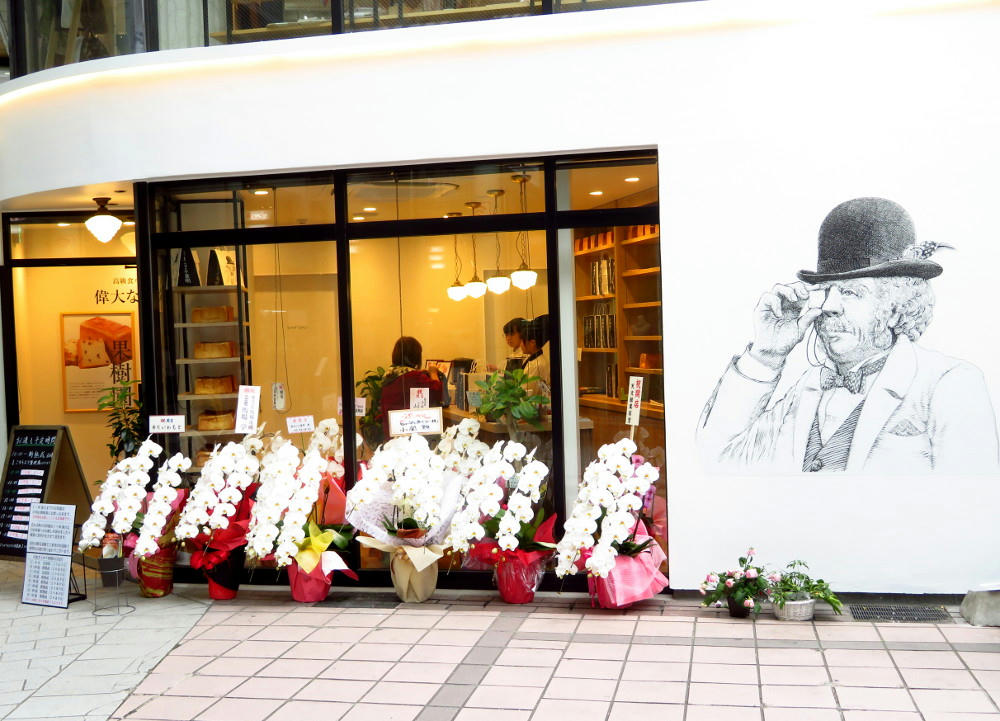
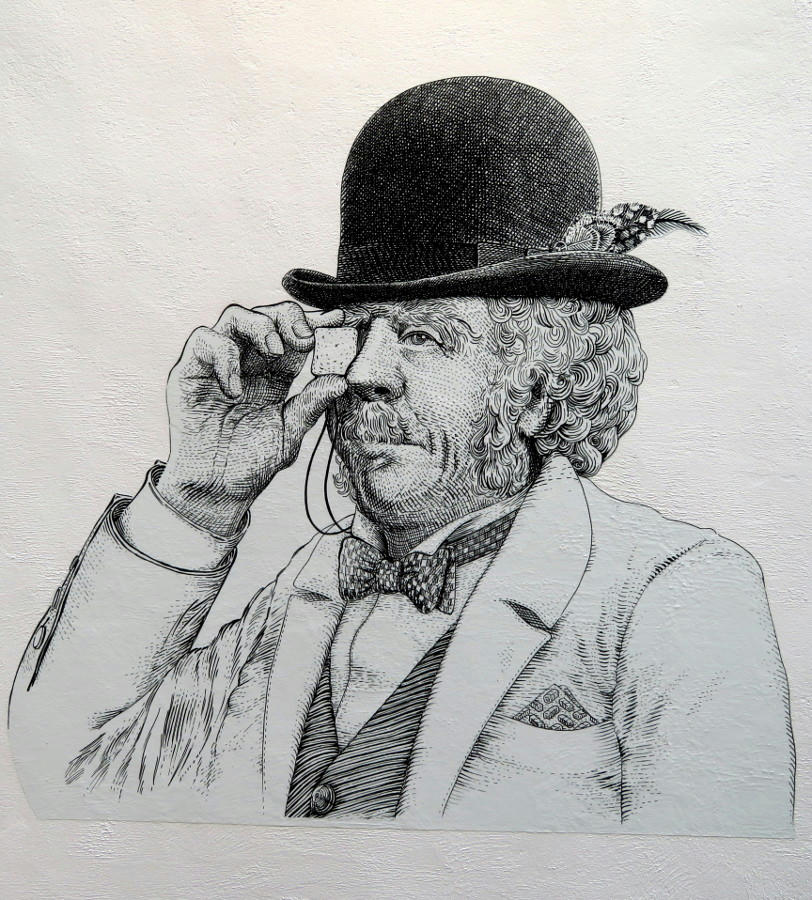
Crouton Monocle


A new bread shop opened in Tenmonkan. All they carry is large unsliced loaves of one kind of bread for about $8 each, but they seem to be really popular right now, with waiting lines during the week


I just really like the artwork.

Friday, June 7, 2019

Daylight Moon.


This is the best my little pocket camera can do with the moon in full daylight, at 3 PM, on a really nice day.